

How to set up SAML with the OLP CLI
This section uses the OLP CLI to set up your SSO.
Single Sign-On (SSO) allows HERE platform users to authenticate, using their own Identity Provider (IdP). This ensures adherence to authentication policies, and dynamically controlling access for authorized users.
SSO integration with HERE using SAML 2.0
HERE supports SSO integrations using the SAML 2.0 protocol.
To incorporate this feature, organizations must to subscribe to one of the following:
- Premium Success or Premium plans.
- Platinum partners.
- Gold partners have access, but must pay a premium to enable SSO.
For more information, see HERE Support Plans.
IdP templates
HERE provides out of the box templates to integrate SSO for your organization with the following identity providers:
- OKTA
- Keycloak
- Entra
- Generic: The generic template allows you to use other identity providers.
Note
When using the generic template, your organization's responsibility is to configure all required parameters, and ensure compliance with the SAML 2.0 standard. If it's fully compliant, integration is possible.
Assign an IdP Manager
To configure a new identity provider or update an identity provider (IdP) settings within your organization, the IdP Manager role must be assigned. To avoid disruption to your access, please ensure that at least one IdP Manager role is always assigned to a user in your organization.
If you are an Org Admin or have the Org Inviter role, you can:
- Invite a new user, and assign them the IdP Manager role.
- Alternatively, you may request your Org Admin or Org Inviter in the organization to assign the role on your behalf.
Note Don’t add the Restricted Access role as this prevents the IdP Manager from being able to sign in to the platform.
The following image shows a sample invitation to complete:
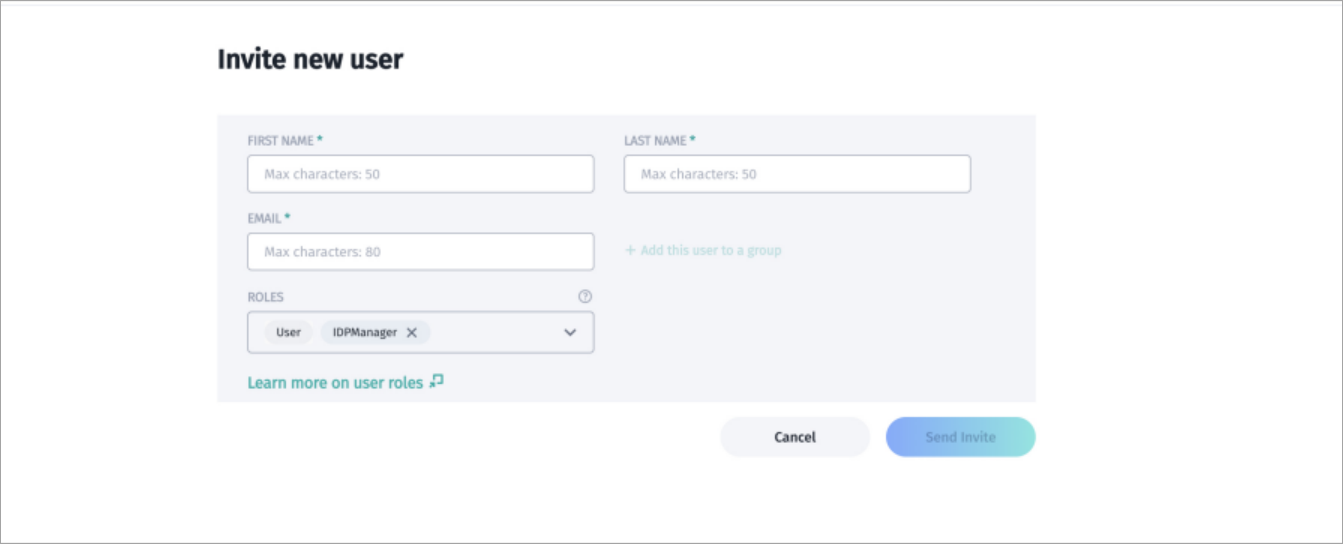
A HERE platform invitation screen.
When your invitee accepts your invitation, they possess the roles you assigned.
Create IdP Manager app
Before configuring your IdP, you must create apps with Org Admin and IdP Manager roles. You can use an Org Admin app you previously created for the IdP Manager role, or you can use a separate app specifically for the IdP Manager role.
Note
Only the IdP Manager has access to configure or change the IdP information within the organization.
To configure your apps with these roles, see Manage apps, and use the following names when you download the credentials files:
- Create a new set of access keys for the IdP app, and name the downloaded credentials file
IDPManager_app_credentials.properties - Create a new set of access keys for the Org Admin app and name the downloaded credentials file
org_admin_app_credentials.properties
Prepare your IdP Manager app
To prepare your IdP Manager app, complete the following steps:
- The OLP CLI SDK has information you can use to configure your apps. From the HERE platform, select the correct HERE OLP CLI SDK file to download, which depends on your operating system. If you already have this installed, verify that you are using version 17.5.17 or newer. For more information, refer to the HERE OLP CLI User Guide: Identity provider.
- Once you finish downloading, run the following command to get the app ID of your IdP Manager and Org Admin apps.
olp org app list --credentials {'{OrgAdminAppCredentialsFilePath}'}- You can also find your org ID and app ID on the HERE platform:
- Select your account icon on the HERE platform to find your org ID. It appears under your name, after the 'Organization' label.
An account icon.
- Select Access Manager from the launcher and search under the Apps tab to find and select your IdP Manager app.
- Create the appHRN and realmHRN, substituting your org ID and app ID, into the following formats:
   appHRN=hrn:here:account::{'{orgID}'}:app/{'{appId}'}
realmHRN=hrn:here:account::{'{orgId}'}:realm/{'{orgId}'}- Run the following OLP CLI command to list the available roles in your organization:
olp role list {'{realmHRN}'} --credentials {'{OrgAdminAppCredentialsFilePath}'}The following is a sample command for getting the role list, using the orgID value org123456, and the organization's app credentials from the downloaded org_admin_app_credentials.properties file.
olp role list hrn:here:account::org123456:realm/org123456 --credentials ~/Downloads/org_admin_app_credentials.properties
Your role list result is similar to the following:
HRN                                                                                               name
hrn:here:authorization::org123456:role/ROLE-aa8f6020-0a6b-41f4-9a00-f6ea527b13c1                  IDPManager
hrn:here:authorization::org123456:role/ROLE-ff341d16-65d9-49af-a02b-f4c1e4307a4a OrgAdmin- Use the following command to assign the IDPManager role to any app:
olp role assignment add {'{roleHRN}'} {'{appHRN}'} --credentials {'{OrgAdminAppCredentialsFilePath}'}
For more information, see the OLP CLI User Guide - Identity provider.
The roleHRN uses the value from the previous role list, the appHRN uses org12356:app/myidpapp, and the credentials are from the downloaded org_admin_app_credentials.properties file, as shown in the following sample that adds a role assignment.
olp role assignment add hrn:here:authorization::org123456:role/ROLE-aa8f6020-0a6b-41f4-9a00-f6ea527b13c1 hrn:here:account::org123456:app/myidpapp --credentials ~/Downloads/org_admin_app_credentials.properties- Confirm the role assignments for your app, by running the following command:
olp role assignment list hrn:here:account::org123456:app/myidpapp --credentials ~/Downloads/org_admin_app_credentials.propertiesIdP settings
To configure your organization's IdP settings, complete the following steps:
- Get the identity provider's metadata file or metadata URL from the person who maintains SSO for your organization. Your metadata file is similar to the following sample file:
<md:EntityDescriptor xmlns="urn:oasis:names:tc:SAML:2.0:metadata" xmlns:md="urn:oasis:names:tc:SAML:2.0:metadata"
                     xmlns:saml="urn:oasis:names:tc:SAML:2.0:assertion" xmlns:ds="http://www.w3.org/2000/09/xmldsig#"
                     entityID="http://keycloak.myorg.com/realms/demo">
    <md:IDPSSODescriptor WantAuthnRequestsSigned="true"
                         protocolSupportEnumeration="urn:oasis:names:tc:SAML:2.0:protocol">
        <md:KeyDescriptor use="signing">
            <ds:KeyInfo>
                <ds:KeyName>EHHW9vzTKOLqiT2HRHdmewGg92vd900kxrhFSHTogbI</ds:KeyName>
                <ds:X509Data>
                    <ds:X509Certificate>
                        MIICmTCCAYECBgGPqjxc3jANBgkqhkiG9w0BAQsAFDAQMQ4wDAYDVQQDDAVkZW1vMjAeFw0yNDA1MjQxMDUyMTNaFw0zNDA1MjQxMDUzNTNaMBAxDjAMBgNVBAMMBWRlbW8yMIIBIjANBgkqhkiG9w0BAQEFAAOCAQ8AMIIBCgKCAQEAyuJ8uGBpmZ8MvuSy1VS4GVxkvBNVQp+JoyCSiMb10yiPvu+XsgkDpguG26i2jAf5qhUJ2Qre0xv1znSMa6g8N5ujgUvD+rTnkV8Twg2RgSS1i9gfWKb61qf5fD9eyPRBkOe2Xci1SXm/0q9fiGolcJ95+0X+4IH8evDb0REwigjTuiD24CbGinFQtCh73j2WJ+WlrFaGrP3HuauKpxWpy+etufJrL9I9mSvYuF4iw24RgbkBwHrMle6f7NwHR5y/ON3iR1HJsGk9sdgGGnL+YQ4ng6vGWg8LzarF0wgW5elFeNt3ftuT/LVyICo3/L0yBnEyP519t9DuTsWQ8/FCvQIDAQABMA0GCSqGSIb3DQEBCwUAA4IBAQCMPb3XBbw1HfeVwp7/3ChFKYRVzZVuAiBD9jjcHzxodpsoP2RYaW50iPMuaavdJSnKSYduay5q8cHWc+dCKvJAZtSJNjl5ctOPfLqxncHz0+X+wcJqkI4hygdMsHtuAADVybM81tJ3ZmfwUhEET9sB1bWLnwsfQ67hyyP0Vbc46tFrR1Wxg3o2C9rTv7ZQBg9ztrXIDbo4oN9dC7+72jTU39+xh7NaRzeZAMzJxiNL6NGLqxw1BcUuX2hJG1gaK3uTALpFXlhVl8mR9odYiM0+7v7w6q3dskxqF55snfFbNB9Hwug7EH/KEsRNA7U3cFEj4ZN4l3QrIqORvqWyWOWL
                    </ds:X509Certificate>
                </ds:X509Data>
            </ds:KeyInfo>
        </md:KeyDescriptor>
        <md:ArtifactResolutionService Binding="urn:oasis:names:tc:SAML:2.0:bindings:SOAP"
                                      Location="http://keycloak.myorg.com/realms/demo/protocol/saml/resolve"
                                      index="0"></md:ArtifactResolutionService>
        <md:NameIDFormat>urn:oasis:names:tc:SAML:2.0:nameid-format:persistent</md:NameIDFormat>
        <md:NameIDFormat>urn:oasis:names:tc:SAML:2.0:nameid-format:transient</md:NameIDFormat>
        <md:SingleSignOnService Binding="urn:oasis:names:tc:SAML:2.0:bindings:HTTP-POST"
                                Location="http://keycloak.myorg.com/realms/demo/protocol/saml"></md:SingleSignOnService>
        <md:SingleSignOnService Binding="urn:oasis:names:tc:SAML:2.0:bindings:HTTP-Redirect"
                                Location="http://keycloak.myorg.com/realms/demo/protocol/saml"></md:SingleSignOnService>
    </md:IDPSSODescriptor>
</md:EntityDescriptor>- List all identity providers supported by the HERE platform for SSO integration, and select an identity provider template, using the following command:
olp identity provider template list --credentials ~/Downloads/IDPManager_app_credentials.propertiesYour results look similar to these:
ID              name
okta            Okta
keycloak        Keycloak
The following image shows a sample Keycloak template:
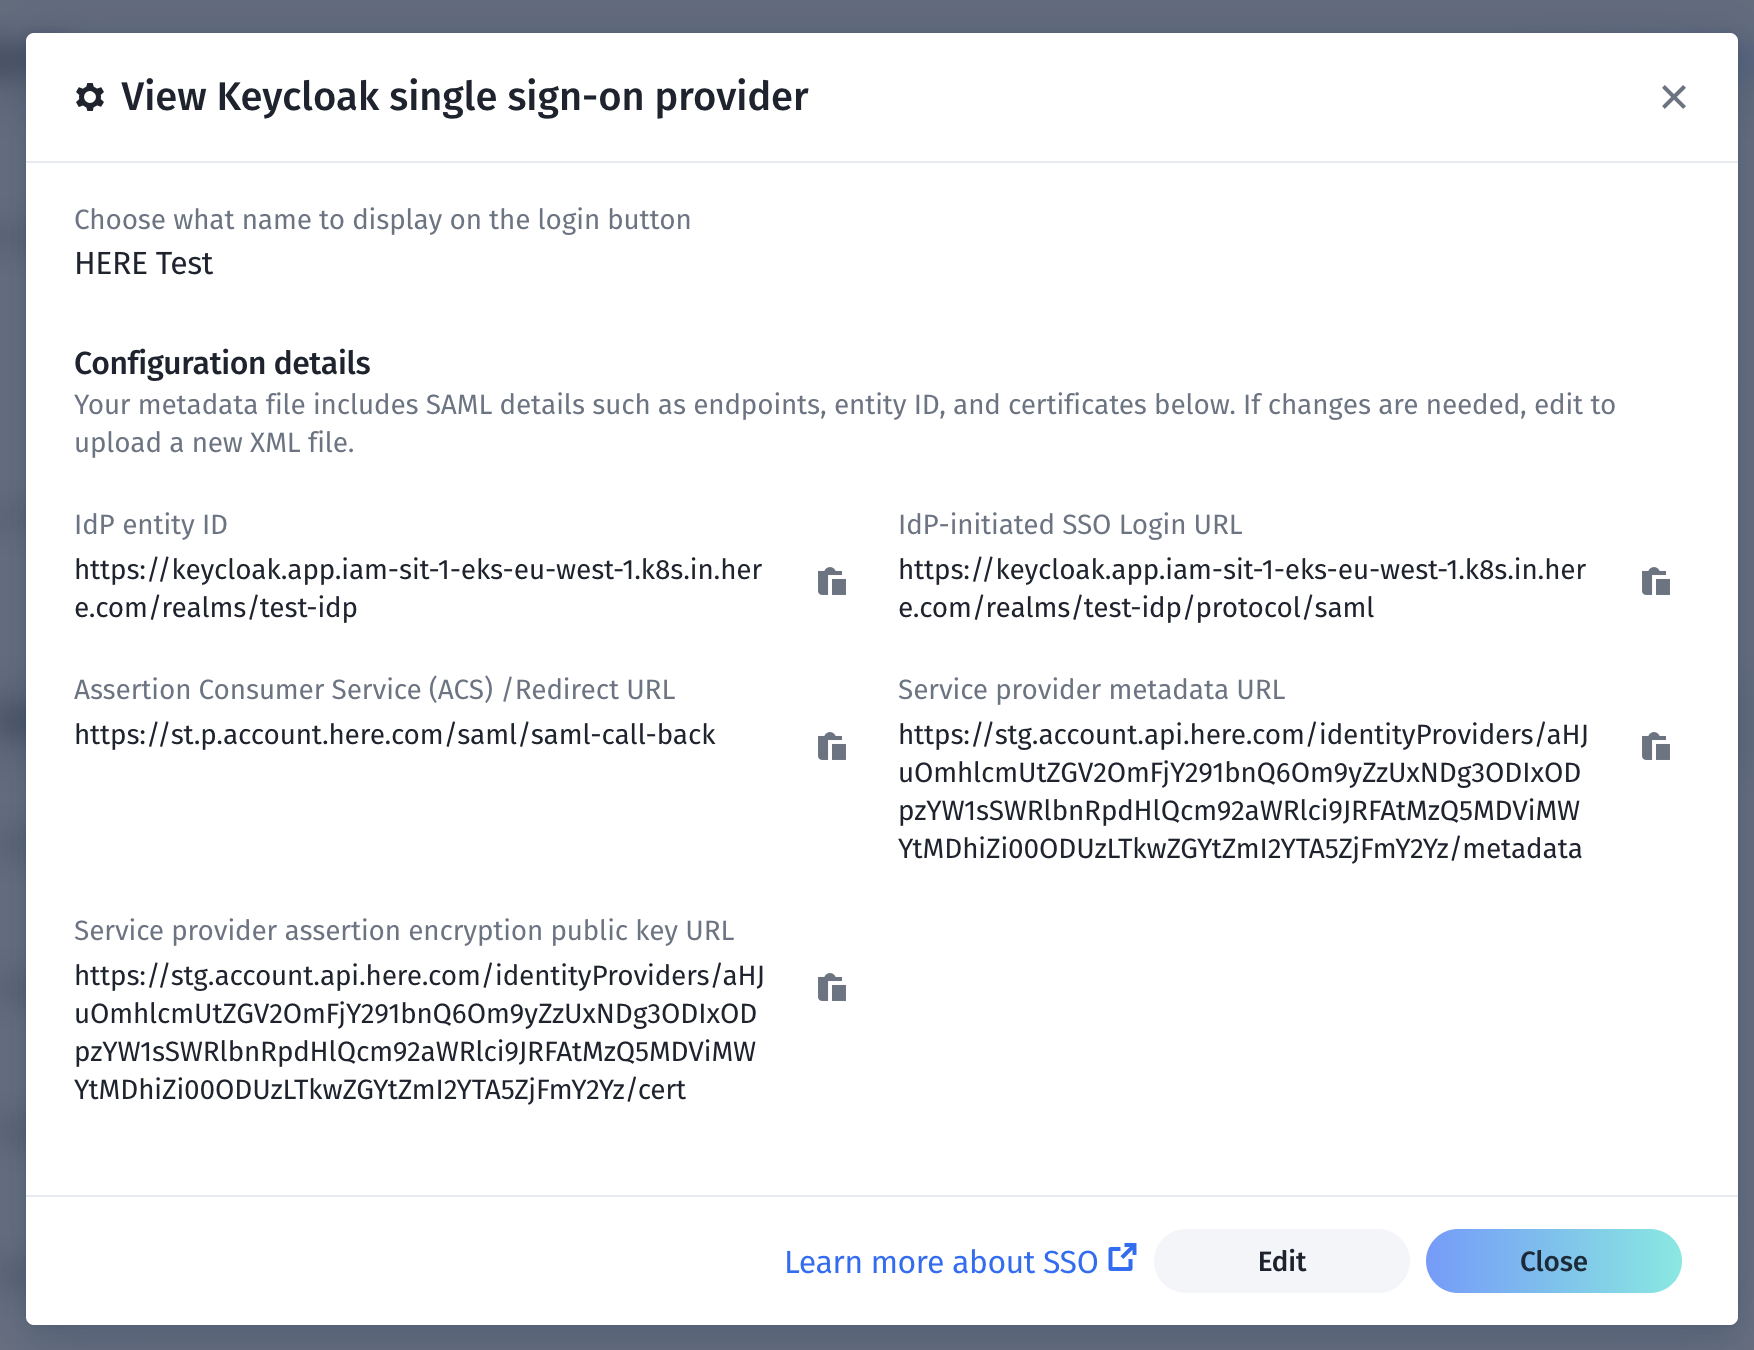
A sample template.
You can edit the template if necessary.
- Create an IdP configuration for your organization, with the following command:
olp identity provider create {'{identity provider display name}'} {'{identity provider template Id}'} {'{url or path to metadata file}'} --credentials {'{IDPManagerAppCredentialsFilePath}'}The following table describes the values used in this command:
| Value | Description |
|---|---|
identity provider display name | Display name shown on the login button. |
identity provider template Id | Supported template ID. One Choose one ID from the list. For example, “keycloak”. |
url or path to metadata file | Enter the HTTPS URL or local path of the IdP metadata file. |
The following sample command shows how to create an IdP configuration:
olp identity provider create "My SSO Login" keycloak https://keycloak.app/realms/master/protocol/saml/descriptor --credentials ~/Downloads/IDPManager_app_credentials.propertiesYour result is similar to this:
SAML identity provider hrn:here:account::org123456:samlIdentityProvider/IDP-b47bf594-d08d-4508-94bf-23e97d517f61 has been createdEnable your SSO
Important!
If at any point during the setup you are unable to gain access to your organization, the IdP manager can regain access to it through the platform temporary access recovery process. This only works during the current session. If a user logs out from the session, they have to invoke the temporary access recovery process again to sign in temporarily. You must know your Org ID to use this process. To find your Org ID in the platform, click the account icon on your platform page and your Org ID appears.
Before you enable SSO, verify that the SAML response is compatible with the HERE platform.
Technical requirements for comparability between the SAML Response and the HERE platform
In the SAML 2.0 Core Specification, the elements in the must be signed if you are using the HTTP POST binding, using one of the algorithms defined in the SAML 2.0 specification. For example, RSA with SHA-256, ECDSA with SHA-256. The SAML Response must contain at least the following assertions:
- first name
- last name
- country code
Note
If the assertions aren't signed (even if the entire SAML Response is signed) SSO always fails.
To enable your SSO, complete the following steps:
- Show your IdP configuration using the following command:
olp identity provider show {'{idpHRN}'} --credentials {'{IDPManagerAppCredentialsFilePath}'}The following is a sample command:
olp identity provider show hrn:here:account::org123456:samlIdentityProvider/IDP-b47bf594-d08d-4508-94bf-23e97d517f61 --credentials ~/Downloads/IDPManager_app_credentials.propertiesYour result is similar to the following:
HRN                   hrn:here:account::org123456:samlIdentityProvider/IDP-b47bf594-d08d-4508-94bf-23e97d517f61
name                  My SSO Sign in
template ID           keycloak
entity ID             https://keycloak.app/realms/master
SSO login URL         https://keycloak.app/realms/master/protocol/saml
created               2025-01-10T09:12:48.566Z
enabled               false
callback              https://account.here.com/saml/saml-call-back
SP metadata URL       https://account.api.here.com/idWRlbnRpdHlQcm92aWRlci9JRFAtYjQ3YmY1OTQtZDA4ZC00NTA4LTk0YmYtMjNlOTdkNTE3ZjYx/metadata
SP certificate URL https://account.api.here.com/identityProviders/aHJuOmhlcmUtZGRlbnRpdHlQcm92aWRlci9TQtZ0NTA4LTk0YmYtMjNlOTdkNTE3ZjYx/cert- Verify the entity ID and SSO login URL.
- If you require assertion encryption, you can enable it from the certificate pointed to by the SP certificate URL and applied on the IdP side. If you don't require assertion encryption, skip this step.
- To enable IdP, run the following command:
olp identity provider enable {'{idpHRN}'} --credentials {'{IDPManagerAppCredentialsFilePath}'}The following is a sample command:
olp identity provider enable hrn:here:account::org123456:samlIdentityProvider/IDP-b47bf594-d08d-4508-94bf-23e97d517f61 --credentials ~/Downloads/IDPManager_app_credentials.propertiesOnce you successfully enable SSO, all users in the organization must use it. All existing users will lose their passwords after enabling SSO, so to sign in they must have an active account in the IdP. From this point on, it will be the only method used to sign in to the organization.
Note
After enabling SSO, any users currently signed in remain signed in. All users must use SSO for the next sign-in.
Test your SSO
To test your SSO, sign out and sign in to the HERE platform. If the IdP isn't configured correctly, you won't be able to access the platform and the IdP Manager must use the temporary access recovery process, and reconfigure the IdP.