Fast styling for branded maps
This tutorial demonstrates how to quickly edit your map style for web integration and data overlays.
Key design points
The following are important style design points:
- Maintain brand consistency across digital products.
- Don't complicate the base map. Keep your overlaid data the main focus.
- Hide details that don’t support the map’s purpose.
- Always preview at smaller sizes.
- Export and re-use modifiers as palettes if creating multiple maps.
- Design to accommodate your target hardware devices.
Get started
The following identifies how to get started for this tutorial:
- If you do not have a HERE Platform account, see Get started.
- A desktop computer is recommended for this tutorial.
Tutorial steps
The following steps are required to complete this tutorial:
- Choose your base map style
- Apply global edits
- Use layers to adjust your style
- Check your map style before exporting
- Schematic map view check
- Accessibility check
- Save and export
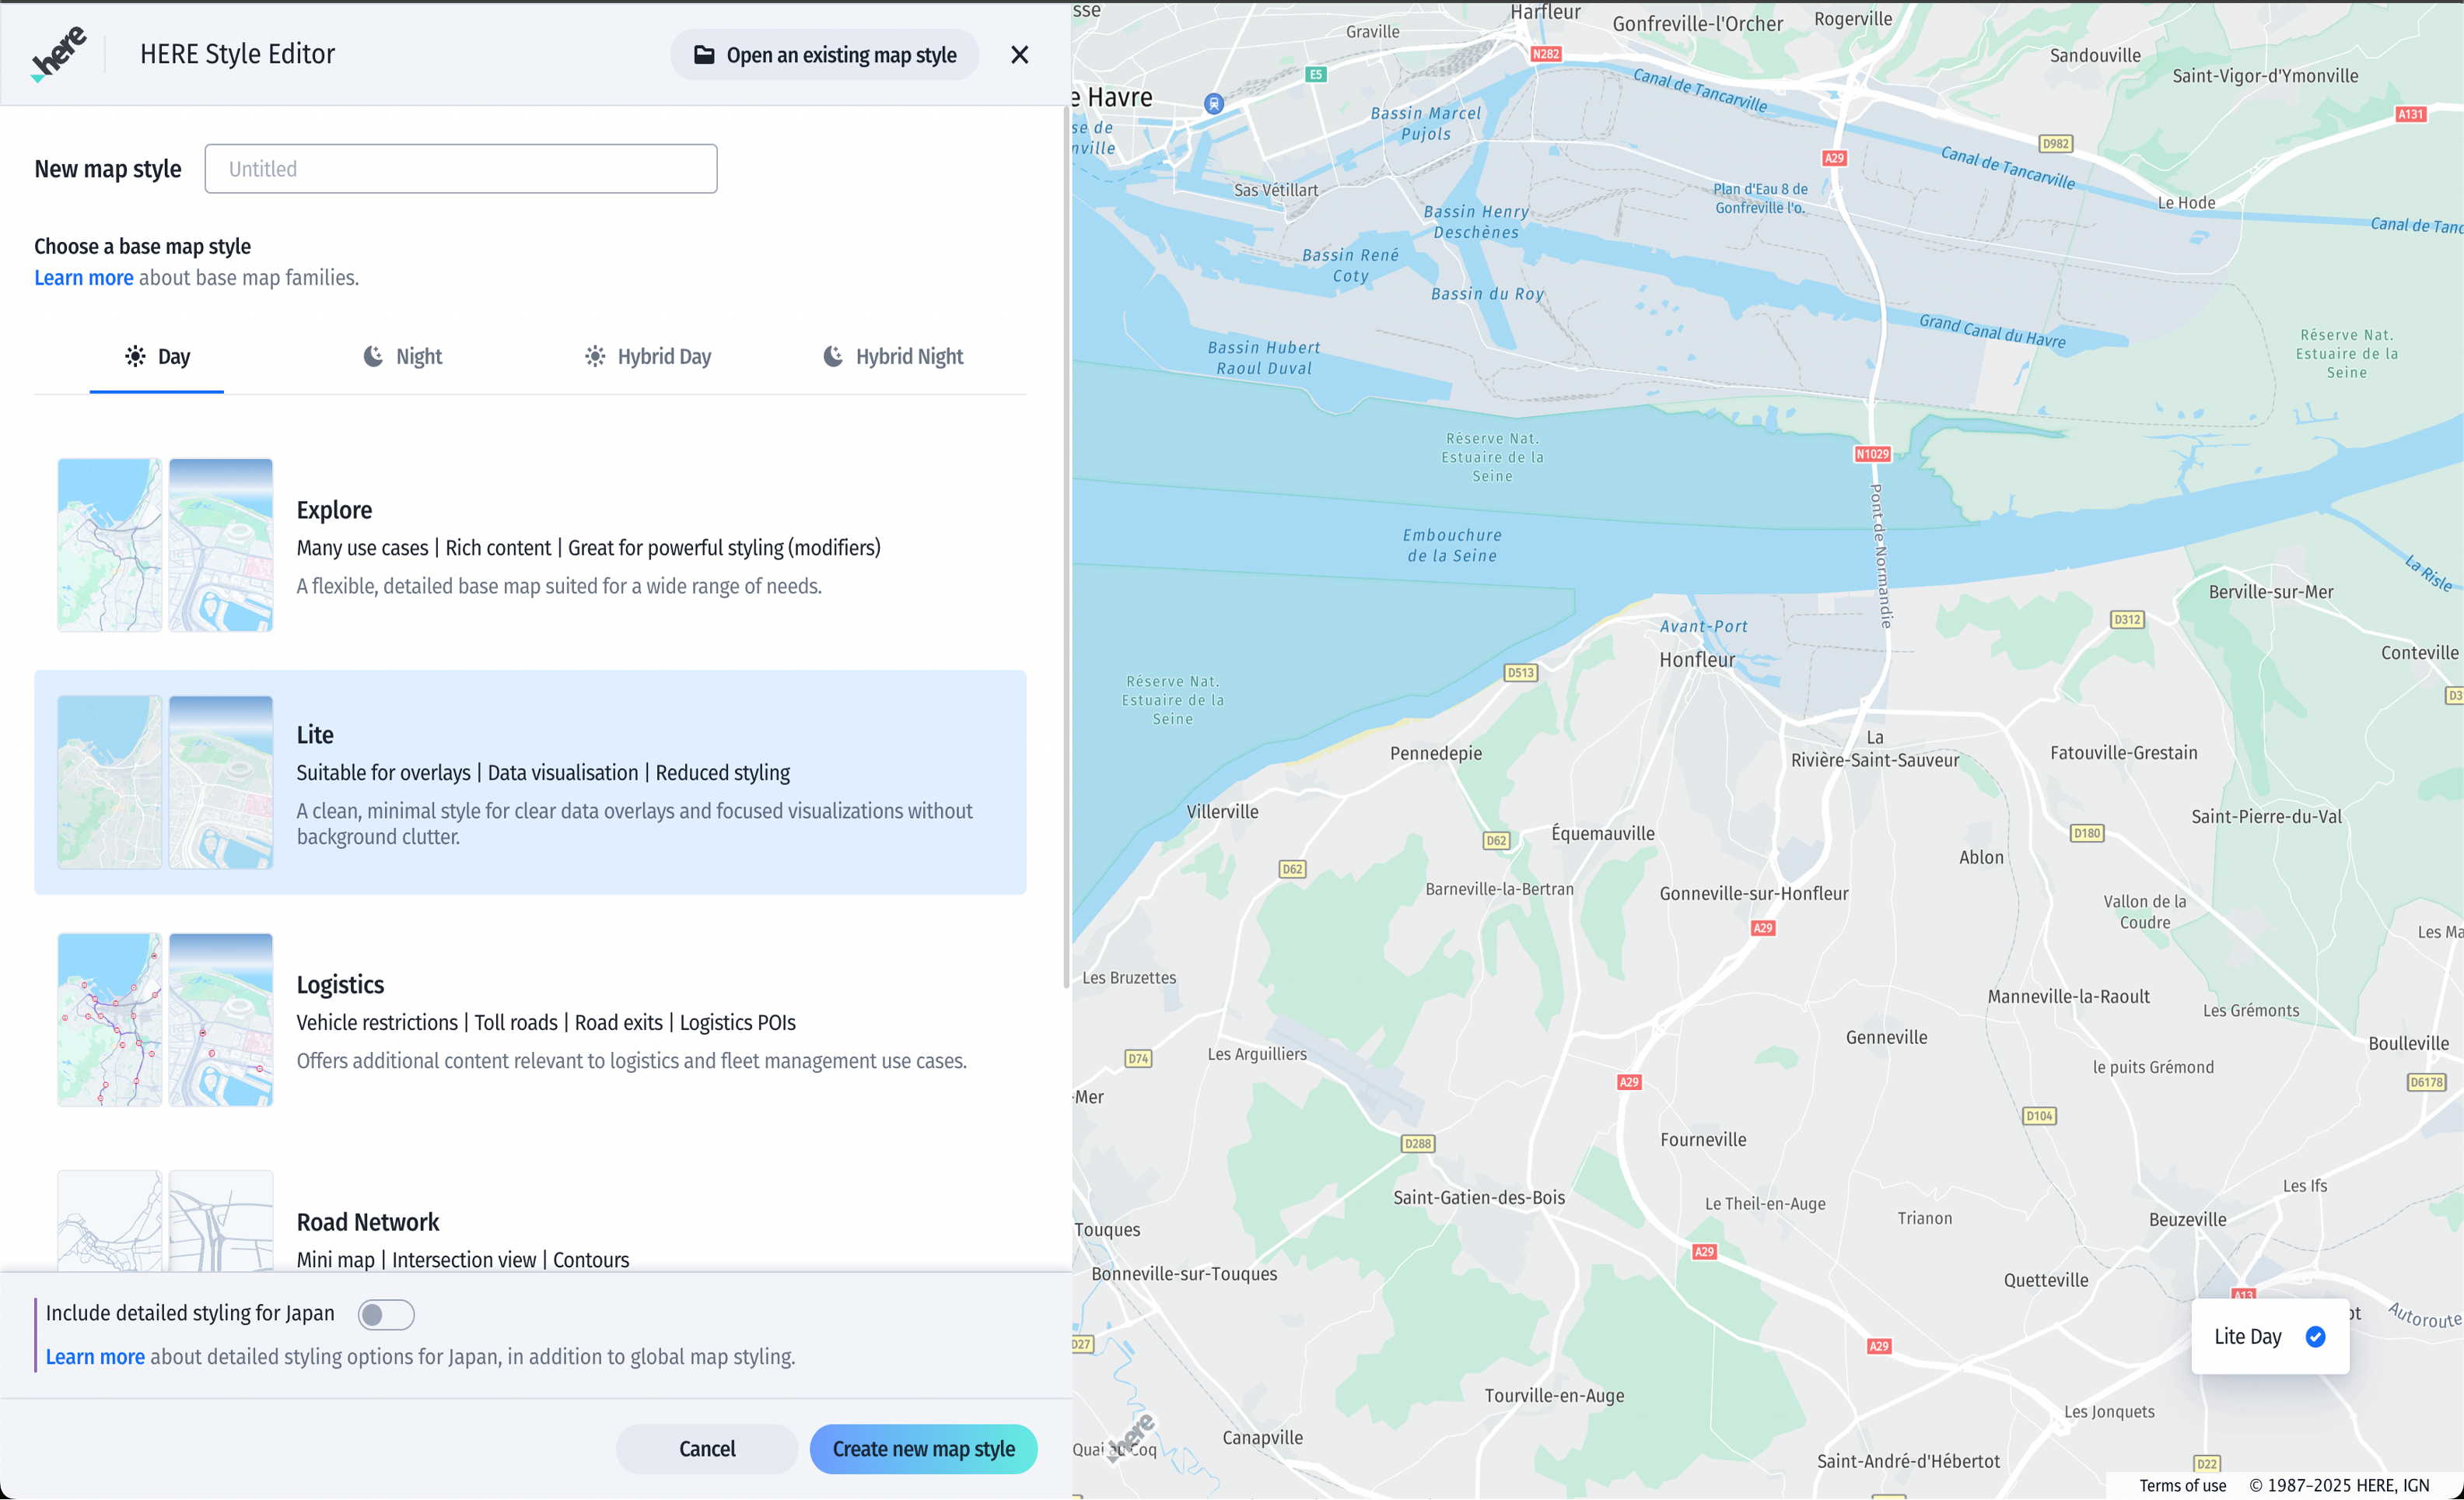
Choose your base map style
The Day base map with Lite is a good choice for low density background maps.
To select a base map and create a new map style:
- From the dashboard, select the Day base family with Lite.
- Click Create new map style.
Apply global edits
Use modifiers to adjust color tone, saturation, brightness, hue, and scale to match brand colors or support general readability.
- Create each modifier, and set the values. All map items is selected by default.
Note
- You can keep the changes or apply them into attributes for finer tuning.
- If you have end app device calibration quirks, you can apply them.
- Shift the hue, or add a color tone so that the brand color reflects in the map.
- Increase the brightness for daylight readability, or desaturate the land background to make the roads visible.
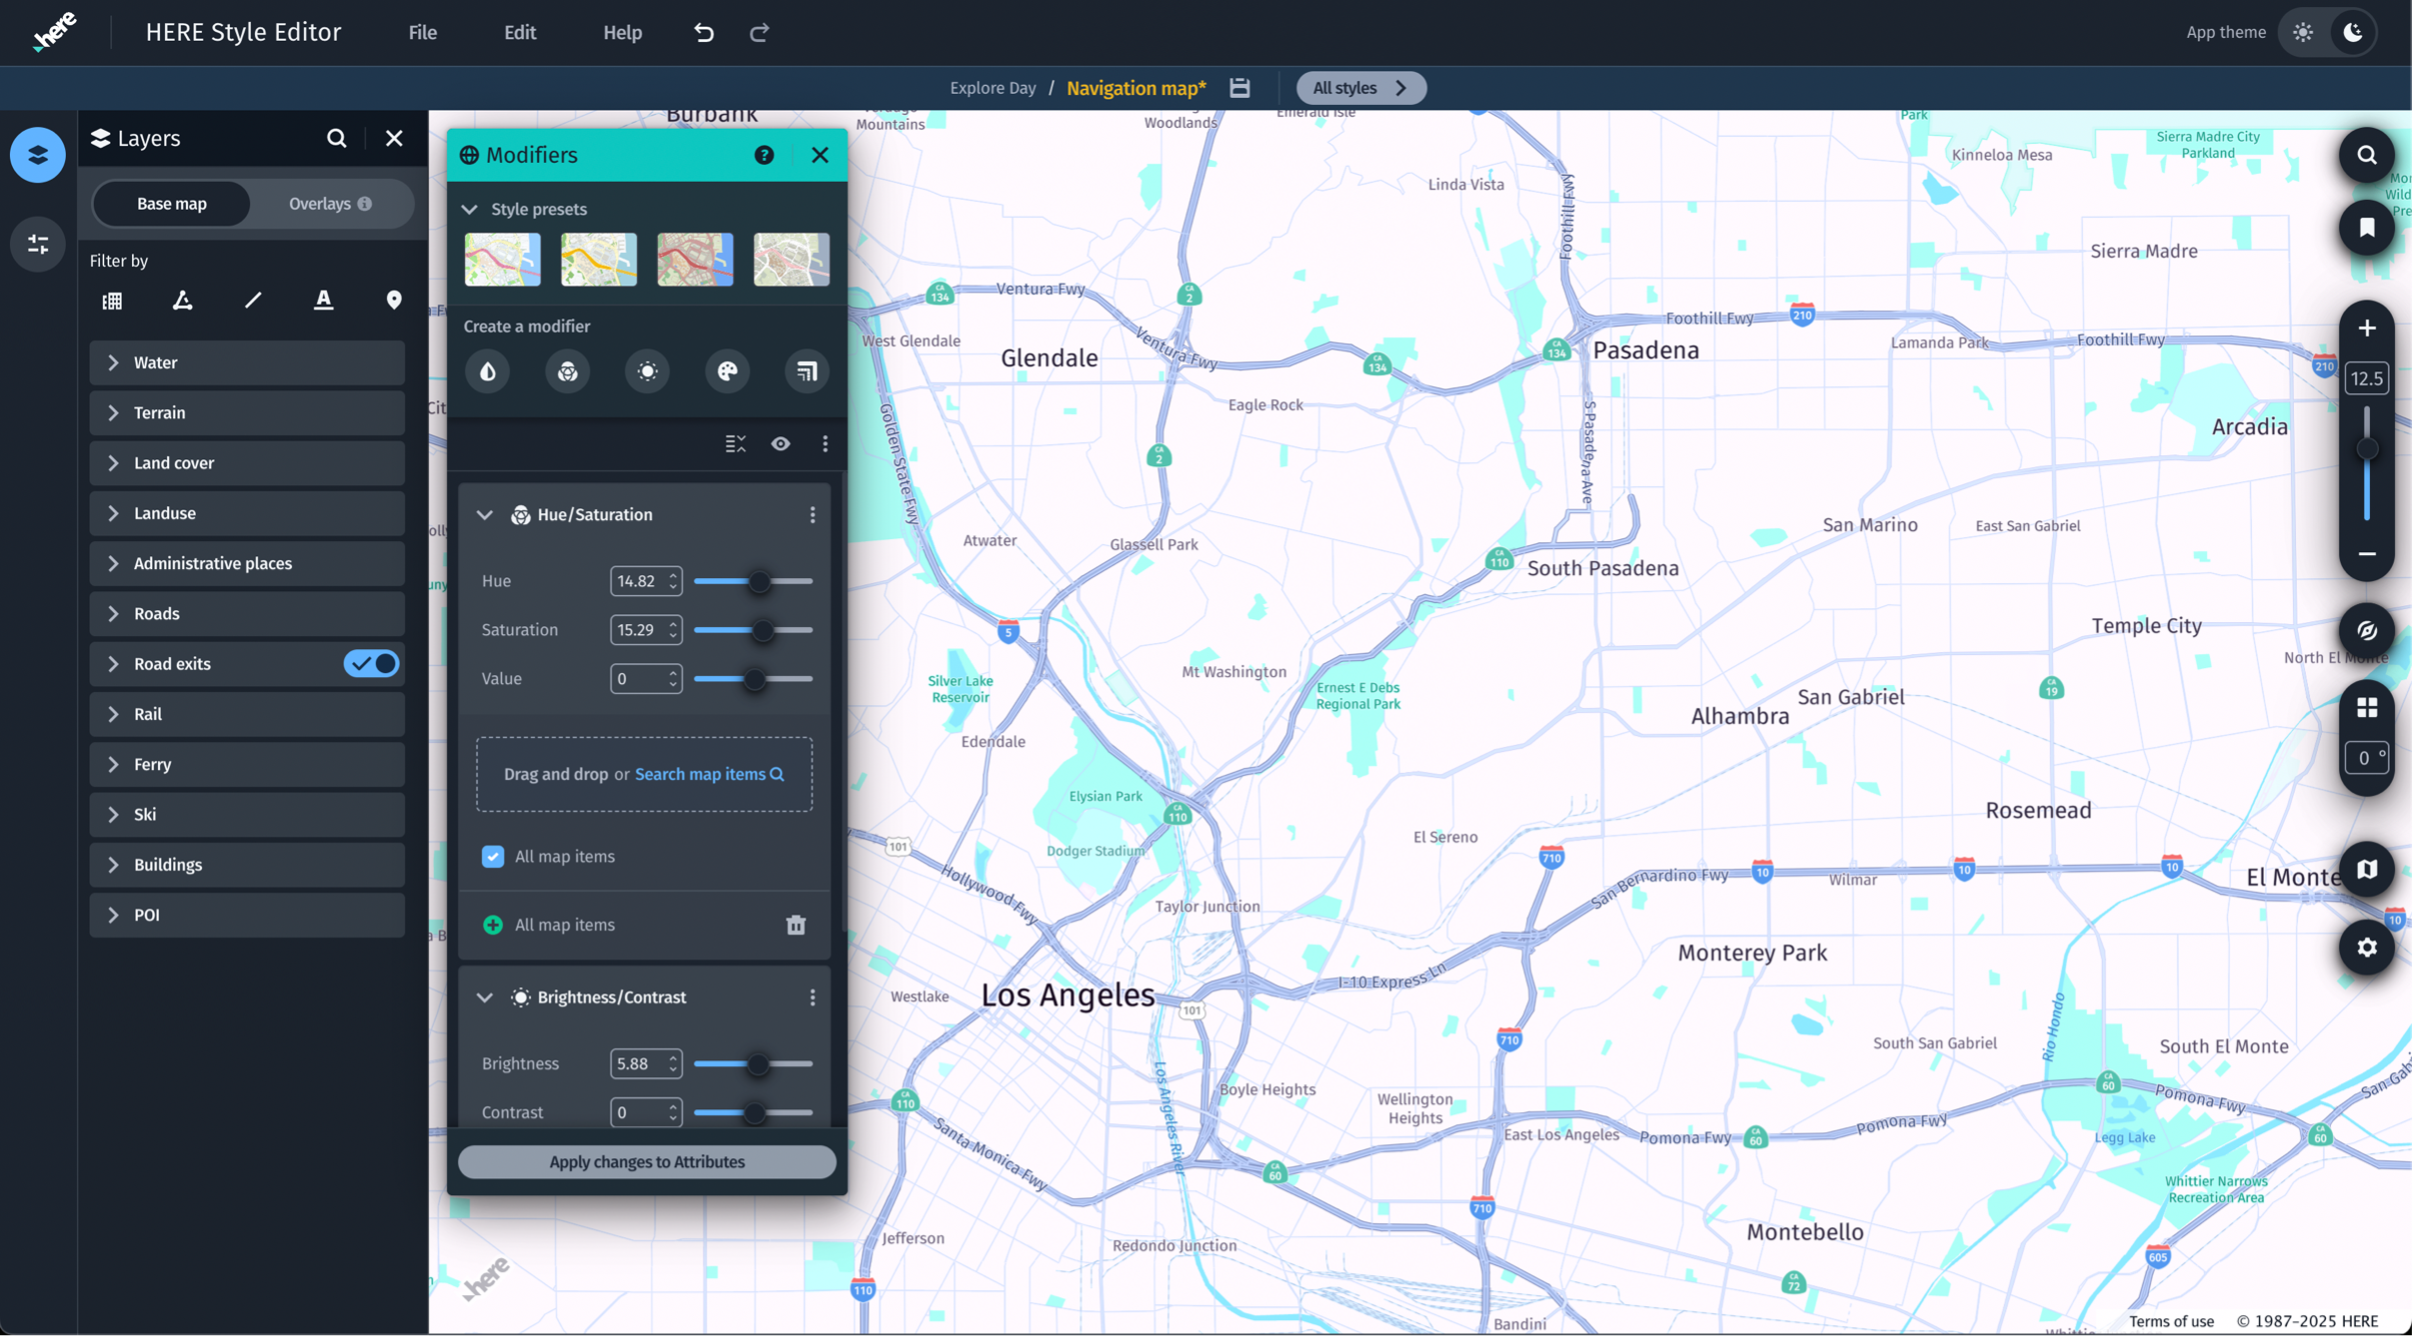
Note
Modifiers can be reused across multiple styles. You can build a ‘core set’ and export it using the overflow menu. You can then import the core set as a new style.
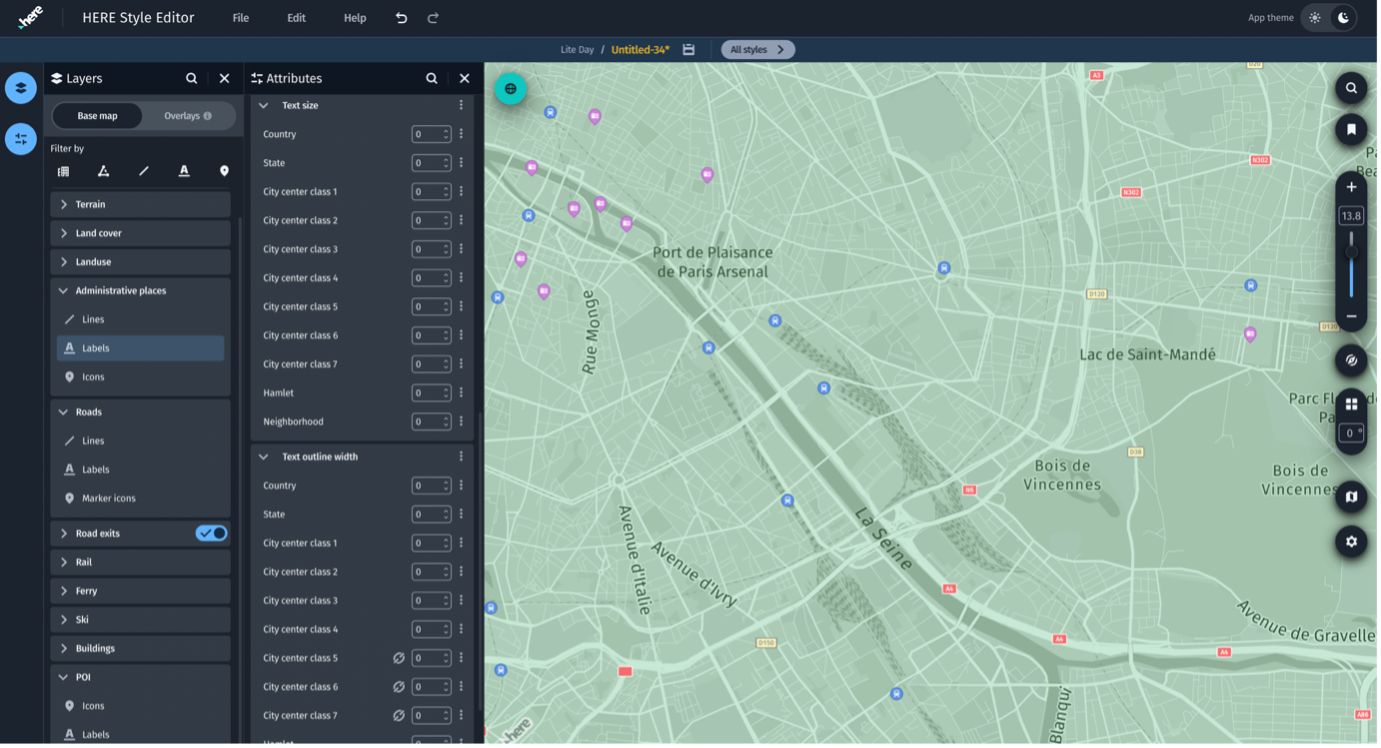
Use layers and attributes to adjust your style
You can use the Attributes panel, under Layers to adjust your style.
Attributes can be affected by Modifiers changes. Changes are indicated by an aqua colored dot on Attribute values. If you are finished using Modifiers and want to work with Attributes, you can click Apply changes to base attributes in Modifiers to see these edits applied in the attribute values.
Check your map style before exporting
You can use location bookmarks to check your style and verify that it performs correctly. You can use preset bookmarks, or you can create your own using the following procedure.
To create location bookmarks:
- Navigate to the view you want to bookmark.
- From the Map view controls, select the Location bookmarks icon.
- From Custom, select +.
- Enter a bookmark name.
Note
You can test using modifiers on or off.
The following are additional testing suggestions:
- Check the style appearance at smaller sizes.
- Take a screenshot (go to Map settings in Style Editor) to capture styled views.
- Place screenshots in a webpage mock-up (Figma, HTML prototype, or slide deck) to determine if the map blends correctly.
- For branding, overlay your company’s logo/colors in the test to validate consistency.
- Reduce clutter - users typically don't scroll/zoom deeply on a small embedded map.
- Consider typical screen conditions.
Note
For web related styling, prioritize clarity over detail.
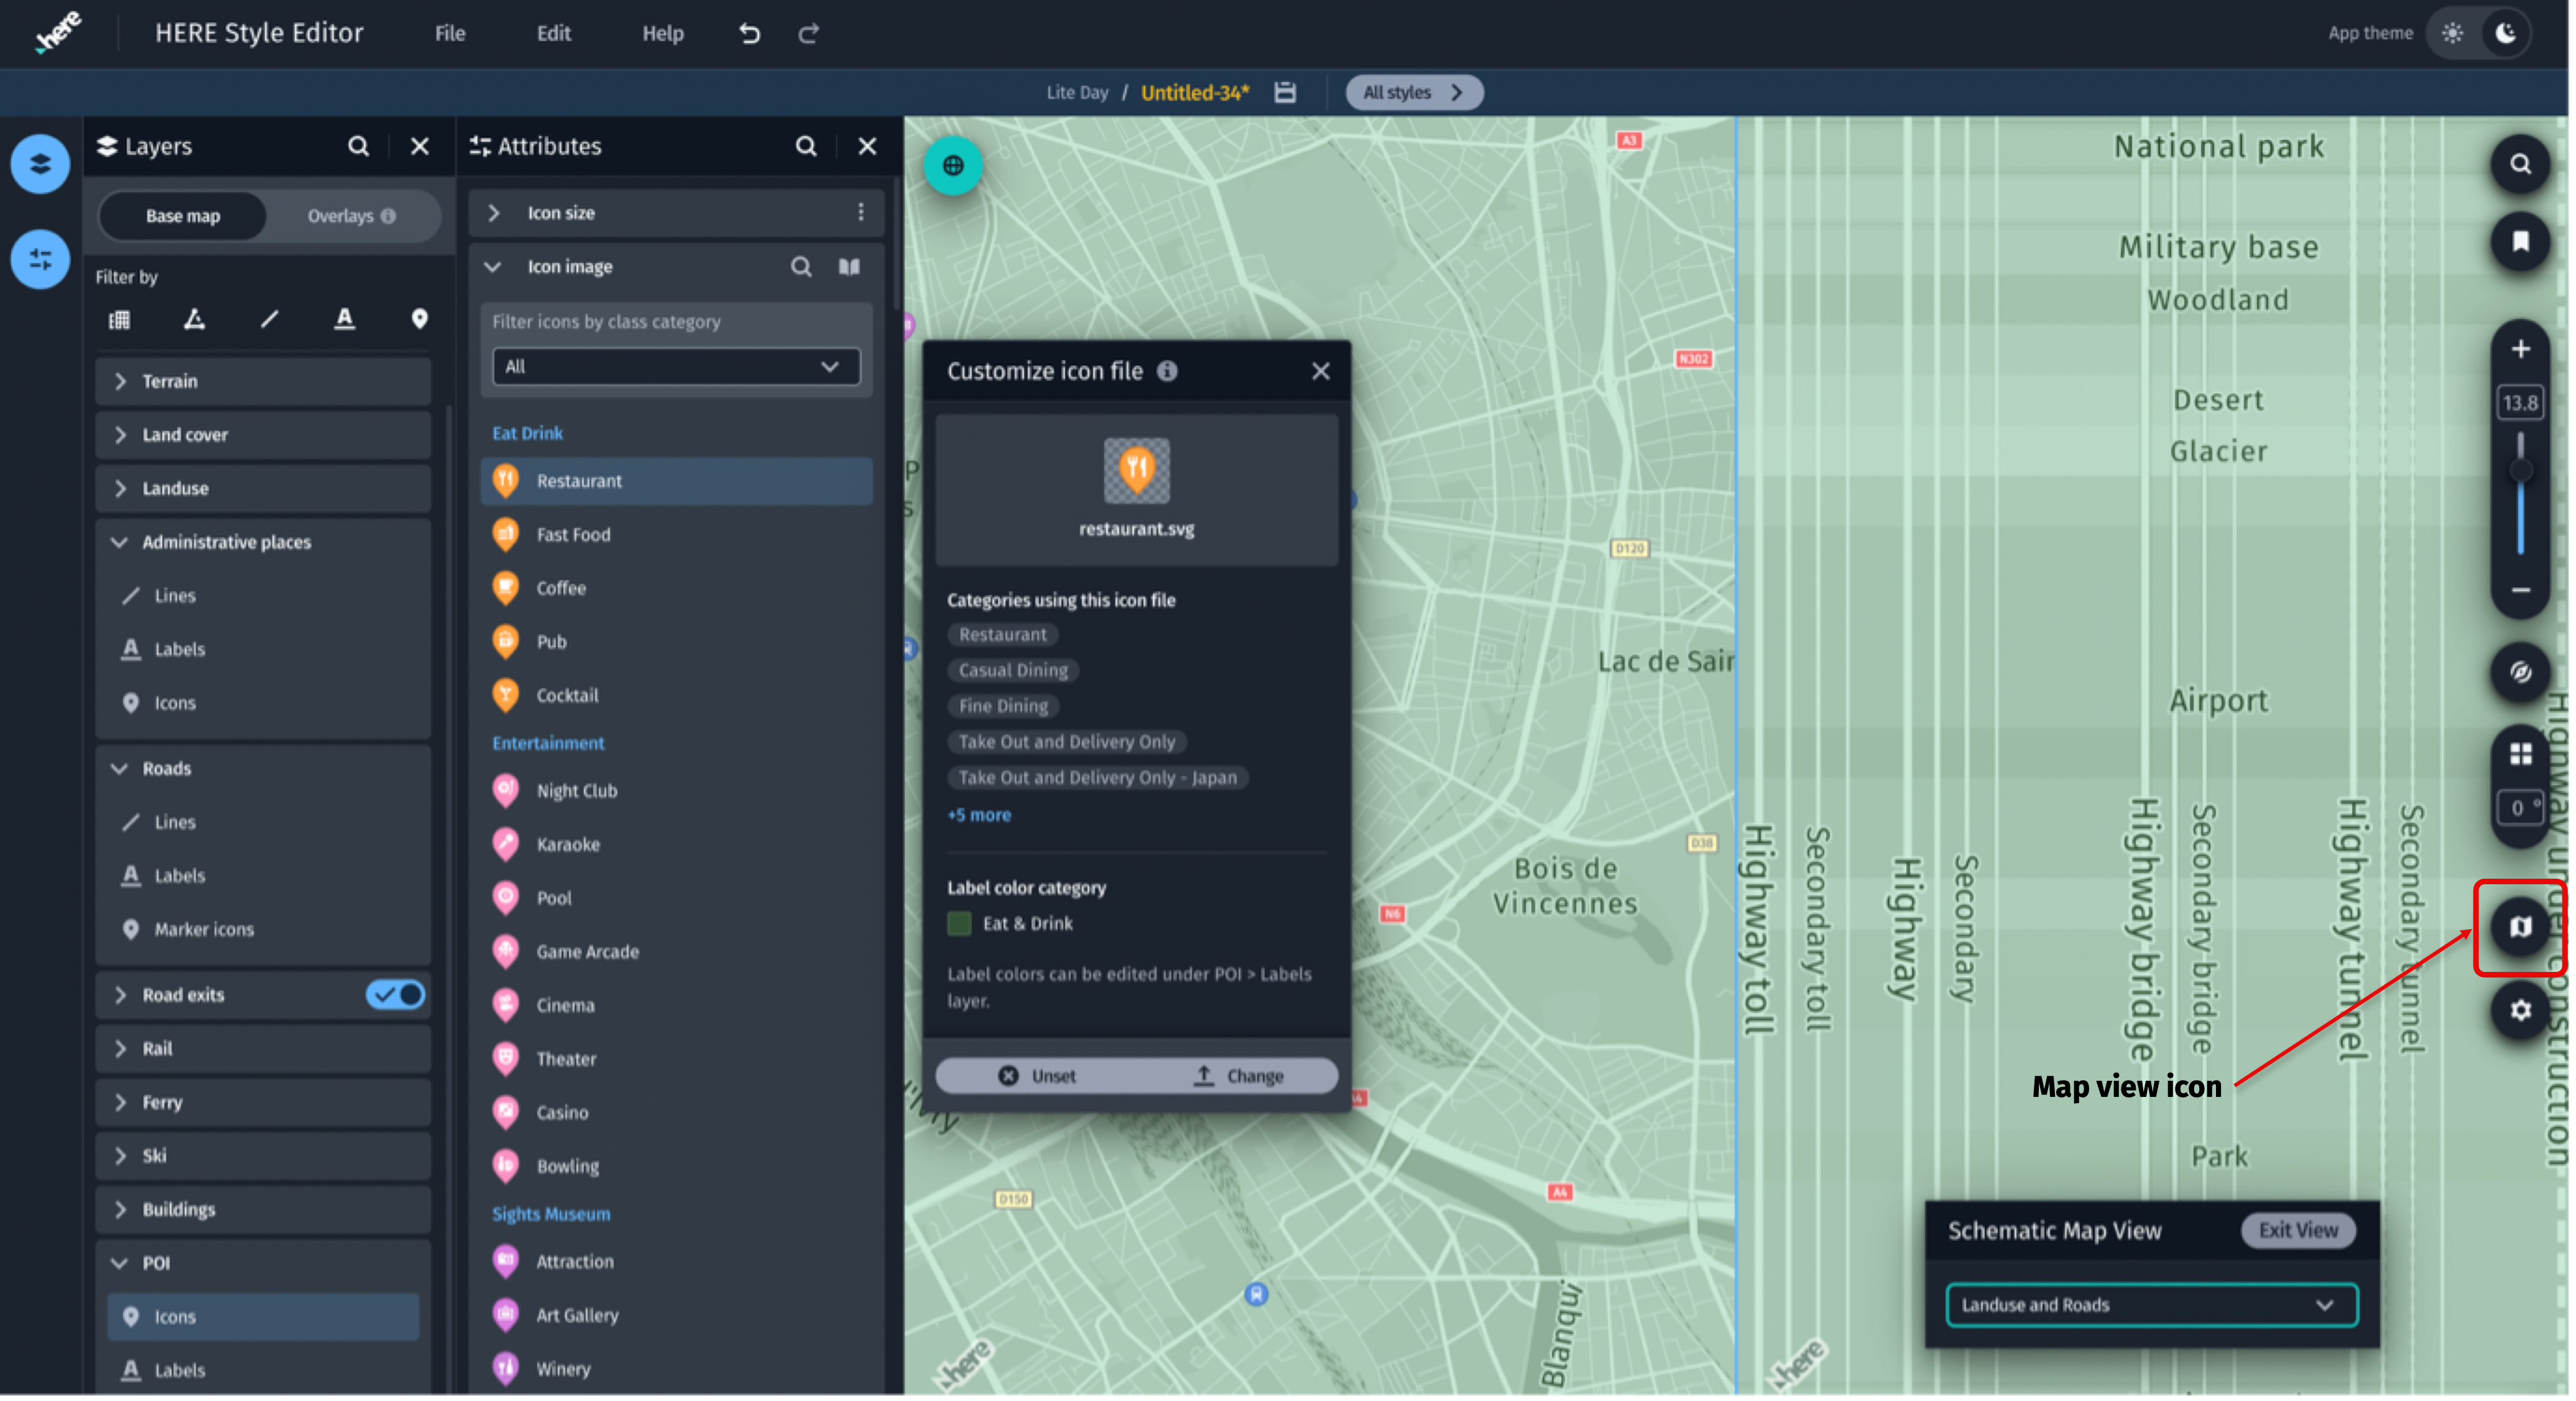
Schematic map view check
You can use the Schematic Map View to search for unstyled features.
To search for unstyled features:
- From the Map view controls, select the Map view icon.
- Select Schematic Map View.
- Style features that are unstyled or require editing.
Accessibility check
You can use the Color vision deficiency view to check for Protanopia, Deuteranopia, and Tritanopia.
To check the Color vision deficiency view:
- From the Map view controls, select the Map view icon.
- Select Color vision deficiency view.
- Edit low contrast areas.
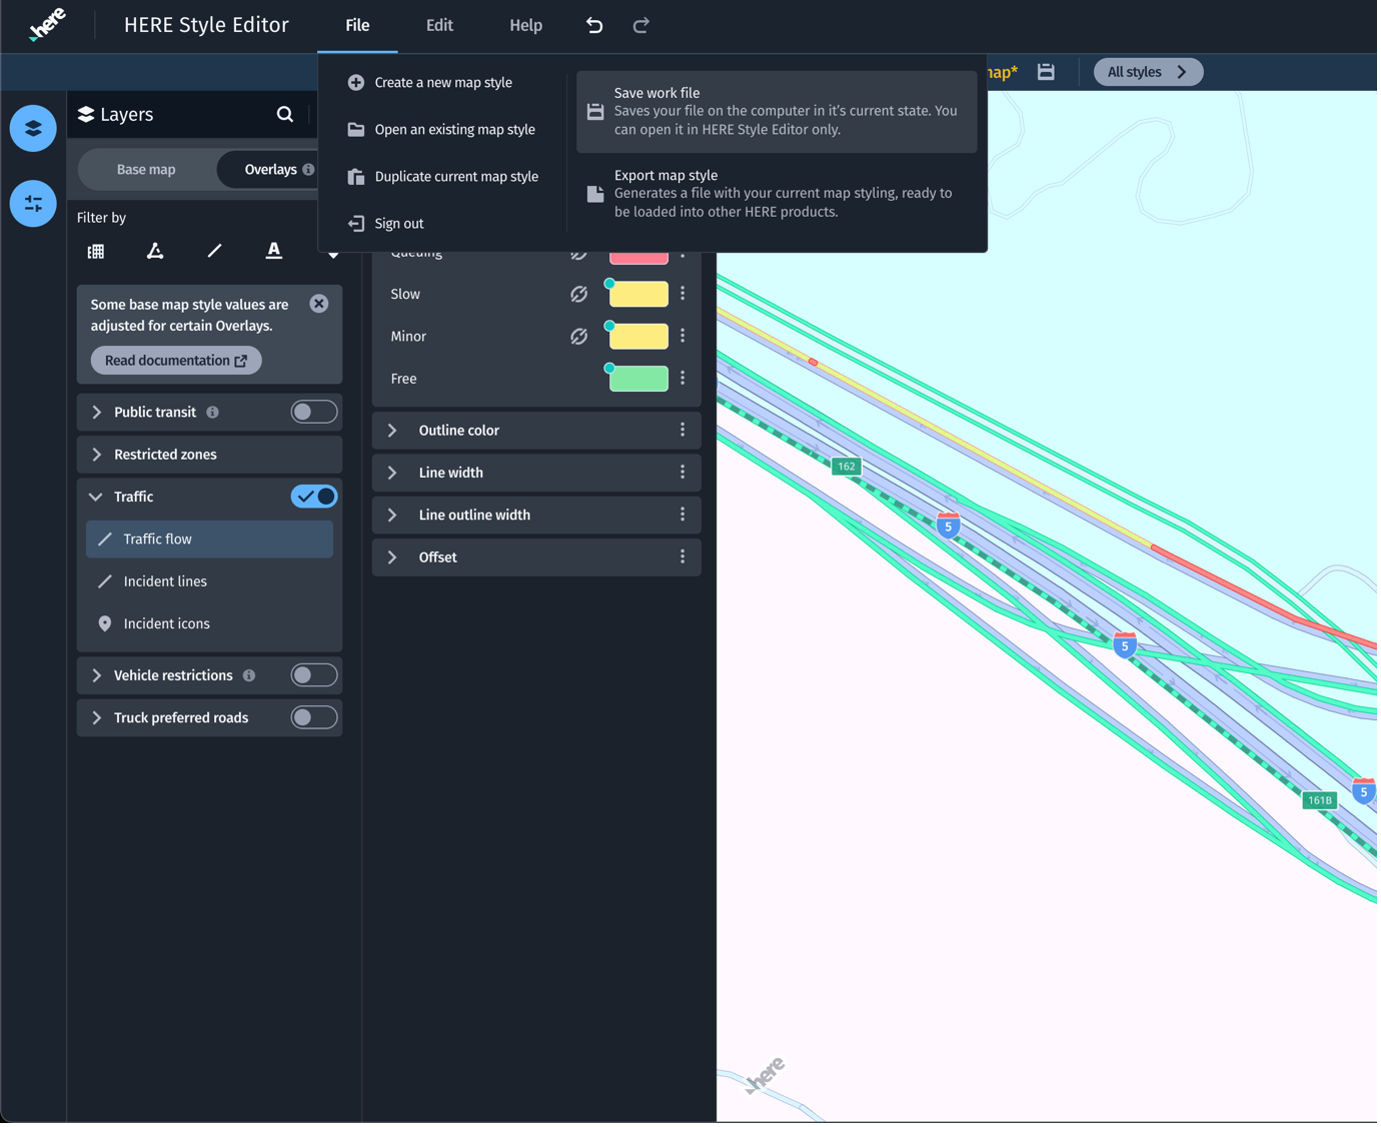
Save and export
Save a copy of your files locally on your computer. Do not rely on browser cache.
To save and export your file:
- To save, from the File menu, select Save work file.
- To export your map style in JSON file format for SDK integration, select Export map style.