

Advanced styling for navigation
This topic demonstrates how to create a day and night navigation map style for an in-car system. The map style maintains brand consistency, ensures legibility in all driving conditions, and passes accessibility checks.
Map style objectives
The following identifies this tutorial's objectives:
- Full visual control: every color, label, and line weight is intentional.
- Create two variants (day/night) that remain visually consistent.
- Accessibility compliance for drivers with Color Vision Deficiency (CVD).
Note
In-car display preview isn't available for HERE Style editor.
Key points
The following are important points to note when designing map styles:
- Always review your style using multiple zoom levels and your saved bookmarks.
- Maintain cartographic harmony unless you must unlink and style items separately.
- Make Schematic Map View and Color Vision Deficiency checks part of your standard workflow.
- Don’t rely only on the editor preview. Plan for real device testing in cars whenever possible to reliably validate light, scaling, and screen conditions.
Get started
The following identifies how to prepare for this tutorial:
- If you do not have a HERE Platform account, see Get started.
- A desktop computer is recommended to create HERE Style Editor map styles.
- Get display specifications from engineering or check the target in-car device. This includes screen calibration, brightness, or brand-color rendering quirks.
- Access to your branding guidelines.
Steps to style maps
The following identifies the steps required to style maps:
- Base map style and bookmarks
- Change the overall tone with Modifiers
- Explore and style specific map elements
- Overlays - traffic and public transit
- Device and Display Considerations
- Differences between HERE Style editor and your native applications
- Check your style
- Take screenshots to use in your presentations
- Save and export
- Create the night variant
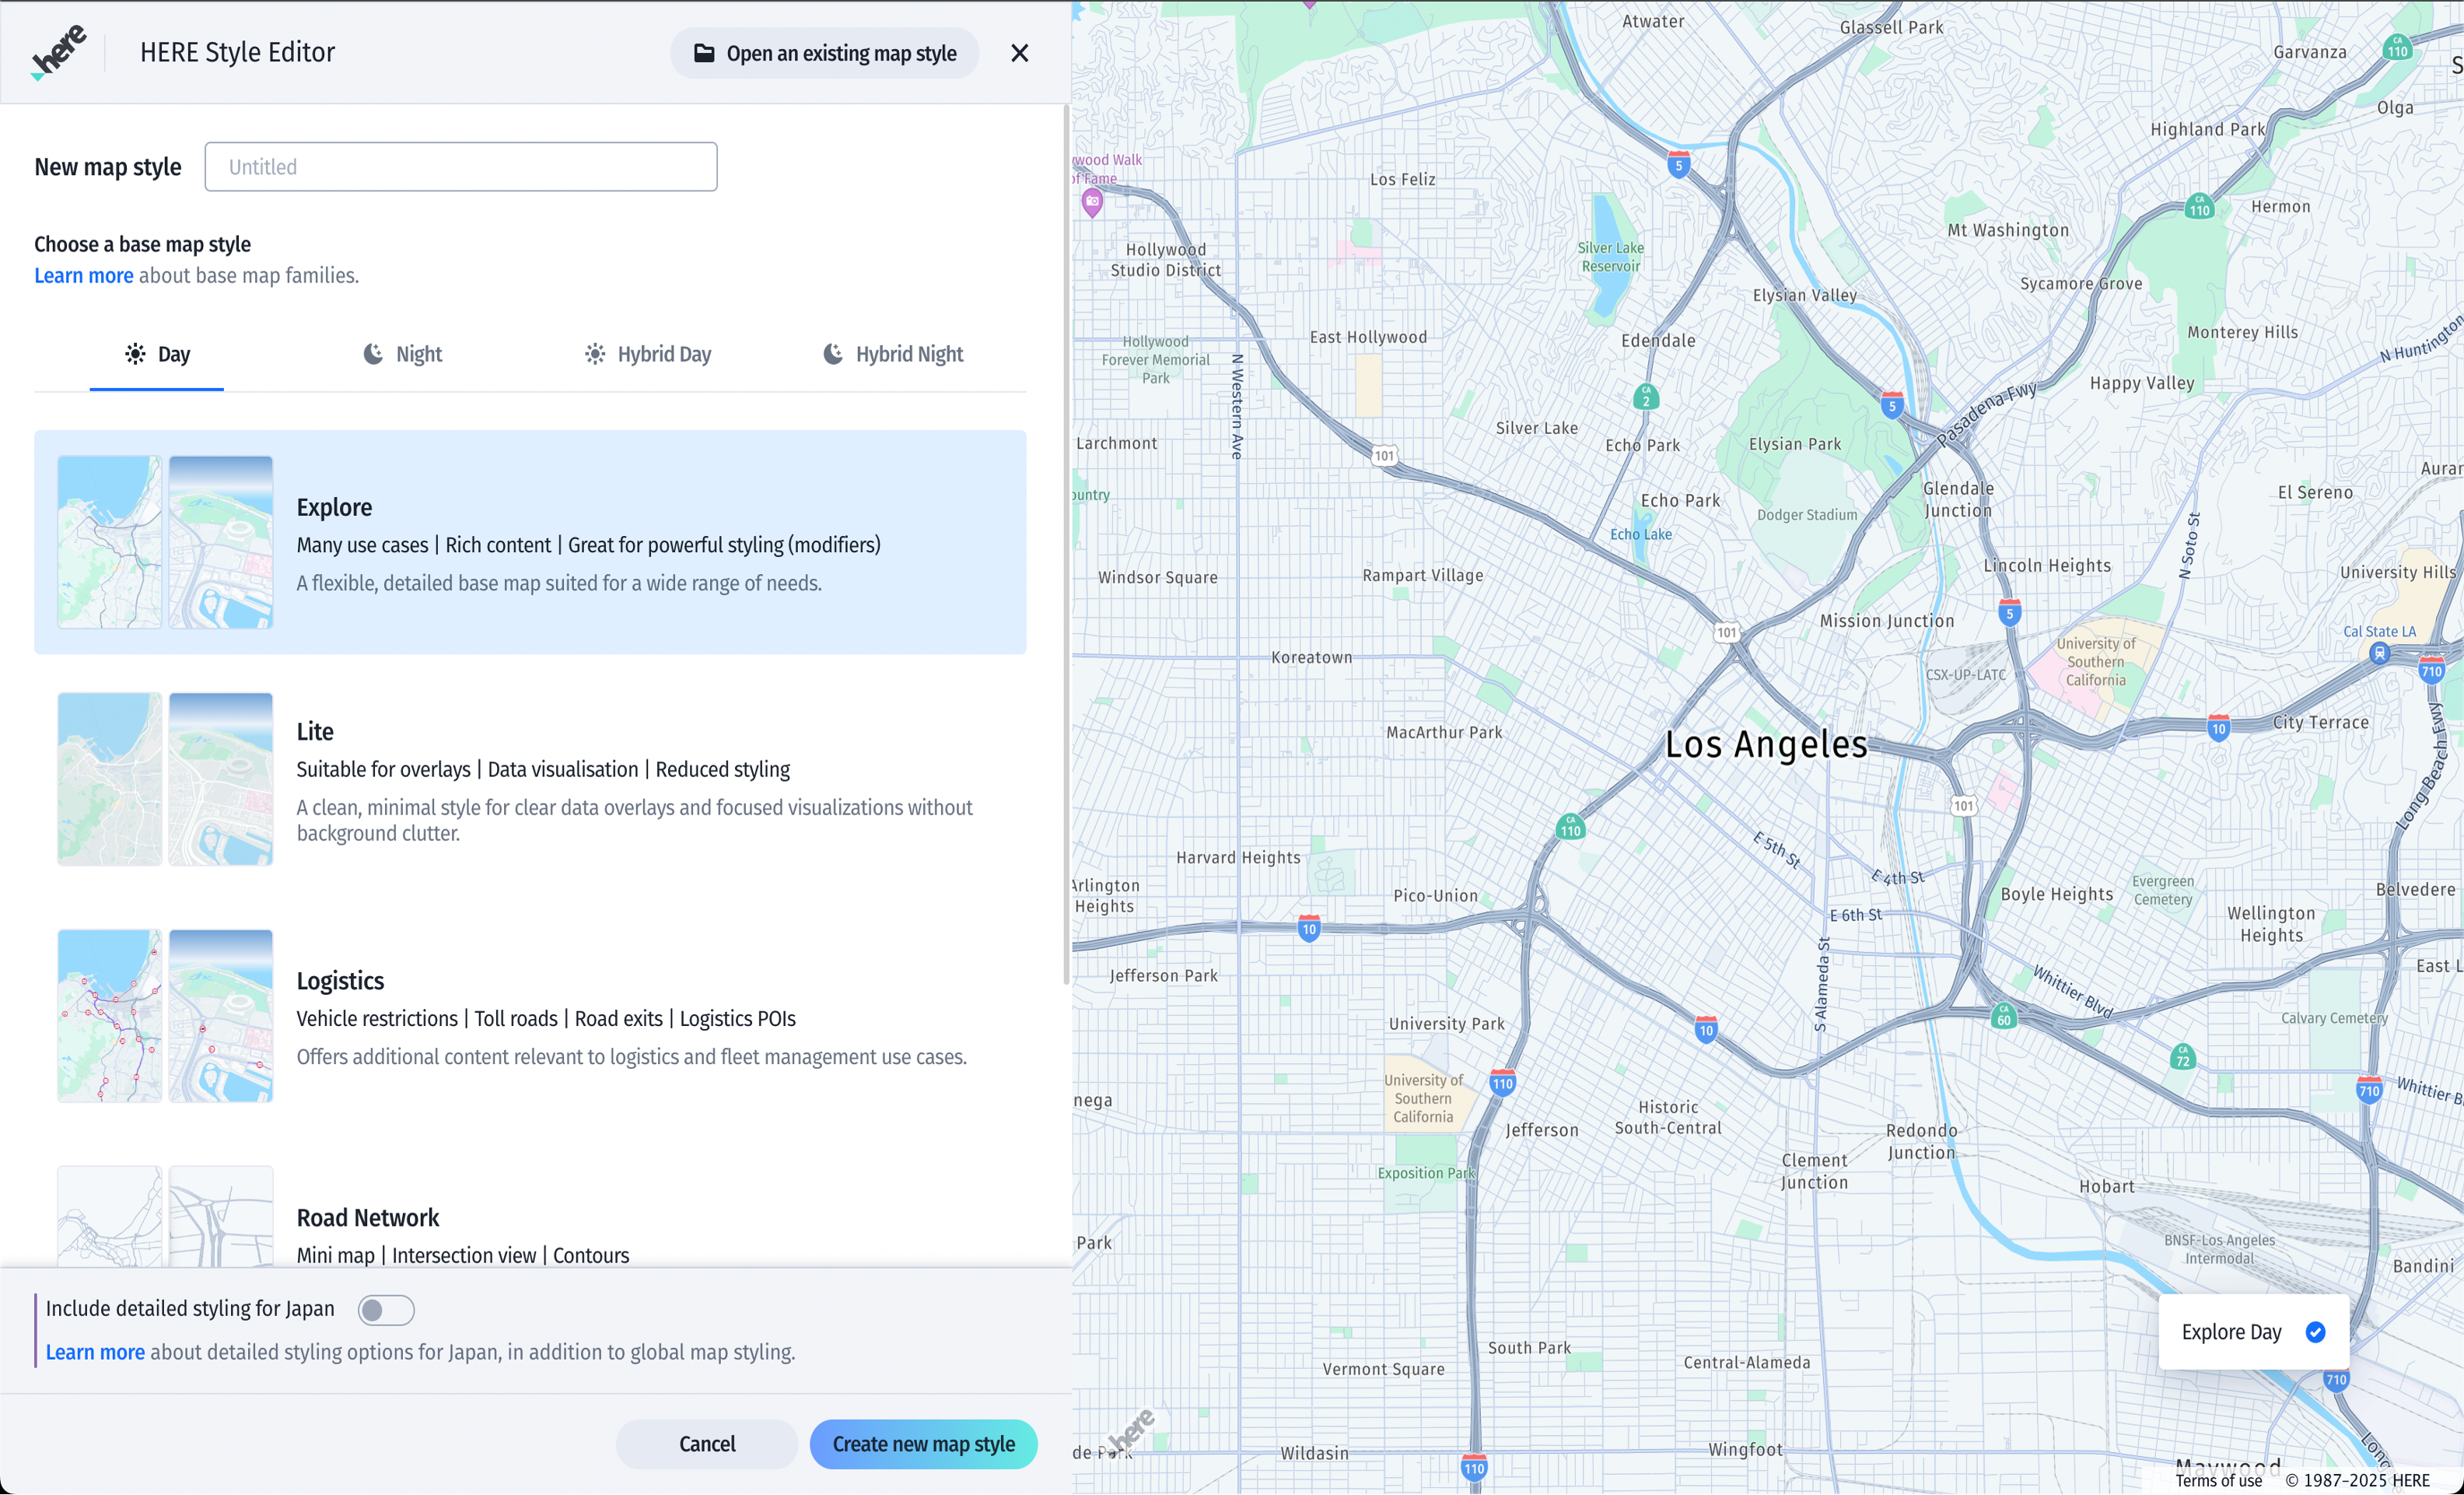
Base map style and bookmarks
The base map style serves as the basis for your custom styles.
To set up your base map style, follow these steps:
- Choose a base map style as your foundation. Explore Day is recommended for detail and clarity.
- Set up location bookmarks which helps save time during testing.
- Bookmark locations for urban and rural areas:
- Choose urban areas with a mix of street categories to check label density and road hierarchy.
- Include towns and cities where different road types appear together.
- Add at least one countryside or rural view to see how background features read.
- Street density varies greatly by geography - compare a dense metro city in India, such as Bangalore, with a European city, such as Berlin. Choosing locations that are diametrically different helps you cover a range of density scenarios.
- For variety, select a bridge location where a road crosses a river, which is useful for checking how road styling interacts with water layers.
- If your style is region-specific, you can also include pedestrian areas, cycle routes, or other local features to ensure these are represented appropriately.
Note
Include locations with multiple zoom levels and tilt angles while setting up bookmarks to identify errors in different conditions.
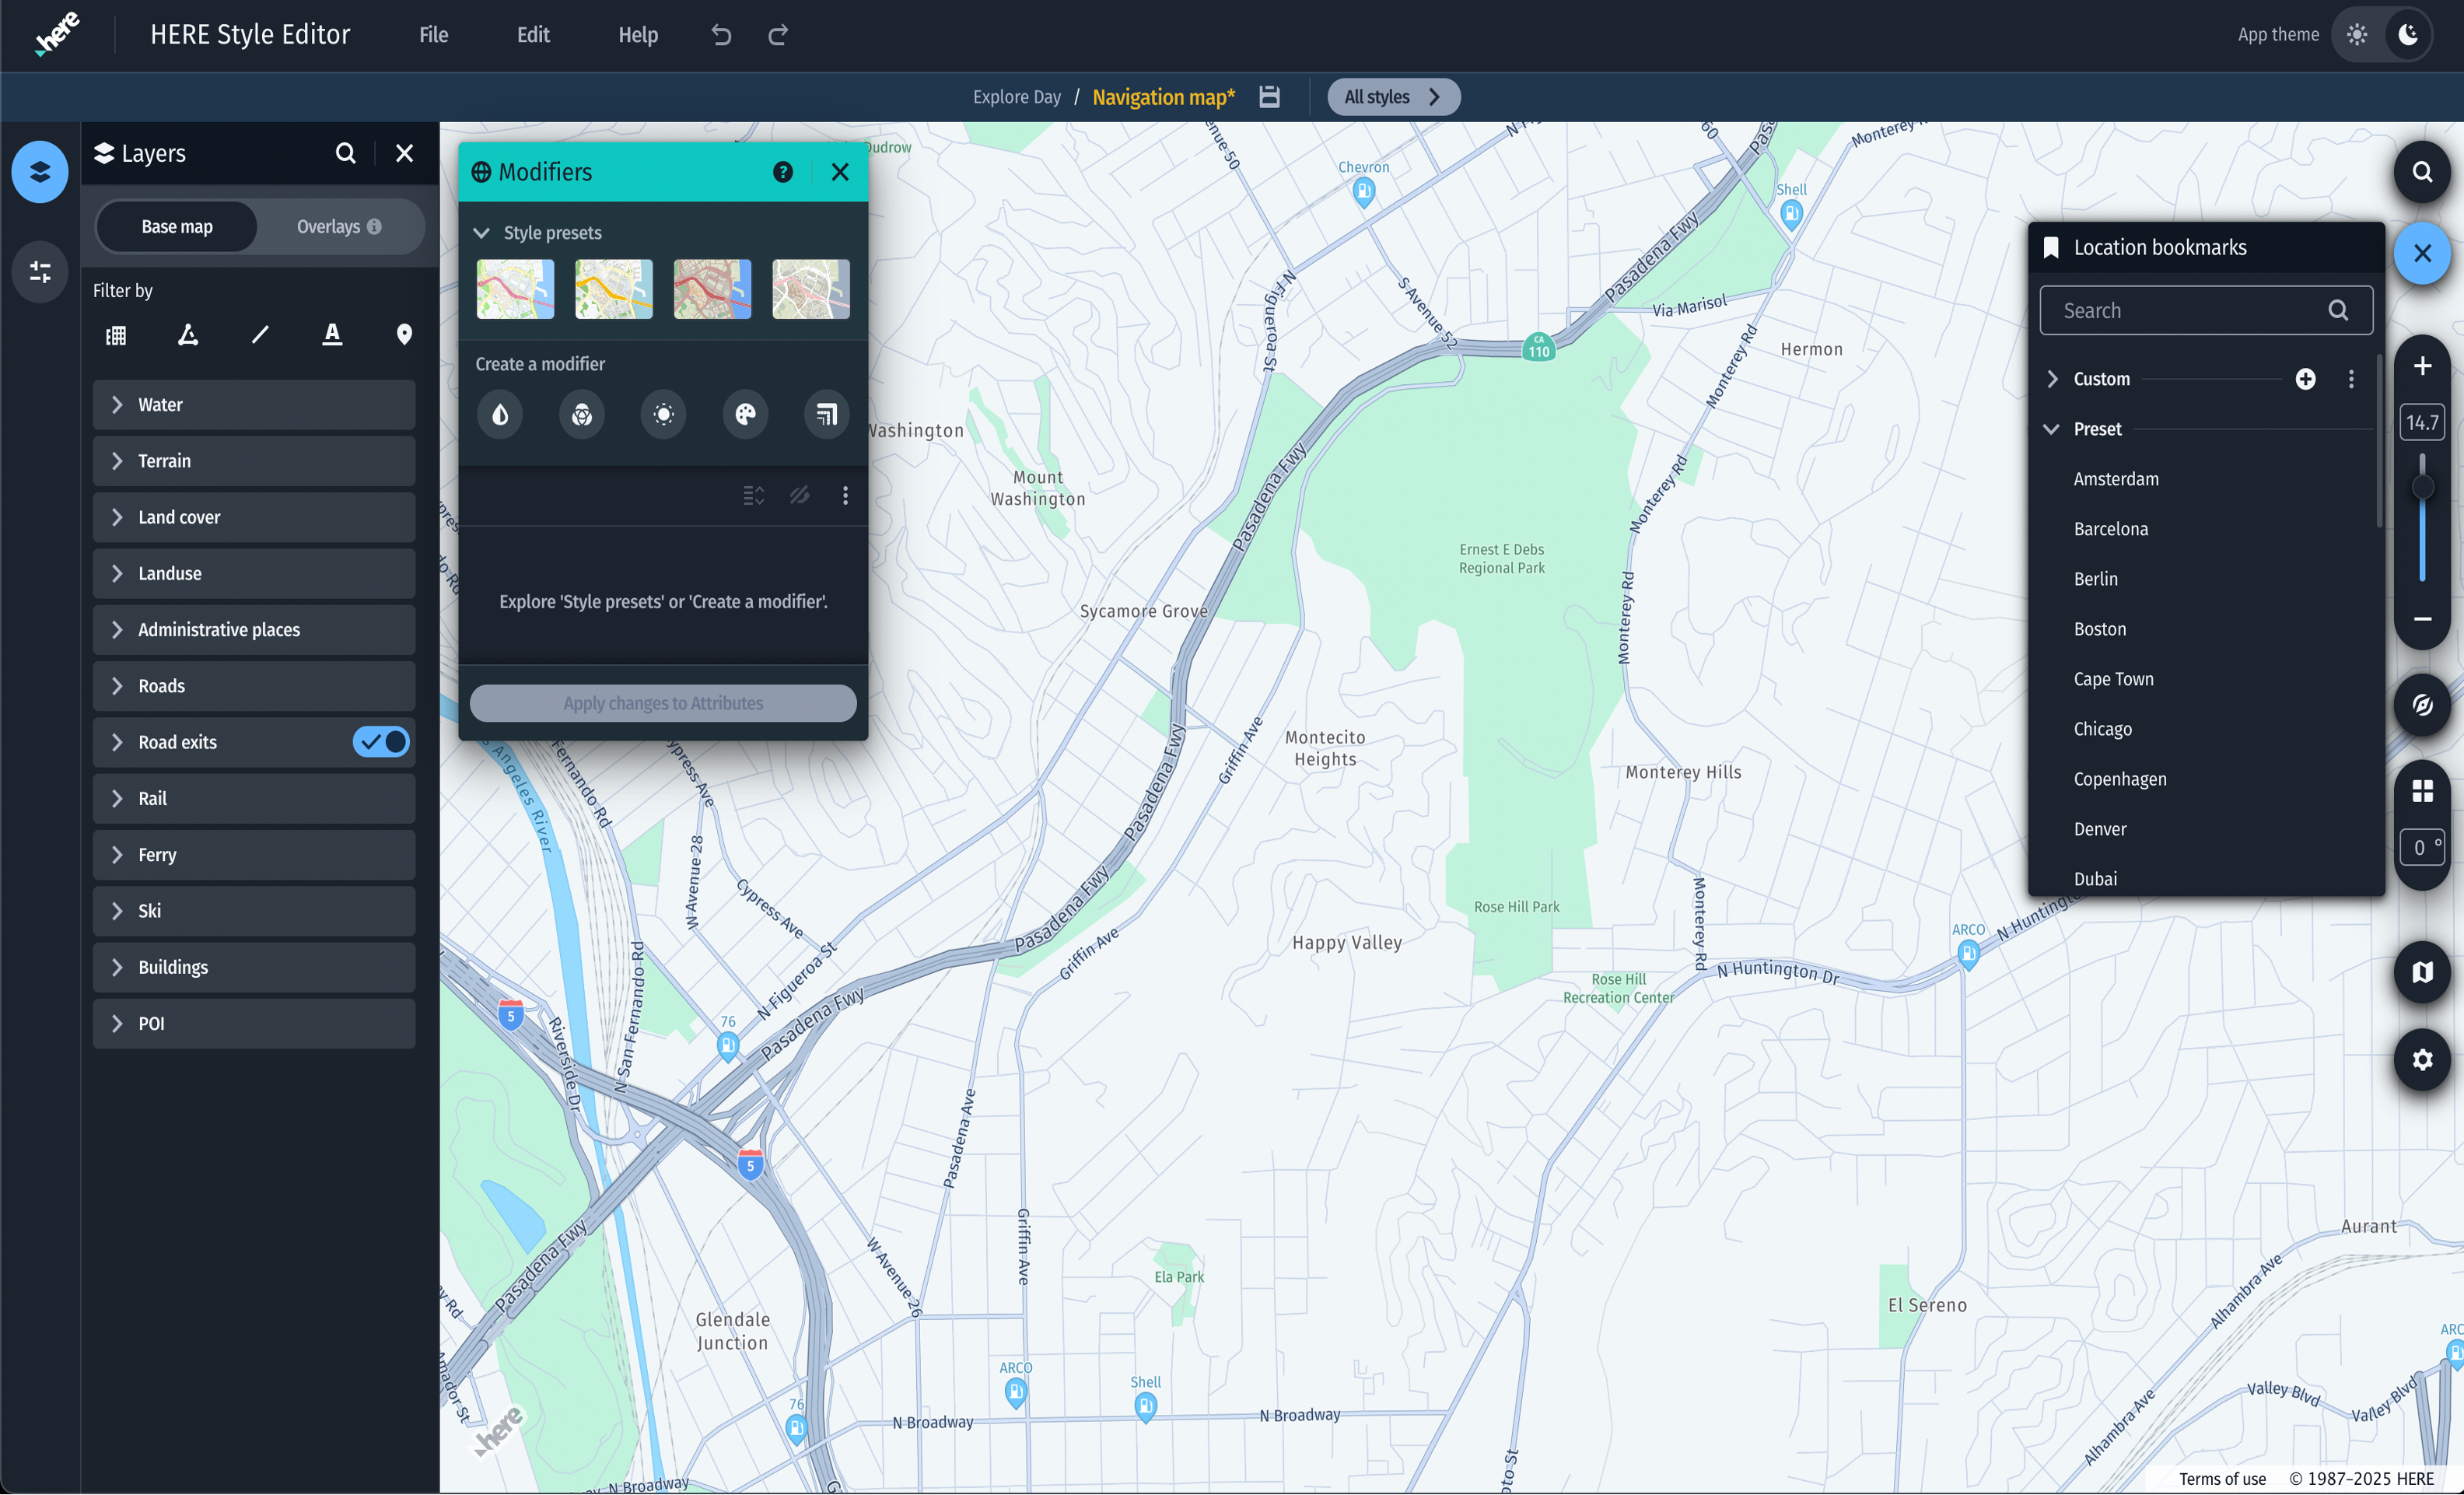
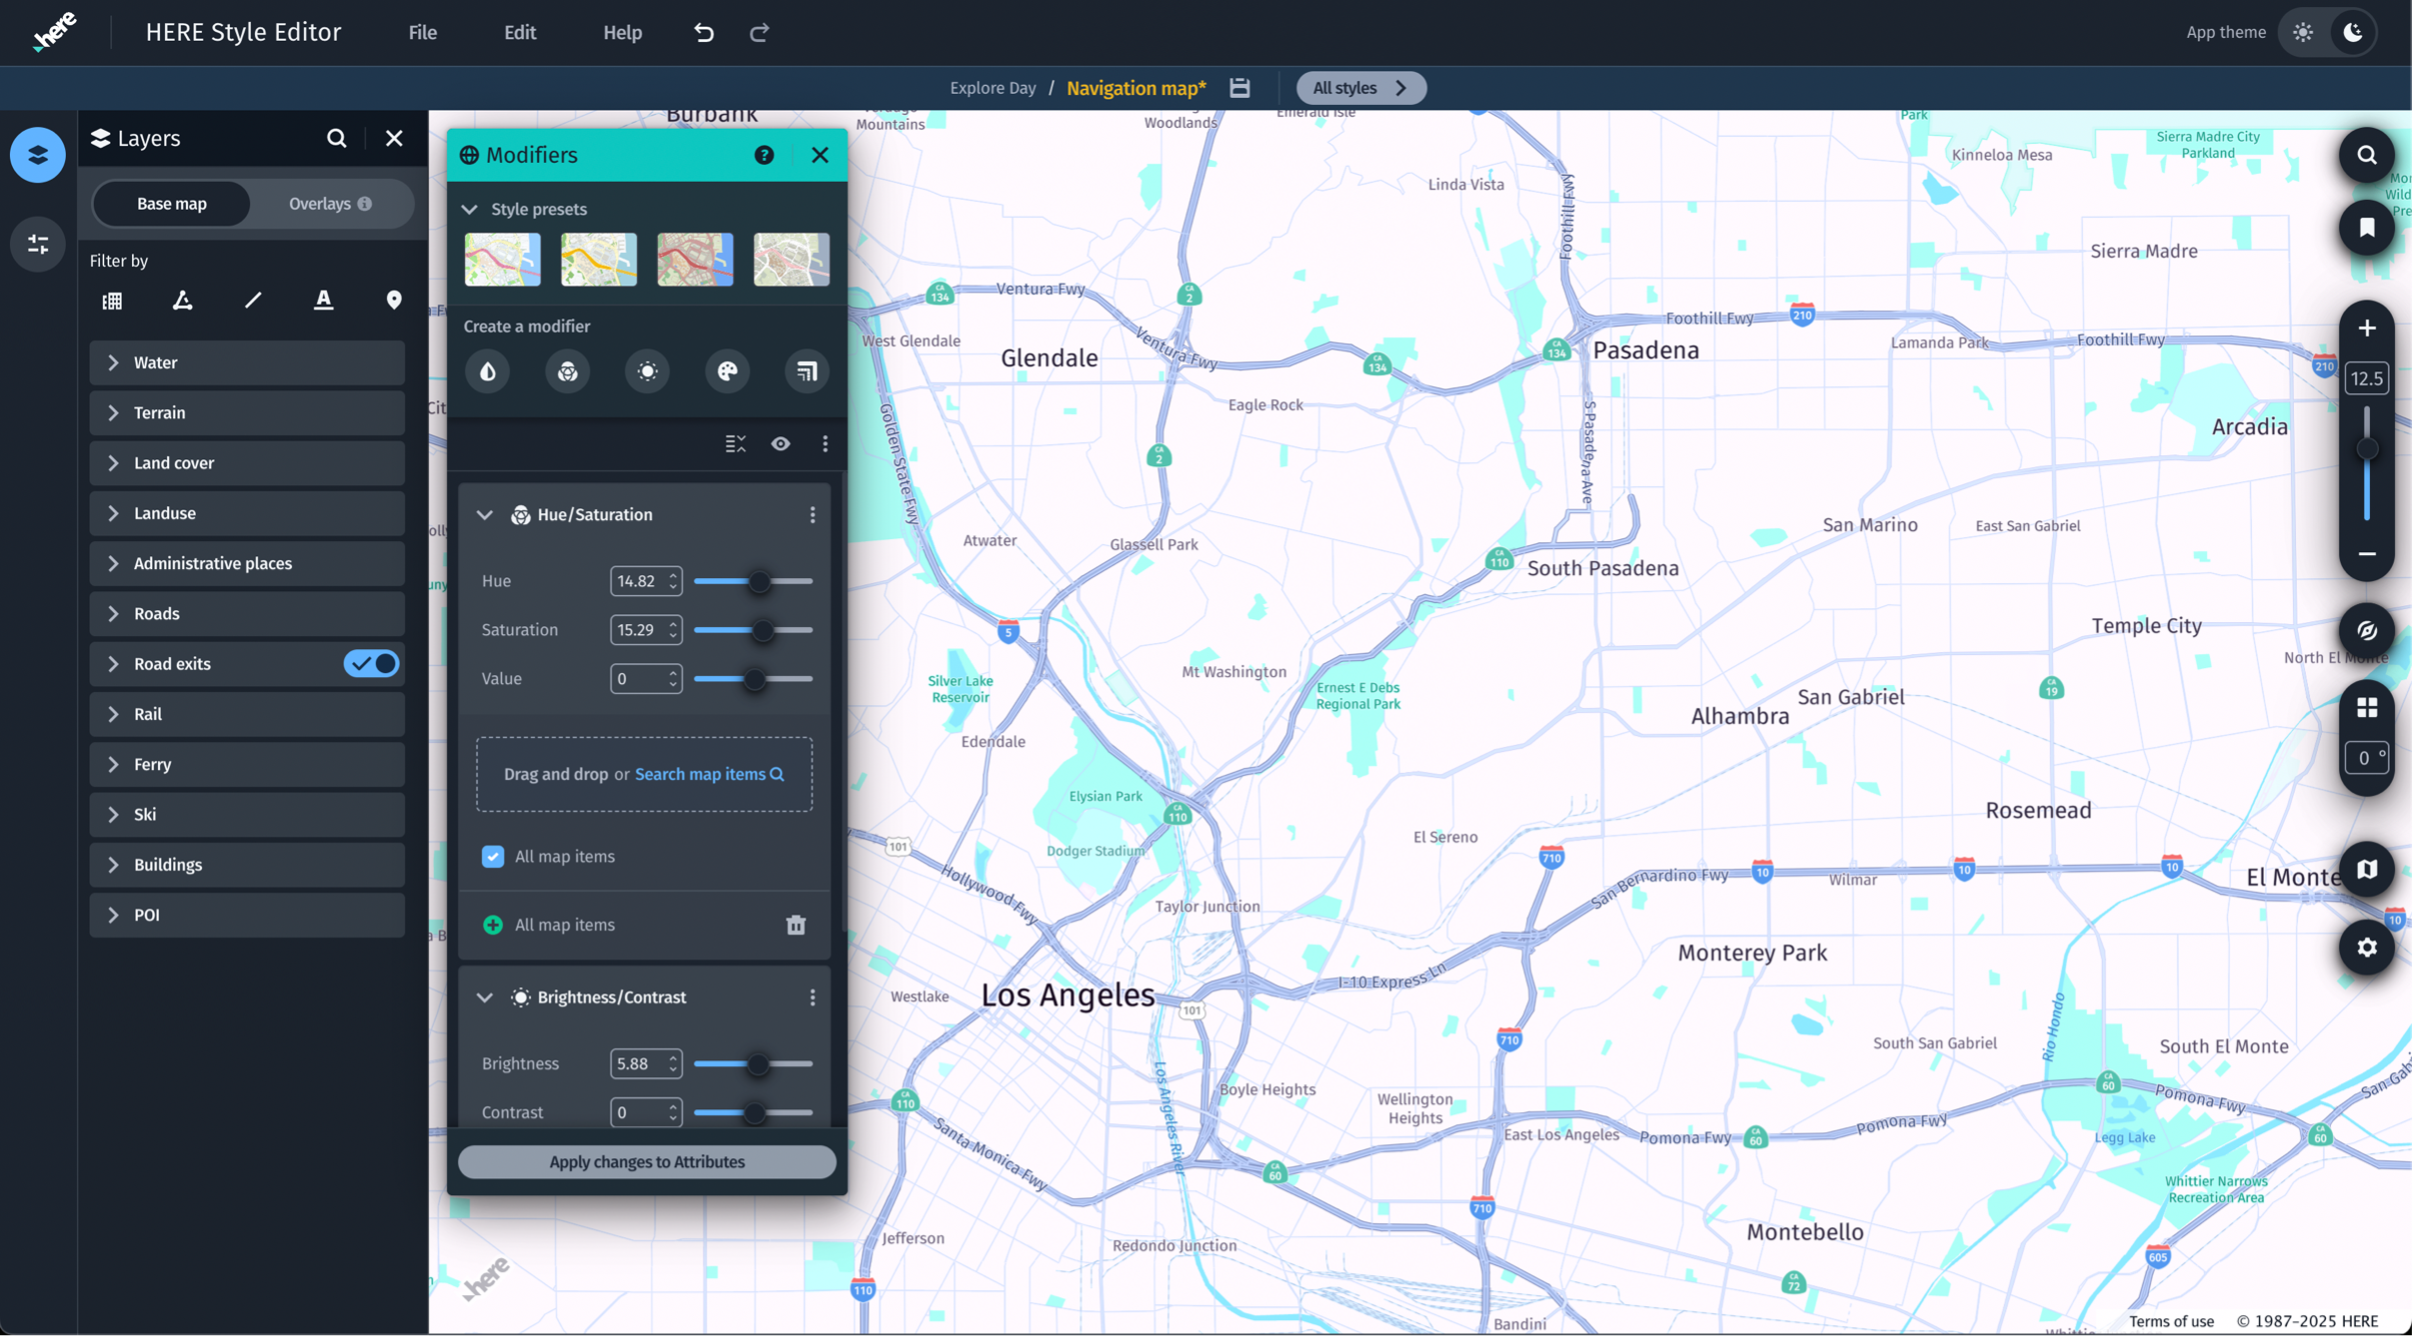
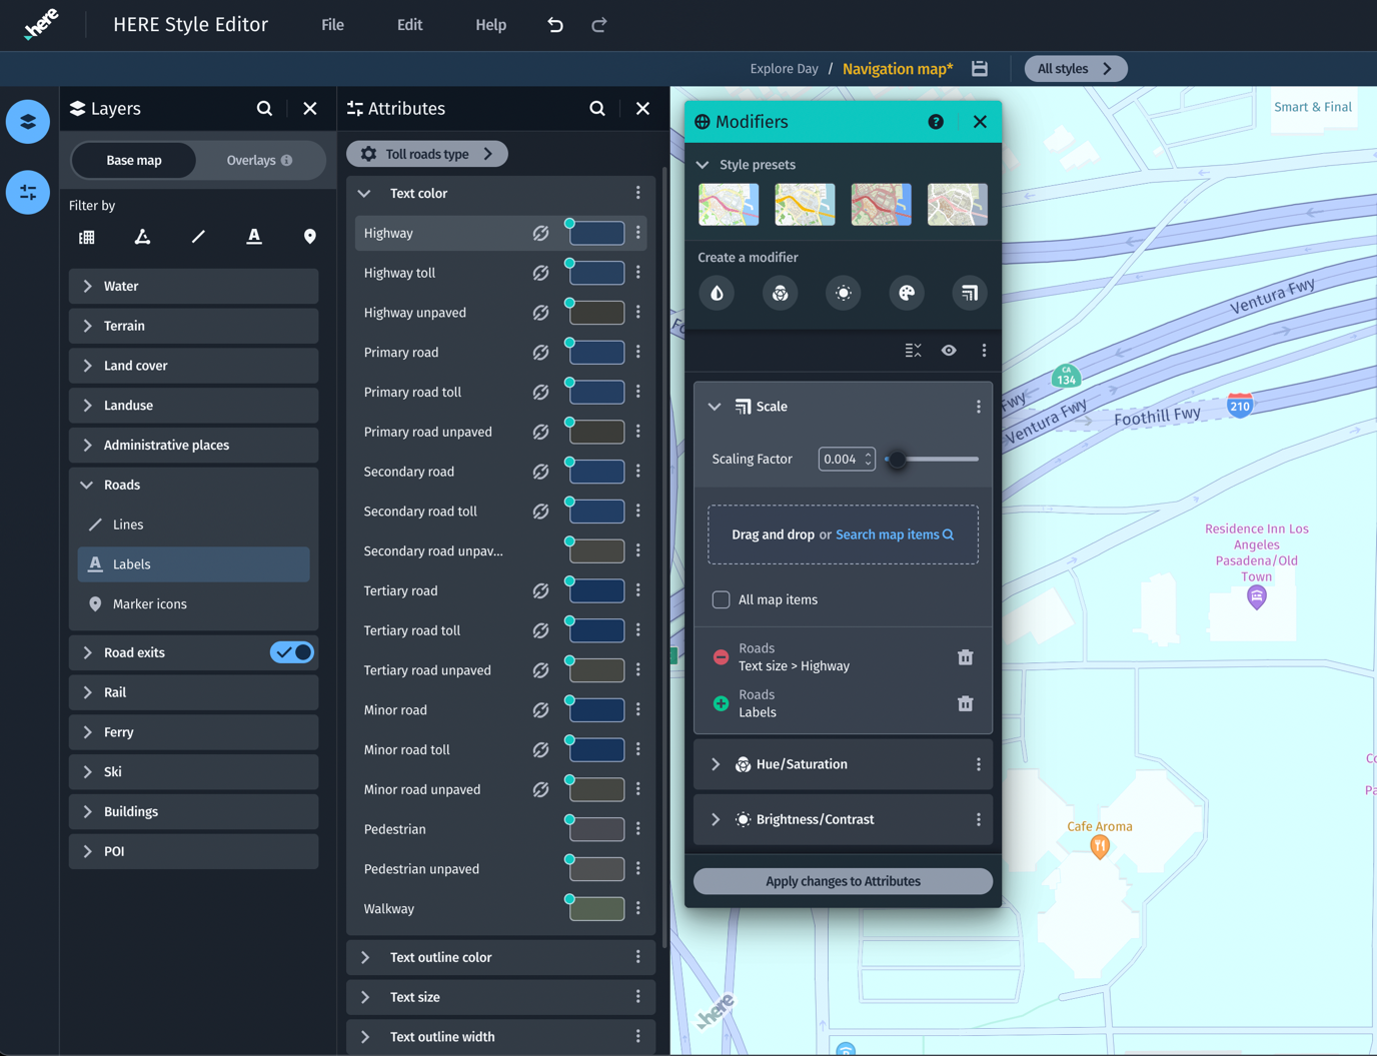
Change the overall tone with modifiers
Use modifiers to adjust color tone, saturation, brightness, hue, and scale to match brand colors or support general readability.
- Create each modifier, and set the values. All map items is selected by default.
- Shift the hue, or add a color tone so that the brand color reflects in the map.
- Increase the brightness for daylight readability, or desaturate the land background to make the roads visible.
Note
Modifiers can be reused across multiple styles. You can build a ‘core set’ and export it using the overflow menu. You can then import the core set as a new style.
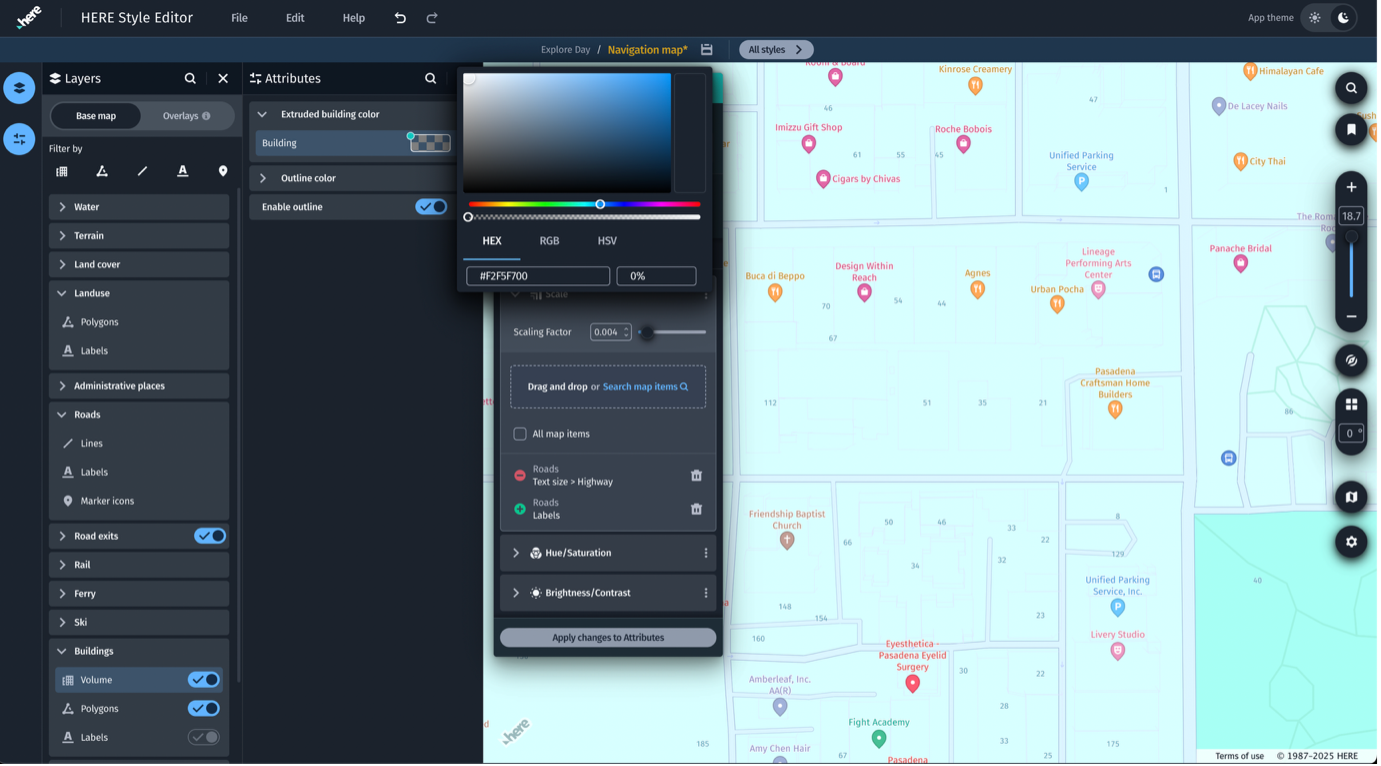
Explore and style specific map elements
Based on your requirements, you can fine tune each key layer. This can include:
- Roads: Adjust color and thickness of highways, primary roads, secondary roads, etc. to create a visual hierarchy.
- POIs: Keep essentials, such as fuel, EV charging stations, emergency services, traffic incidents, and so on. Others can be removed.
- Buildings: Hide names at lower zoom levels.
- Water: Reduce contrast unless navigation-critical.
Note
All labels, streets, and other important map items can be higher in contrast. Base maps have these characteristics and can be enhanced as required.
How to use bulk and precision edits
You can use bulk and precision edits as follows:
- Bulk edits: Directly drag & drop a layer (such as Roads) into a Scale modifier. All widths/labels scale together. Or create a Scale modifier first and then drag and drop map items into it. Alternately, you can search for map items within a created modifier.
- Precision edits: When you create a set of map items, you can include/exclude items. While dropping an item from the panels into modifiers, you can drop them on include or exclude. Alternatively, you can search for items within modifiers. By default, whatever you select is included. Click on ‘+’ to change to ‘-‘ which is an excluded state.

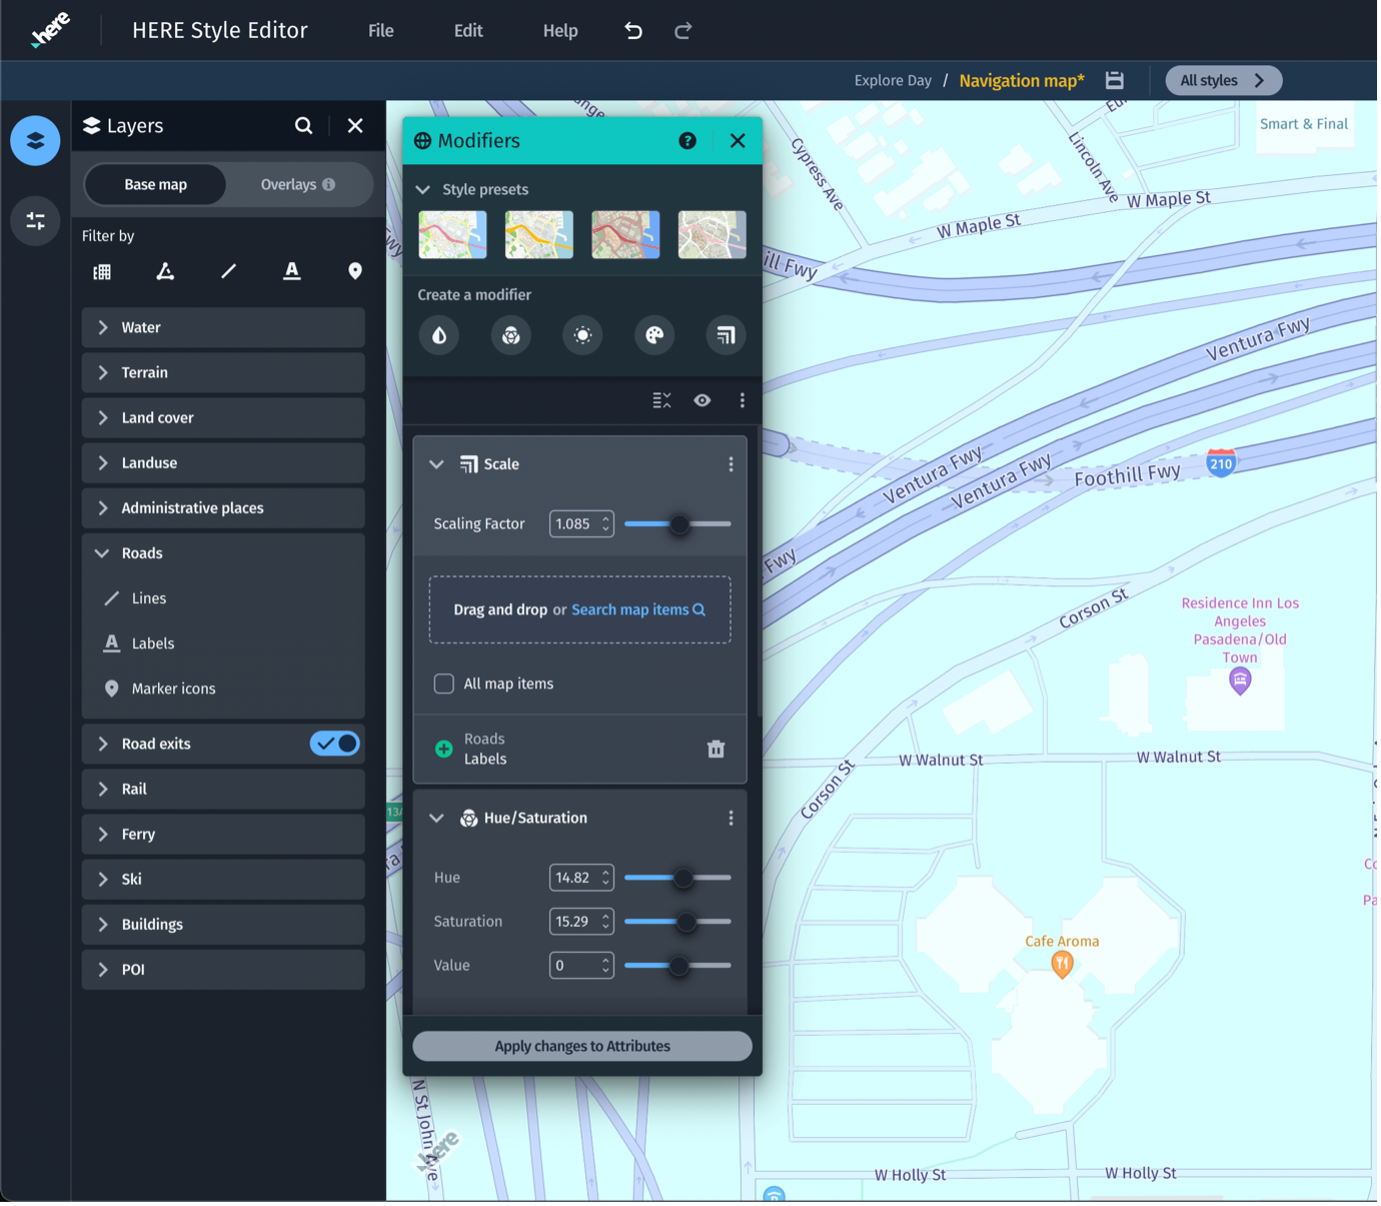
Specific style workflow
The following shows an example of a specific style workflow:
- Style only highways:
- Drag and drop Highways from the Attributes panel into your modifiers set.
- Remove All map items from the list. Now your edits apply only to highways.
- Style all roads except highways:
- Keep Roads in the set.
- Drag and drop Highways and mark them as ‘-‘ excluded. Now your edits apply to all other roads, but not highways.
Note
- You can keep the changes or apply them into attributes for finer tuning.
- If you have end app device calibration quirks, you can apply them.
- Use the Attributes panel: If you want to fine tune some map items and their attributes at different zoom levels or an added precision, you can use the Attributes panel. If you have used modifiers, you will need to ‘Apply changes to base attributes’ to see the modifiers applied to base map attributes. Modifiers get based into:
- Add zoom stops to enable line widths to change dynamically.
- Hide unneeded items by setting Color Opacity to 0 or the text value to 0.
- Unlink attributes when you need distinct styling for particular map items (toll roads, for example). Click on the link icon to link or unlink.
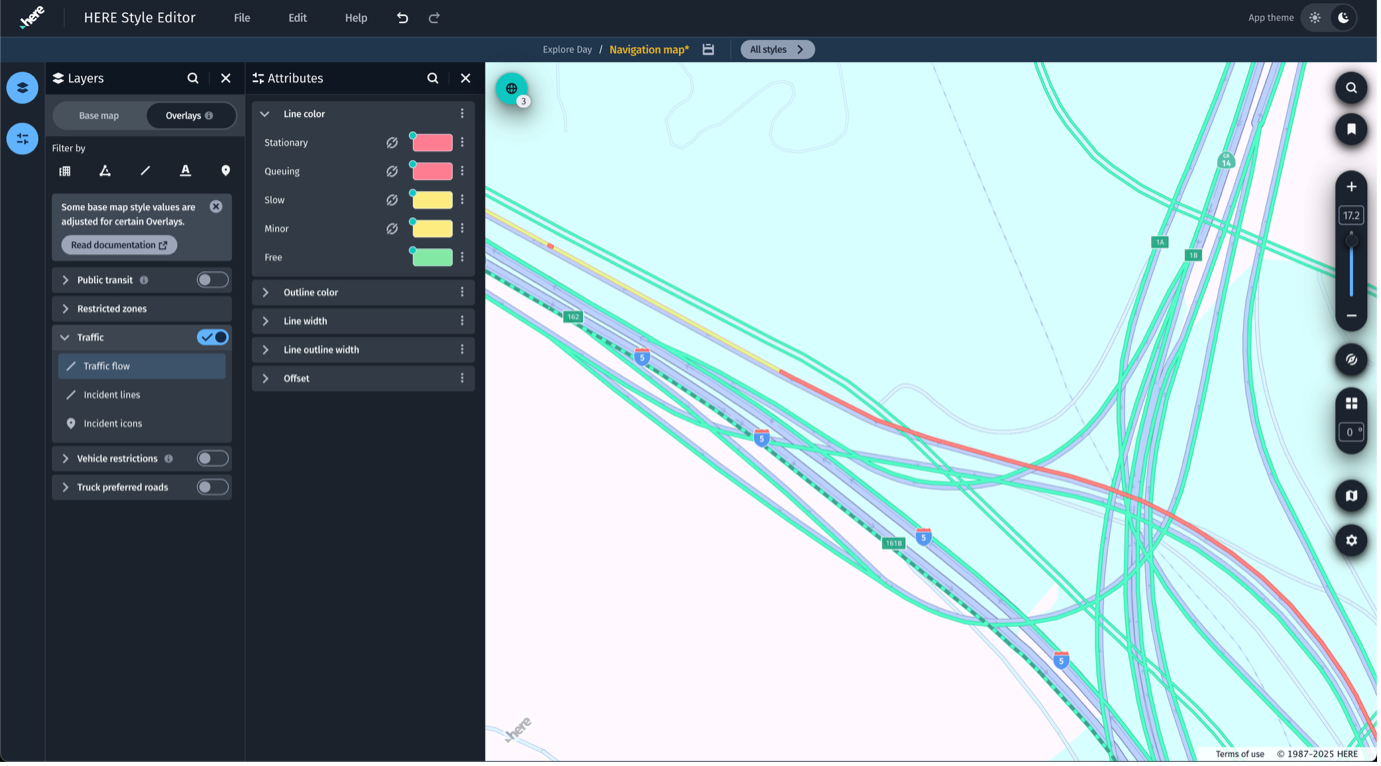
Overlays - traffic and public transit
Overlays are layers displayed on top of the basemap for specific use cases. The following list identifies key usage.
- Overlays can be toggled on or off from the Layers panel.
- Traffic overlay needs enough contrast to stand out clearly against the base map. Default traffic colors follow familiar conventions: red = blocked, yellow = slow-moving, green = free-flow. Preserve readability even if you adapt the palette.
- Use supporting traffic related elements, such as incidents - which should be bright enough to draw attention without overwhelming the map.
- For overlays that carry higher importance (live traffic on a muted map, for example), consider using a lighter or desaturated base map, such as Lite instead of Explore to make the overlay become the visual focus.
Device and Display Considerations
Map styles can look different in an end-user environment. The following are important considerations:
- Screen Calibration & Color Shift: In-car displays might not match your desktop monitor. Colors can appear warmer, cooler, or less saturated.
- You can adjust hues, tones, and brightness with modifiers.
- Avoid relying on subtle differences between dark shades (dark gray vs. black, for example).
- Resolution & PPI Differences: Dashboard displays and mobile screens often have different pixel densities than your desktop.
- Labels may look larger, denser, or thinner once deployed.
- Always test at multiple zoom levels to determine how scaling appears.
- Lighting Conditions: Drivers encounter maps in all conditions including direct sunlight, dusk, and night.
- Bright daylight can wash out pale colors.
- Night driving amplifies glare from high-contrast or overly bright labels.
- Use bookmarks and modifiers to test both extremes.
- Mobile as a Proxy: If you don’t have immediate access to an in-car screen, load your style on a mobile device and dock it. This simulates many of the contrast and readability issues of real driving environments.
- Overlays in Context: Traffic, incidents, or public transit overlays must remain visible on all device types. If in doubt, use a lighter/desaturated base to make overlays the focus.
- Best practice:
- Design in HERE Style Editor
- Preview on real or proxy devices
- Adjust modifiers
- Repeat until both brand requirements and practical readability are satisfied. You can create settings in modifiers, and export them for recurring use. Import these modifiers in other styles. The settings are uniformly applied.
Differences between HERE Style Editor and your native applications
Check how the styling works under the expected final application camera views. Not all observed visuals will appear similarly if the style is used in applications based on the native HERE libraries. The following are examples of differences:
- The view horizon has a different appearance in Native libraries. The view typically shows less content than HERE Style Editor and fades out content that is closer to the camera.
- Native libraries have functionality to adjust the camera view angle and override the map view pixel density. This can render differently sized items for labels and icons.
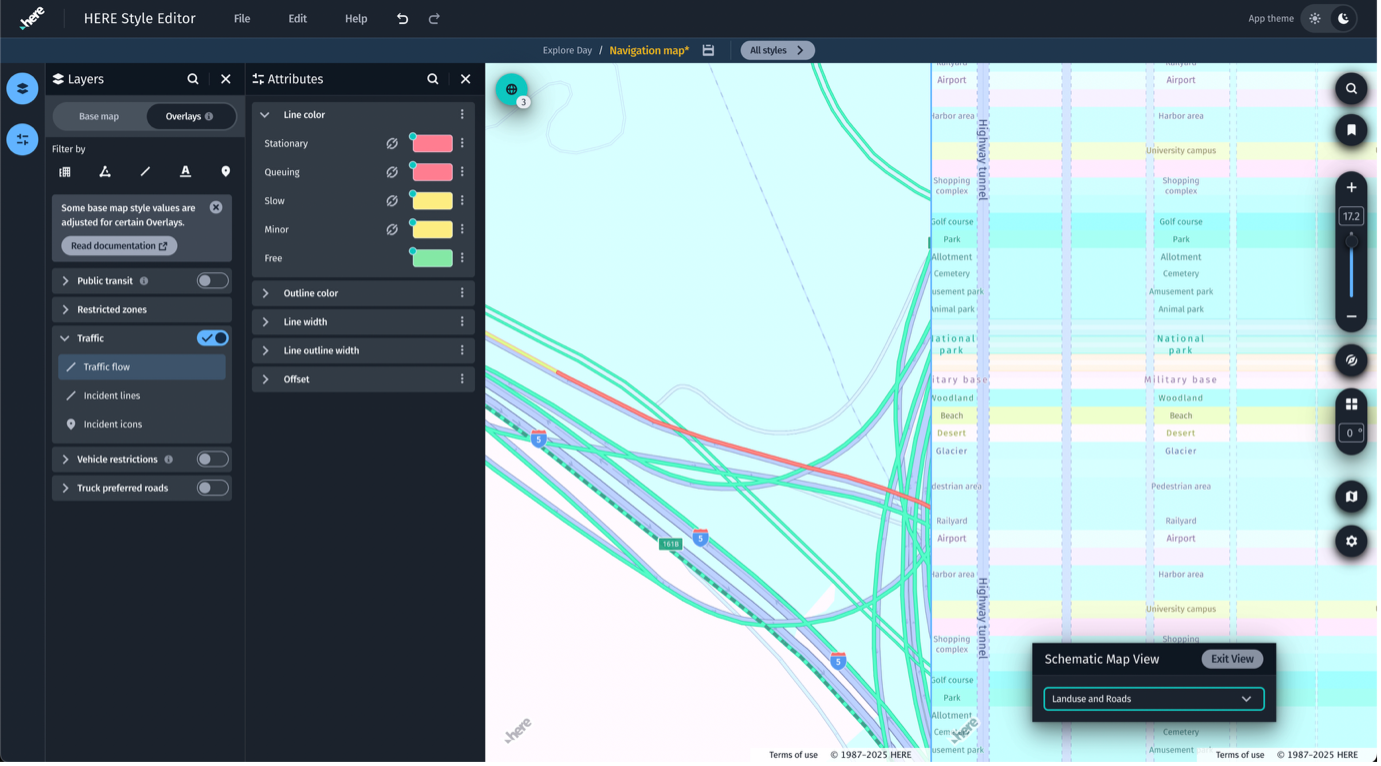
Verify your style
Verify before saving and exporting your style.
To verify your style, follow these steps:
- Check your location bookmarks.
- Open Schematic Map View to see a graphical representation of what has been styled (or left out).
- Look for elements that aren't styled (often they’ll appear visually as out-of-place).
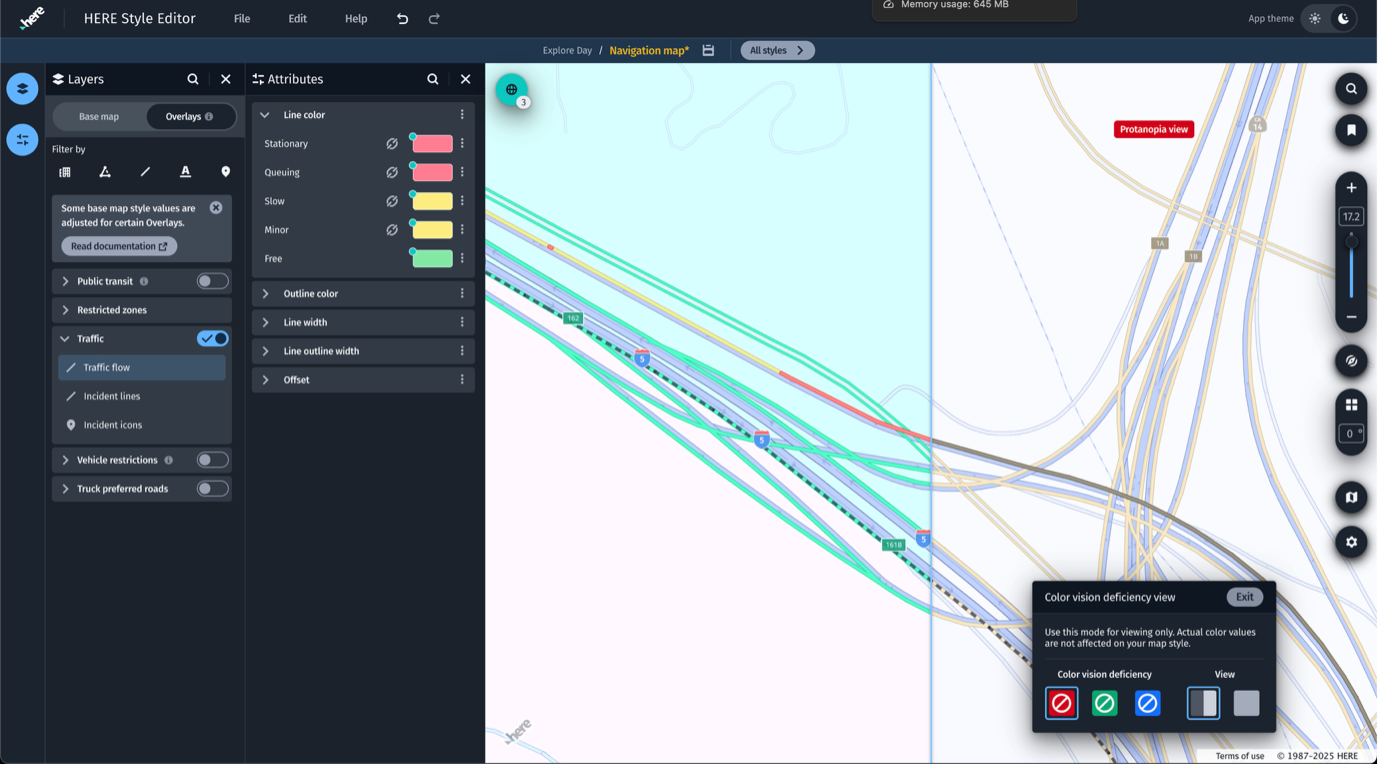
- Accessibility Check: Use Colour Vision Deficiency View to test for Protanopia, Deuteranopia, and Tritanopia. Adjust colors/contrast if items merge. Check your bookmarks.
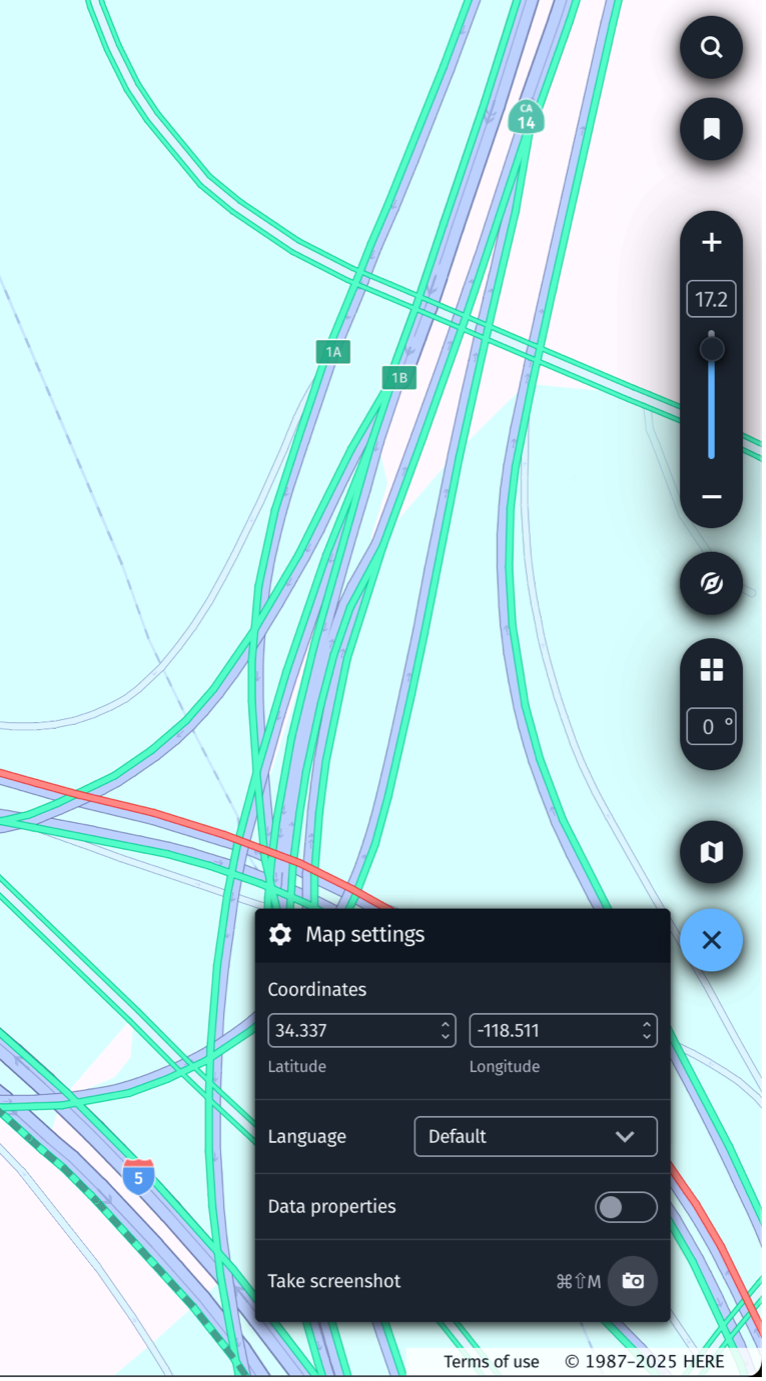
Take screenshots to use in your presentations
Take Screenshots from Map settings to capture styled views from different locations. Screenshots can be useful for reviews and presentations.
- You can place screenshots inside a device stencil (your in-car display frame, for example) or embed them in a presentation deck to show how the map will appear in context.
- Create variants by toggling Modifiers on/off (for example, one with higher contrast vs. one with muted tones) to compare options.
- Check your screenshots using the same dimensions as the target app screen. A layout that works using a desktop monitor might be too small on an in-vehicle display.
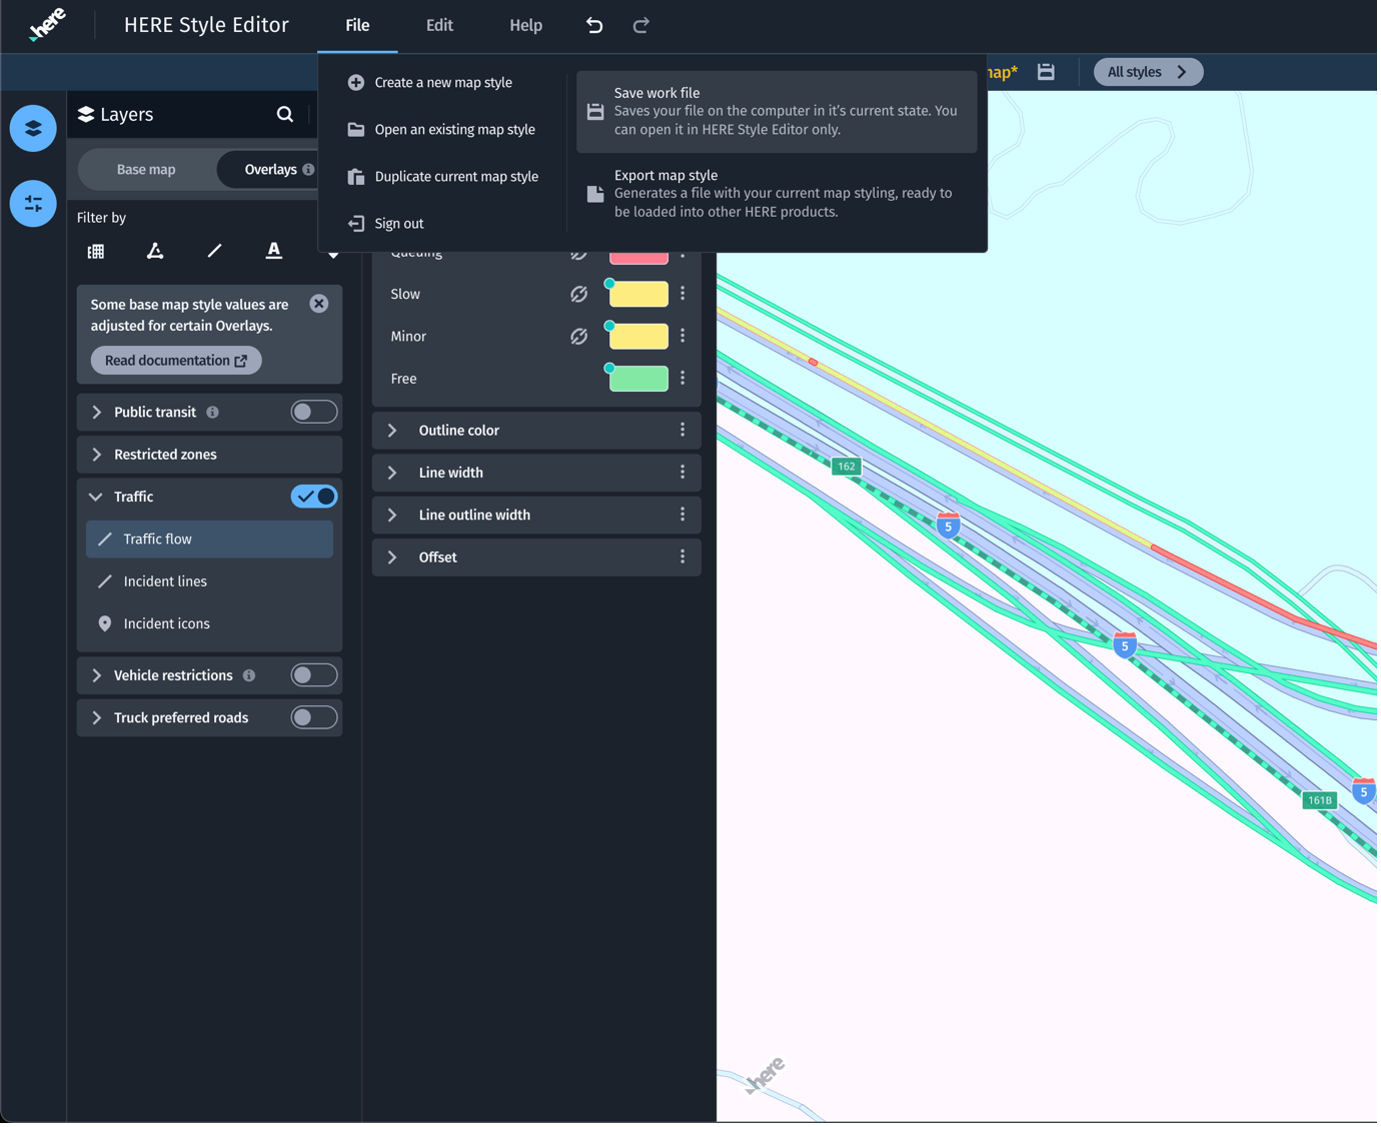
Save and export
Save a copy of your files locally on your computer. Do not rely on browser cache.
To save and export your file, follow these steps:
- From the File menu, select Save work file.
- To Export, from the File menu, select Export map style.
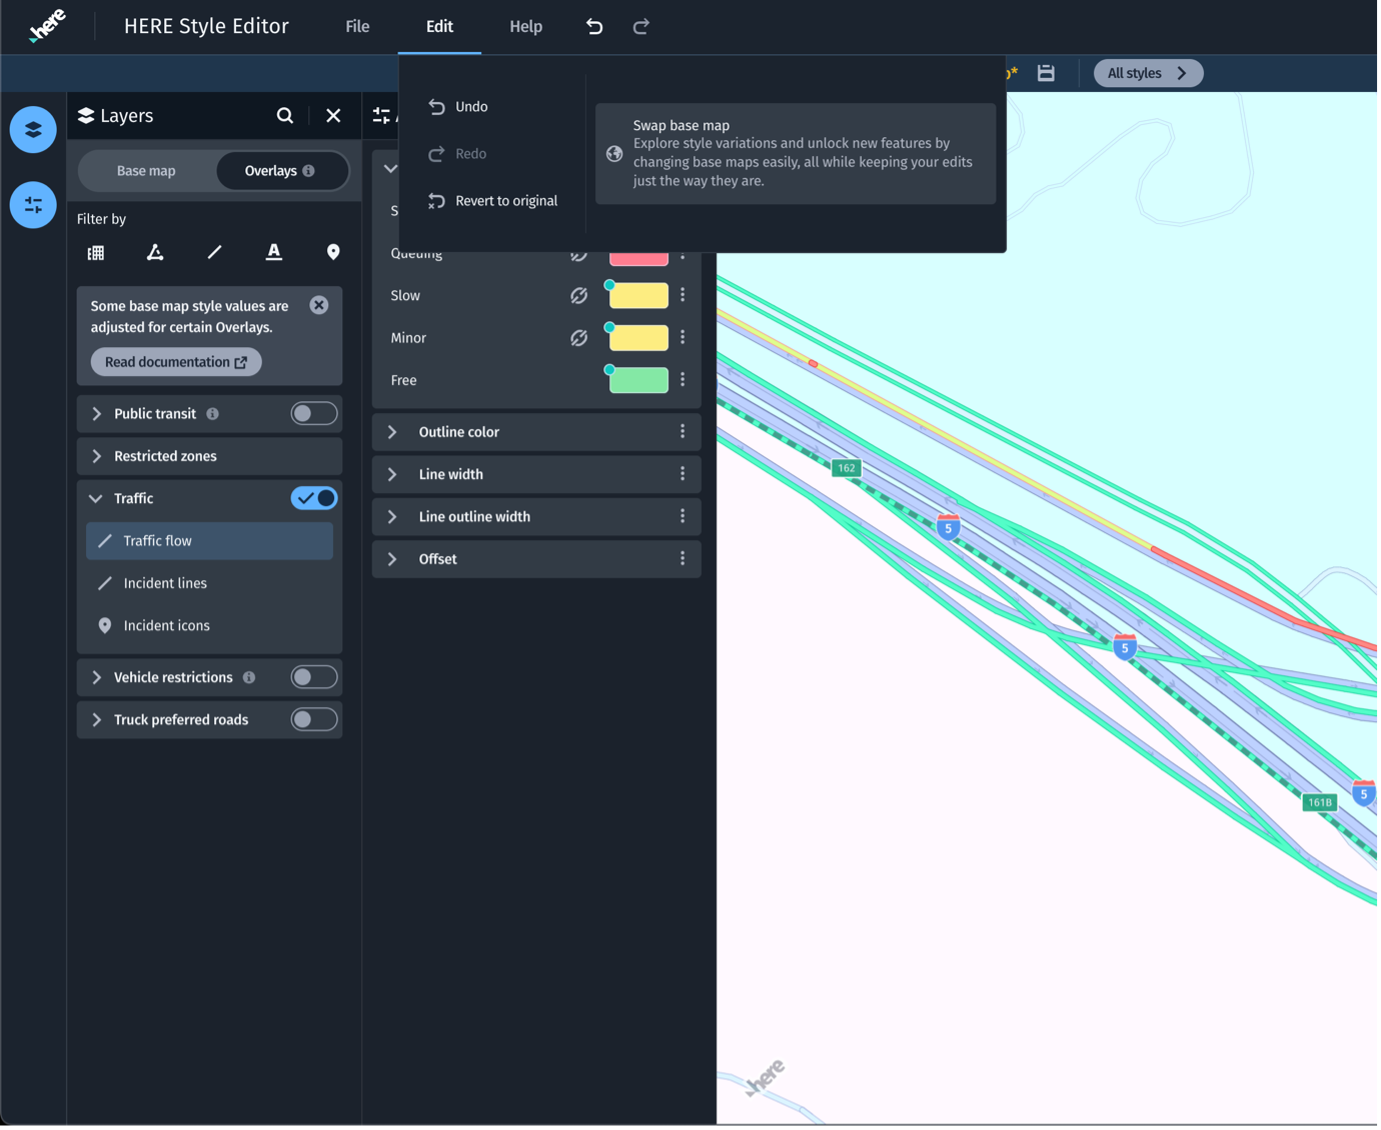
Create the night variant
To create the night variant, follow these steps:
- Click Edit and Swap base map.
- Select the Night variant in the same, Explore map family.
- Click the Create a copy button.
For more information on using these features with HERE SDK, see the HERE SDK documentation.