

How to style Attributes
Change attribute values
The options menu, opened by clicking on the vertical ellipses to the right of an attribute value, allows you to switch the input type. Choose between Single Value or the Zoom Level editor.
Single Value
Define a static value for the attribute. For color values, HEX, RGB and HSV are supported along with transparency amount.
Style by zoom level
To create gradual color changes based on zoom level, follow these steps:
- Click the vertical ellipses to the right of the color swatch and choose Zoom Level to open the zoom editor.

Click the color swatch itself to open either the color picker or the zoom editor, depending on which input was last used. By default, the HERE styles have a mix of both static values and zoom level based changes.
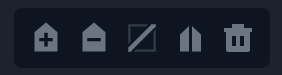
Zoom editor controls
- Add creates a stop at your current zoom level.
- Delete removes the currently selected stop.
- Interpolation can be set to step, linear, exponential or cubic. Default is linear.
- Split creates a second stop value at the same position, which is treated as a single stop on the range bar.
- Delete All removes all stops from the zoom range.
- Click the add button to add a stop at your current zoom level, then zoom in or out on the map and add another stop. The white number above the range bar represents your active zoom level in the MapView. Use the color swatch beneath the range bar to set your desired color for each stop.
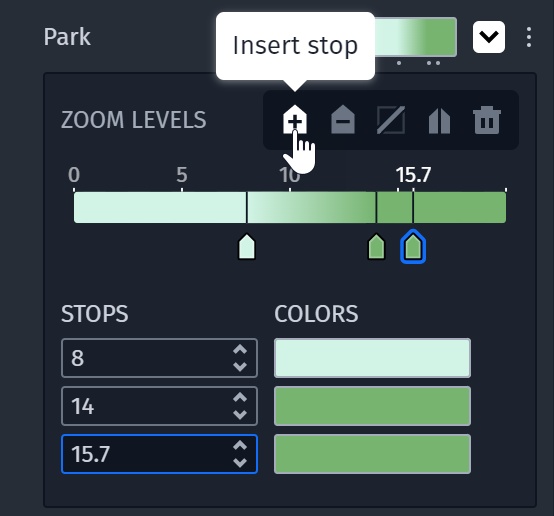
Hint: Double-click directly on the range bar to add a new stop at that position, and click-drag stop markers to new zoom positions.
- Select a stop to highlight it in the list under the range bar. With a stop selected, you can select its swatch to change the color or enter another zoom level in the field.
Note
If a Modifier is active, it may override Attribute values. Check for the dot indicator next to the property. To regain full control over individual Attribute values, you can apply the Modifier changes to Attributes.
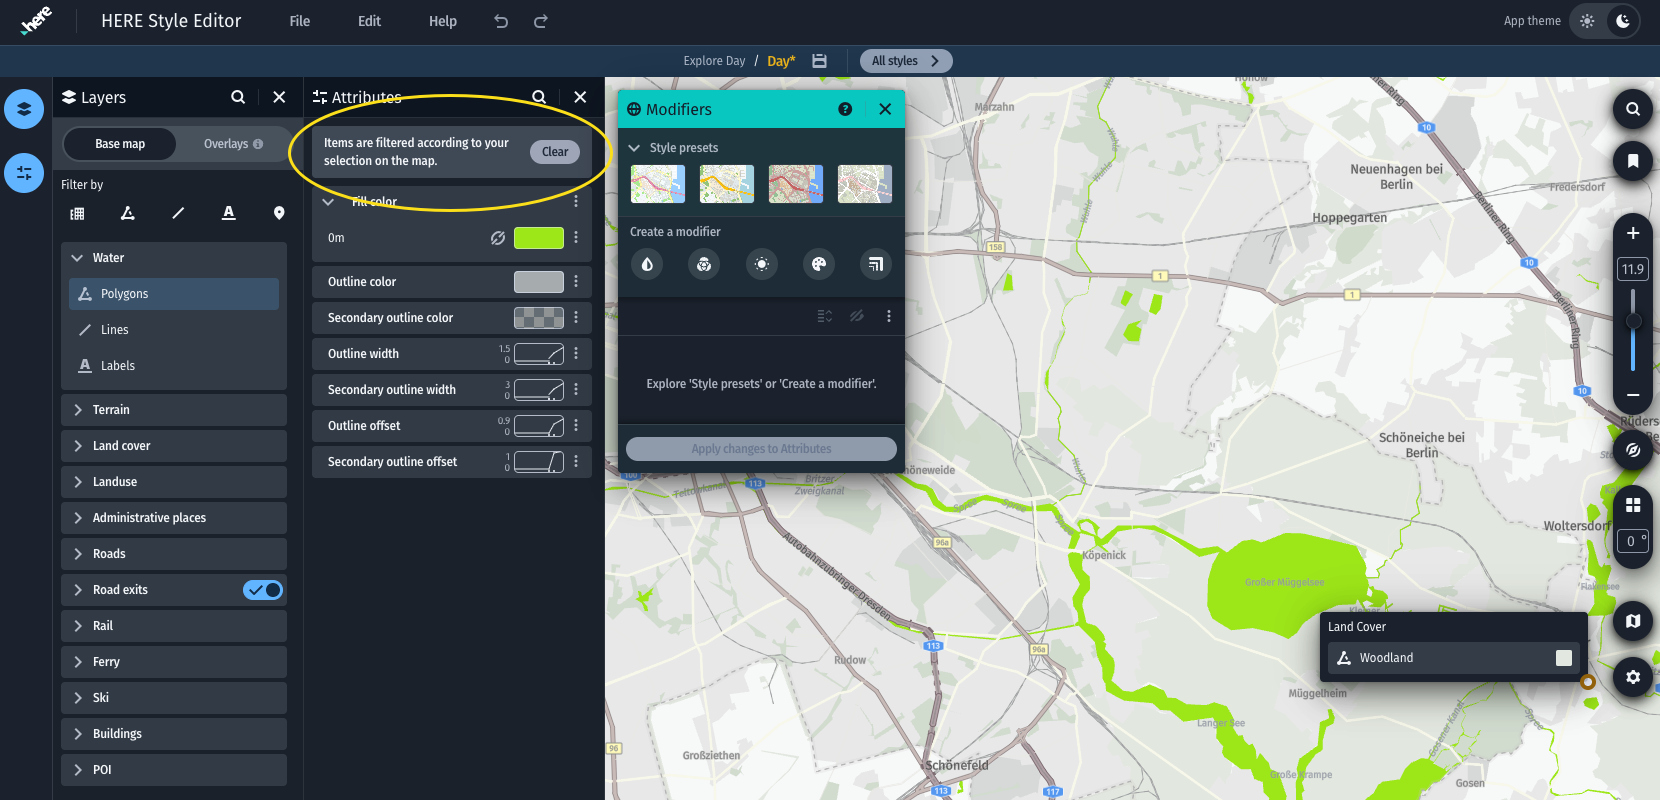
Filter attributes
You can filter the Attributes panel by clicking directly on the map to select the layer you want to edit, or by entering a name in the search field at the top of the panel.
Map picking
Select a specific layer by clicking on the map and choosing the corresponding layer from the pop-up. You can clear this attribute filtering using the Clear filters option at the top.
Search attributes
For example, with the Landuse Labels layer selected, type in color to filter the panel to only display the attributes for Color and Outline Color. Type in park to filter and highlight all data conditions containing the word park. Note that this filter remains active when selecting different layers.

Toll Road type selection
You can now select the type of toll road that is present in your style. For the Road layer, an additional widget allows the user to toggle between toll road types. The attributes related to toll roads are explicitly marked while operating the widget.
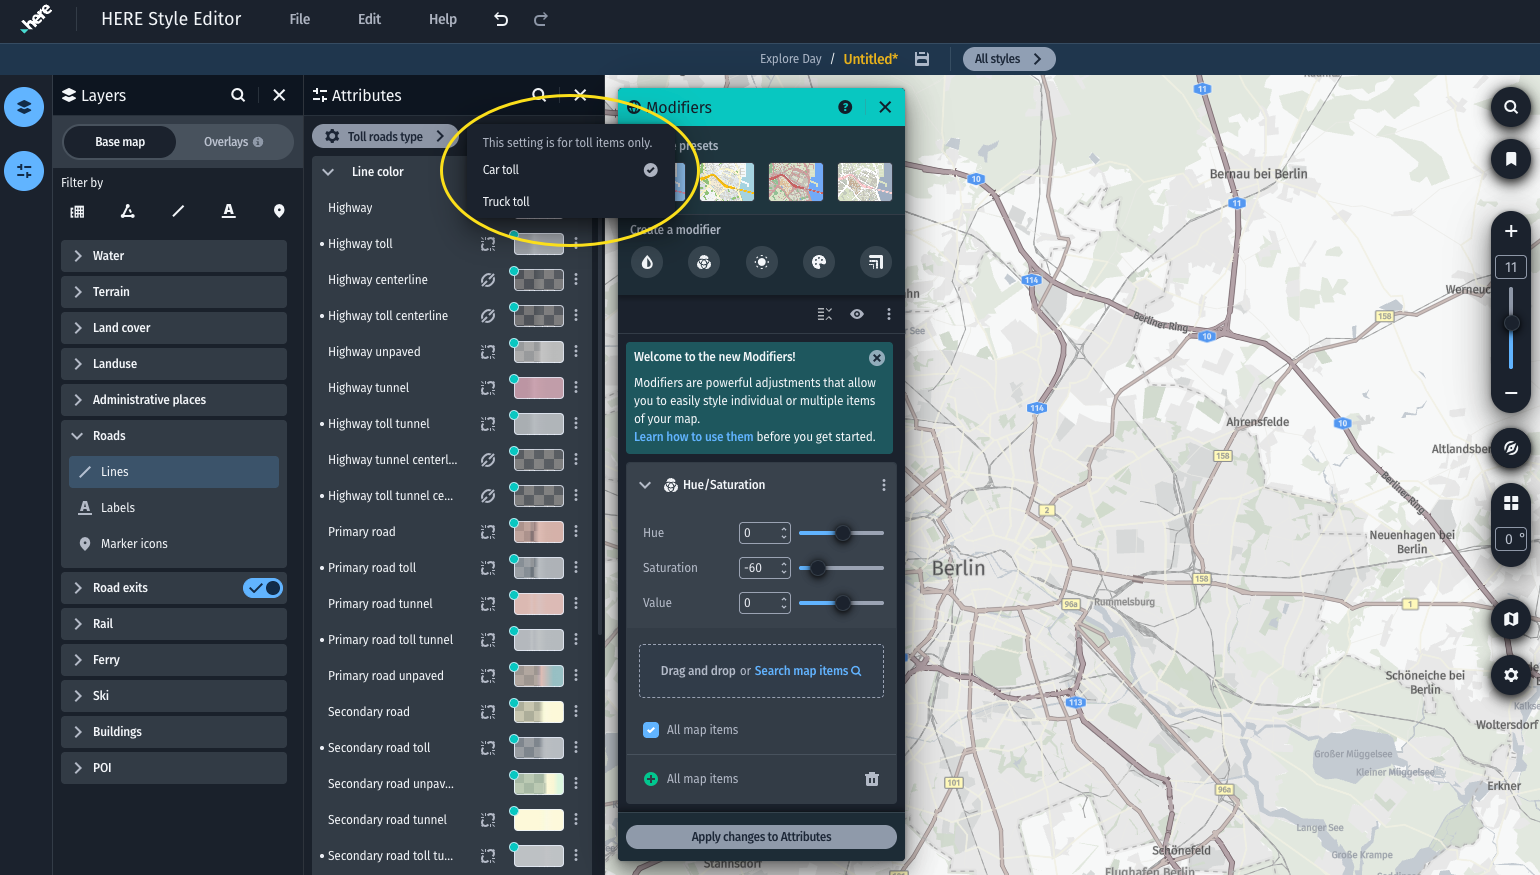
Toll Road types
Toll roads are a unique specialization of normal roads. They come in two flavours: car toll and truck toll. By default, every map style except logistics style has the toll road type set to Car toll. What this means is that, the selected toll road type will be exported as part of your map style.
Note
Truck toll roads are a feature contained in premium roads map content. When enabled in your client application additional charges may incur. Refer to the respective SDK documentation for further information on how to enable them.
Linked values
Some attributes or data conditions are linked to other attributes or conditions. Linked items share the same attribute value and always stay in sync during editing. The linking in the base styles is set by expert cartographers to keep the map consistent and to help edit the map style.
Linked items can be recognized via a link icon  next to their input.
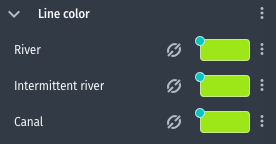
Unlinking
Clicking on the link icon opens a modal dialog which lists the linked items and allows to unlink the selected item.
In the example below the Intermittent River conditions in the Water > Lines layer is linked to the River and Canal conditions within the same layer and the 0m condition under the Fill color attribute of the Water > Polygons layer.
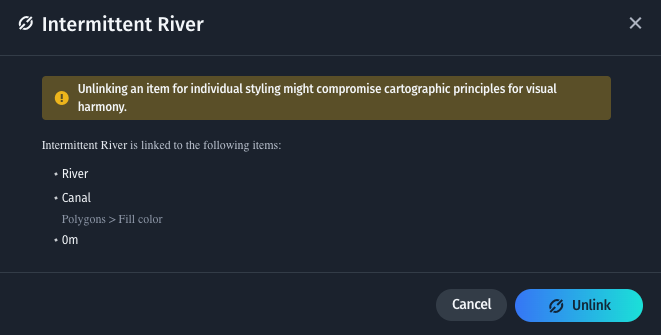
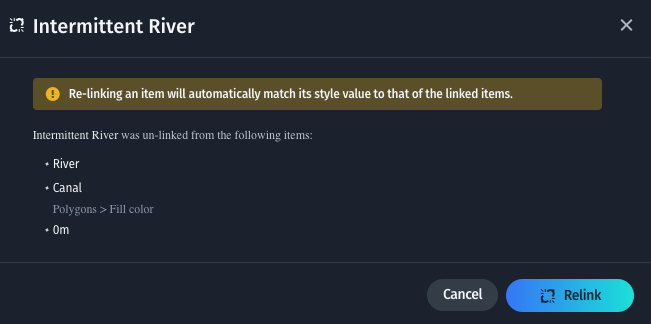
Unlinked items are no longer kept in sync with their linked items. Editing their value will not influence the style value of the items that the item was originally linked to. This is indicated by the broken link icon. The remaining item will still stay linked.

The link can be reinstated via the modal dialog that opens when clicking on the broken link item of an unlinked item.
Updated last month