Japan focused style
This tutorial demonstrates how to create a day and night map style for a Japan focused use case. The style highlights Japan-specific features, maintains brand alignment with a global map, and observes accessibility and legibility standards in dense driving environments.
A Japanese map has unique characteristics, such as dense urban POI clusters, highly detailed street networks, Shinkansen lines, ferry routes, and cultural cartographic conventions. Applying a global style is not recommended, as this might introduce overcrowded visuals in cities, obscure items such as expressway entrances, and render the map unfamiliar to local users. Style Editor provides an option to style map items unique to Japan, which might not be listed in the default rest of the world map.
Key design points
The following are important style design points:
- Only enable Japan styling if your end product is intended for the Japanese market.
- Check both local and global views to maintain design consistency.
- Test in both dense city and sparse rural environments.
- Consider performance. Japan styles contain a large amount of data.
- In your end-user application, review your Japan bookmarks in low-light conditions.
Get started
The following identifies how to get started for this tutorial:
- If you do not have a HERE Platform account, see Get started.
- A desktop computer is recommended for this tutorial.
Tutorial steps
The following steps are required to complete this tutorial:
- Choose your base map and enable Japan styling
- Identify Japan styling indicators
- Set up location bookmarks
- Style Japan specific layers
- Compare with global view
- Schematic map view check
- Accessibility check
- Create the night variant
- Export and save
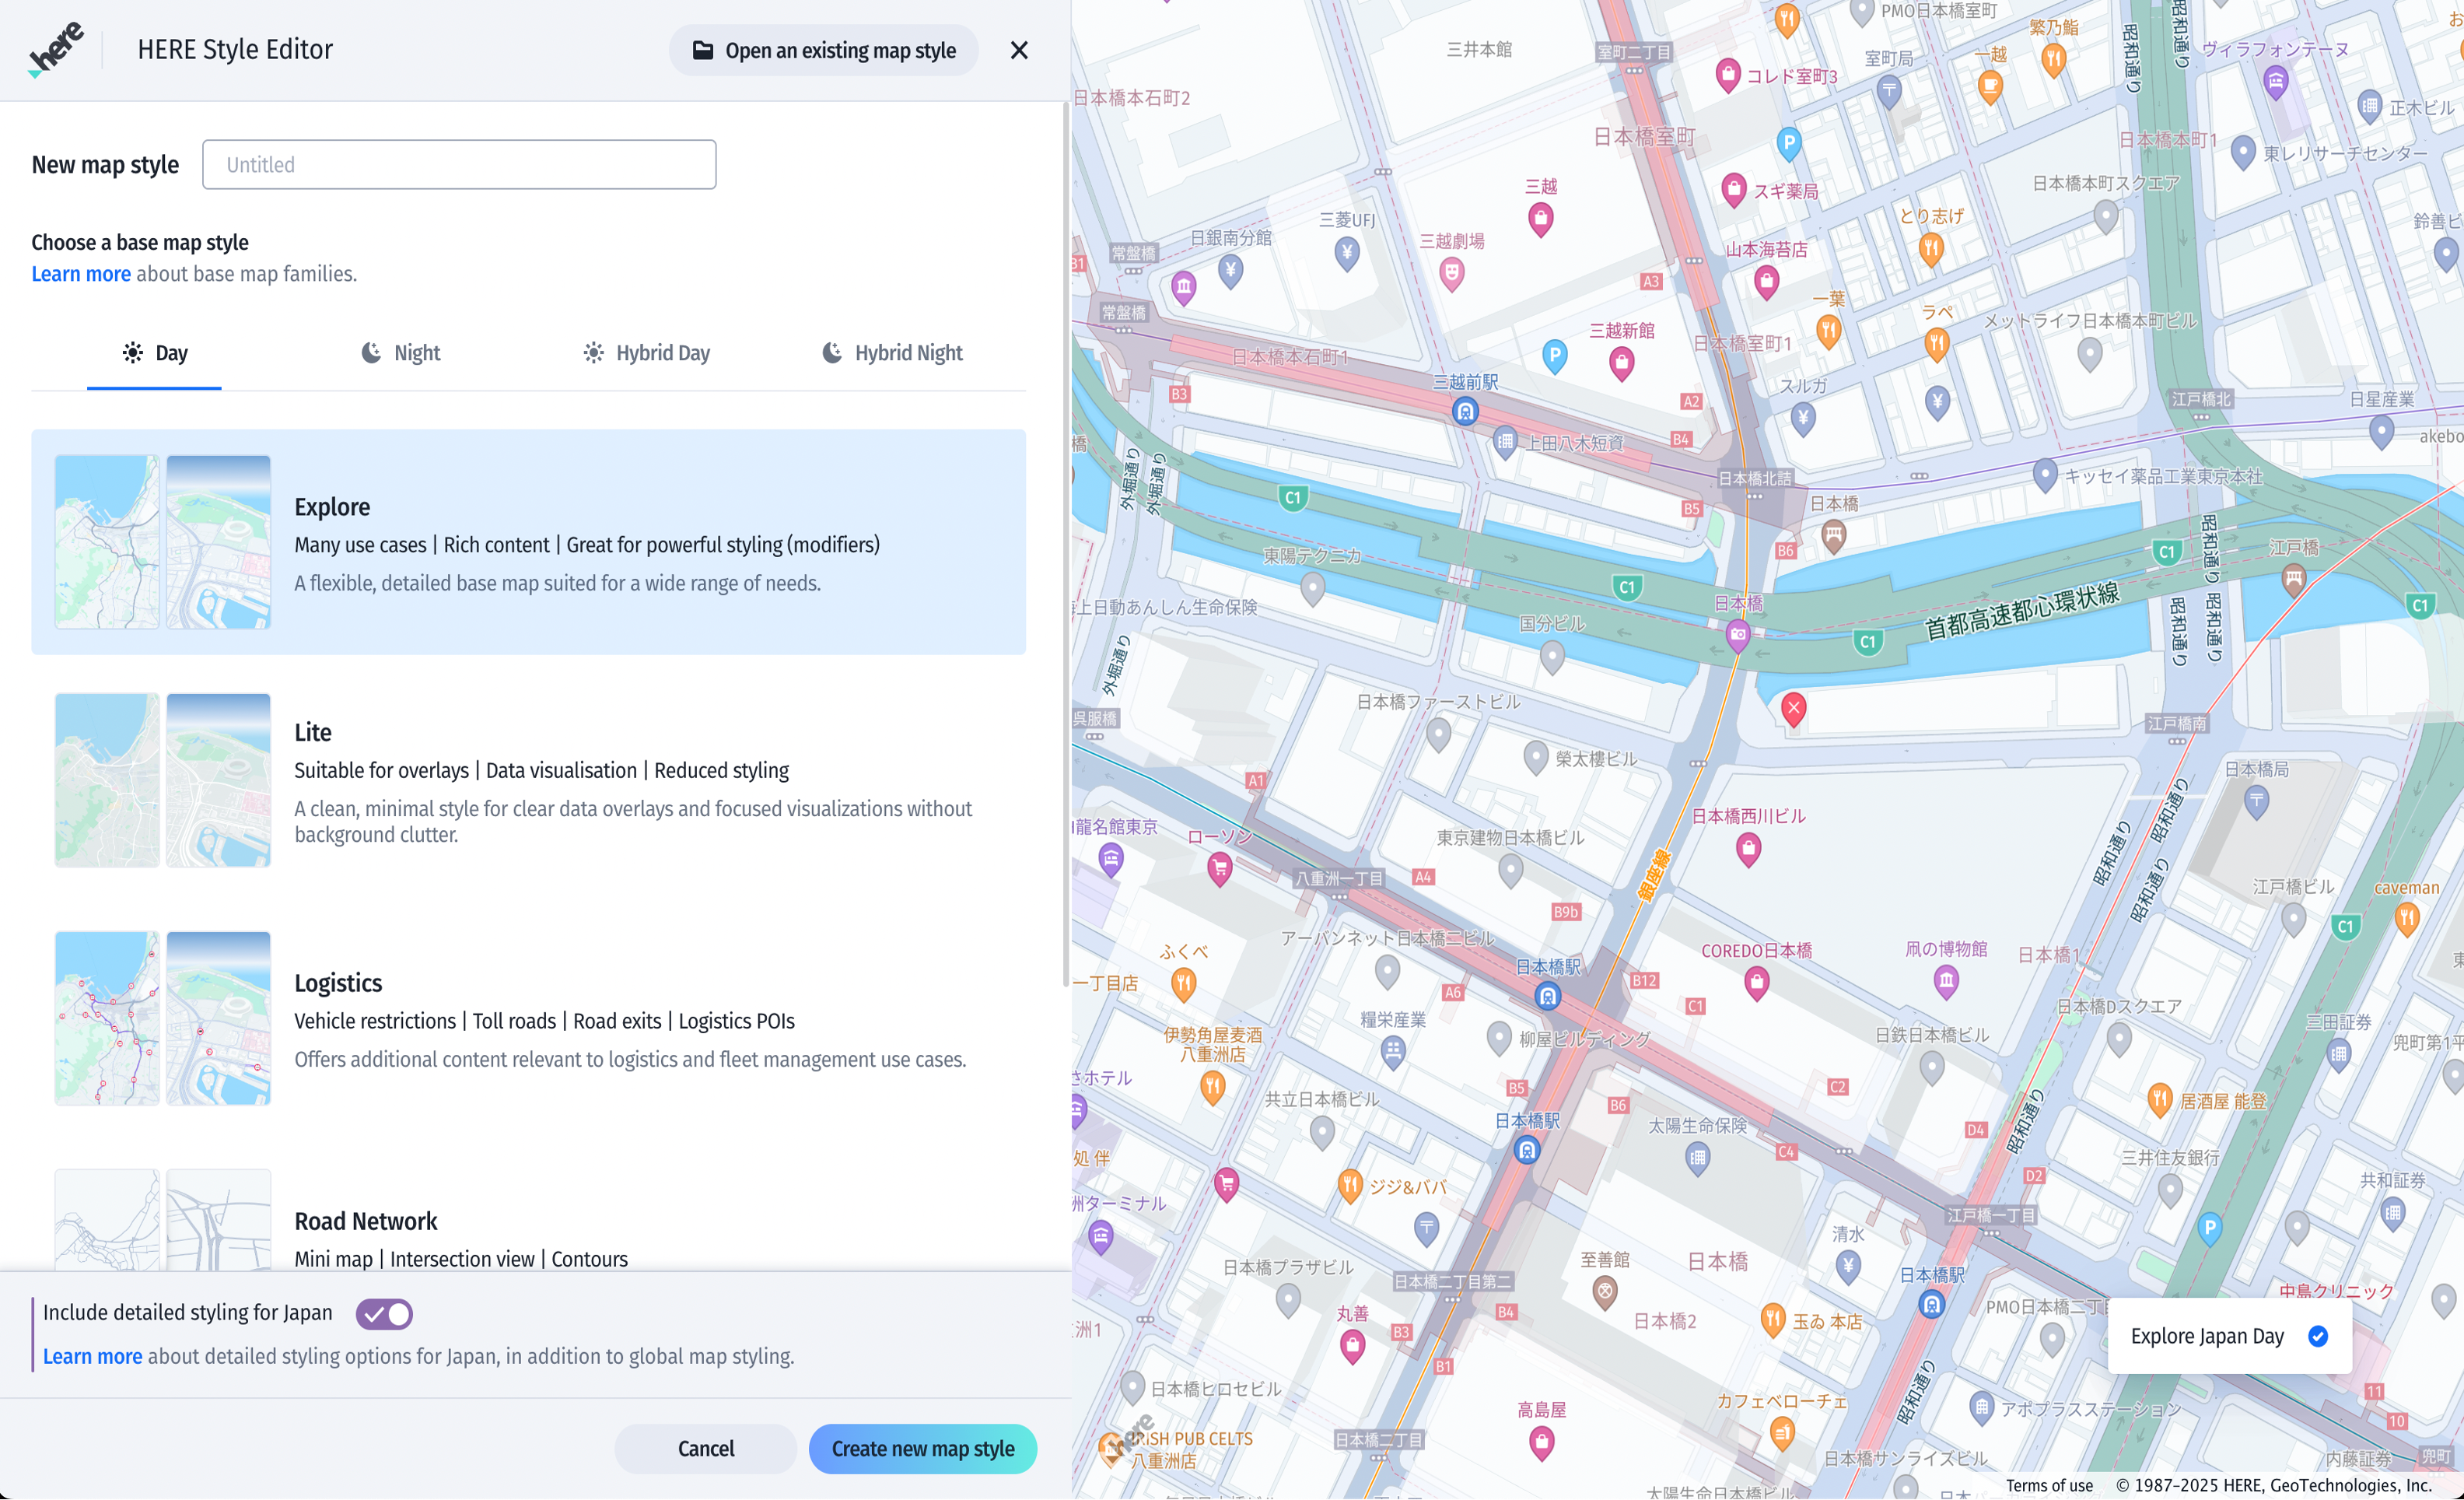
Choose your base map and enable Japan styling
To choose a base map and create a new style:
- From the File menu, select Create a new map style.
- From the dashboard, select Explore and Day as a base family.
- Select the Include detail styling for Japan toggle.
- Click Create new map style.
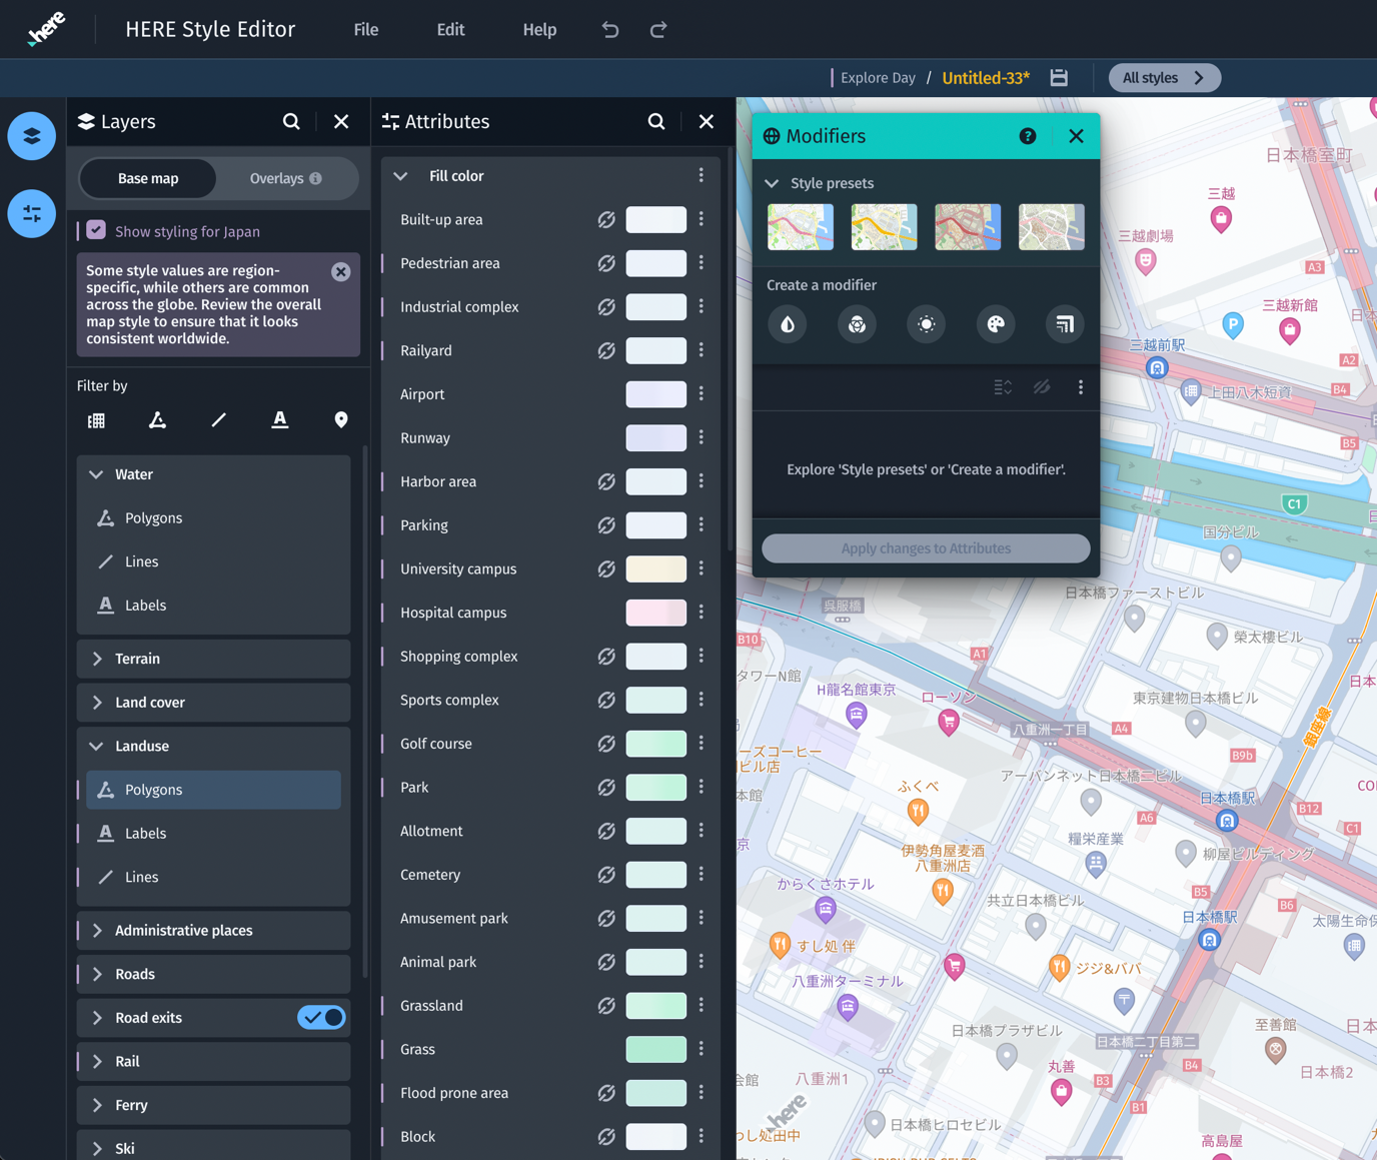
Identify Japan styling indicators
In the Layers panel, items with a purple colored indicator are Japan specific. These indicators identify items that are:
- Unique to Japan
- Global style overrides, for example, rail, state boundary, and pedestrian areas.
Note
Japan specific edits don't affect global styling.
You can switch this view on or off by deselecting the Show styling for Japan checkbox and moving to regions other than Japan.
Set up location bookmarks
You can use location bookmarks to check your style and verify that it performs correctly. You can use preset Japan bookmarks, or you can create your own using the following procedure.
To create location bookmarks:
- Navigate to the view you want to bookmark.
- From the Map view controls, select the Location bookmarks icon.
- From Custom, select +.
- Enter a bookmark name.
In the location bookmarks, there are several Japan bookmark presets available. These include Tokyo, Kyoto, Sapporo, and others.
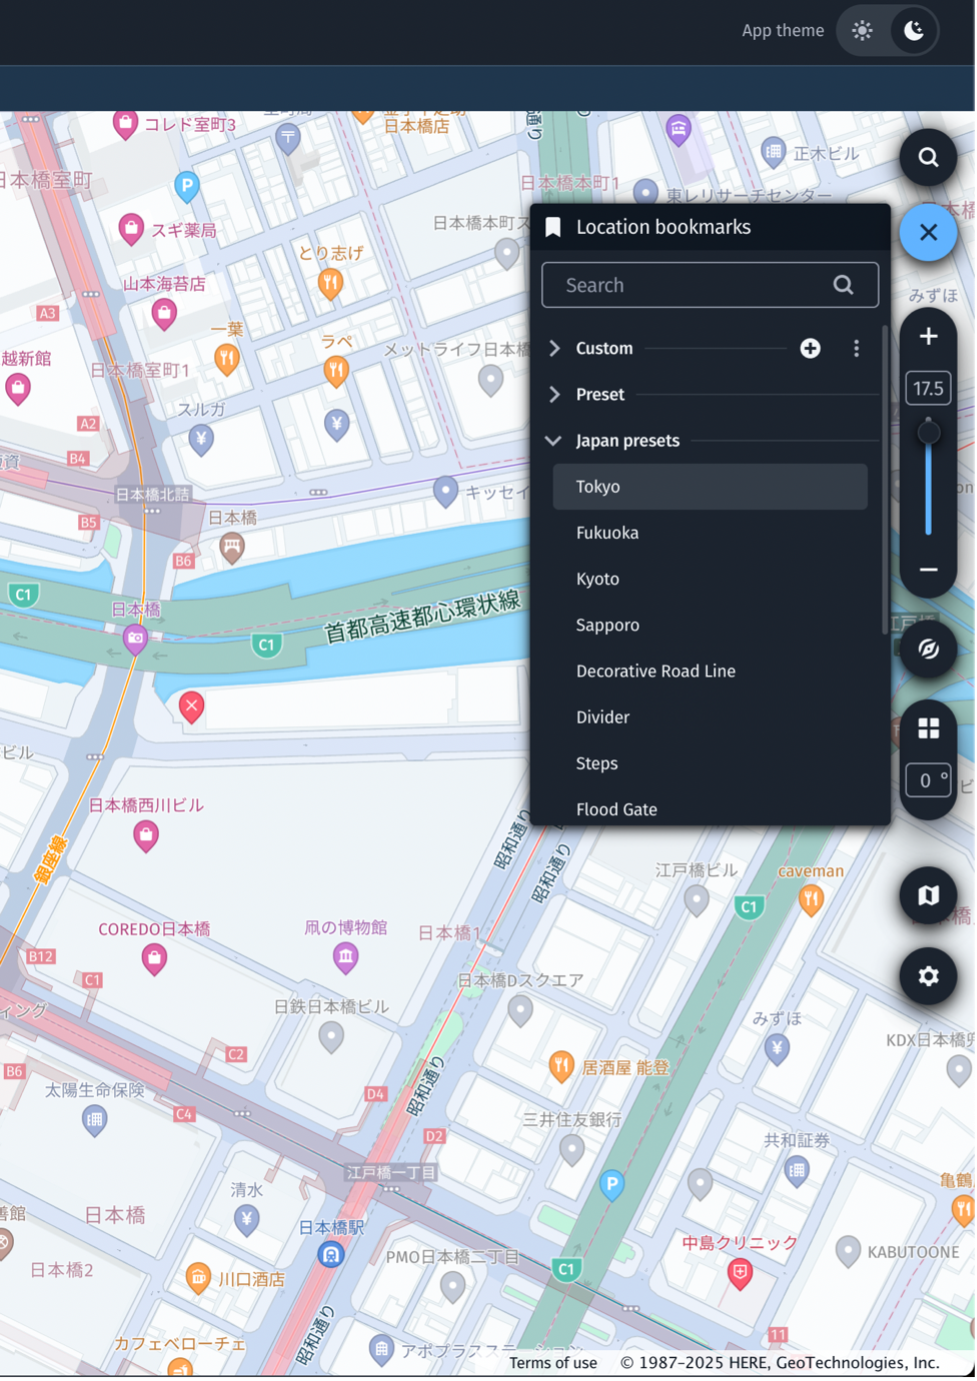
Add location bookmarks
Style Japan specific layers
You can style any of the Japan specific layers listed in the Layers panel. It's good practice to style the following layers first:
- Roads - Japanese expressways, toll roads, and small local streets have different classifications compared to global maps.
- Transit - Shinkansen lines, subways, major JR railways, and ferry routes.
- POI - Prioritize gas stations, convenience stores, and local transport hubs.
- Landuse - Japanese parks, temples, and shrines often require distinct but subtle styling.
- Administrative boundaries – Many borders for districts and cities.
To apply best practice for styling layers, follow these steps:
- Select a layer with a purple indicator. Edit color, line thickness, and label appearance first.
- Use zoom-level stops to make dense data manageable.
- Adjust opacity for non-essential items in crowded contexts.
- You can hide items by setting the numeric value to 0. You can also set the opacity to be fully transparent.
- You can override a global value specifically for Japan by selecting Style differently for Japan from the Attributes menu. See the following screen capture.
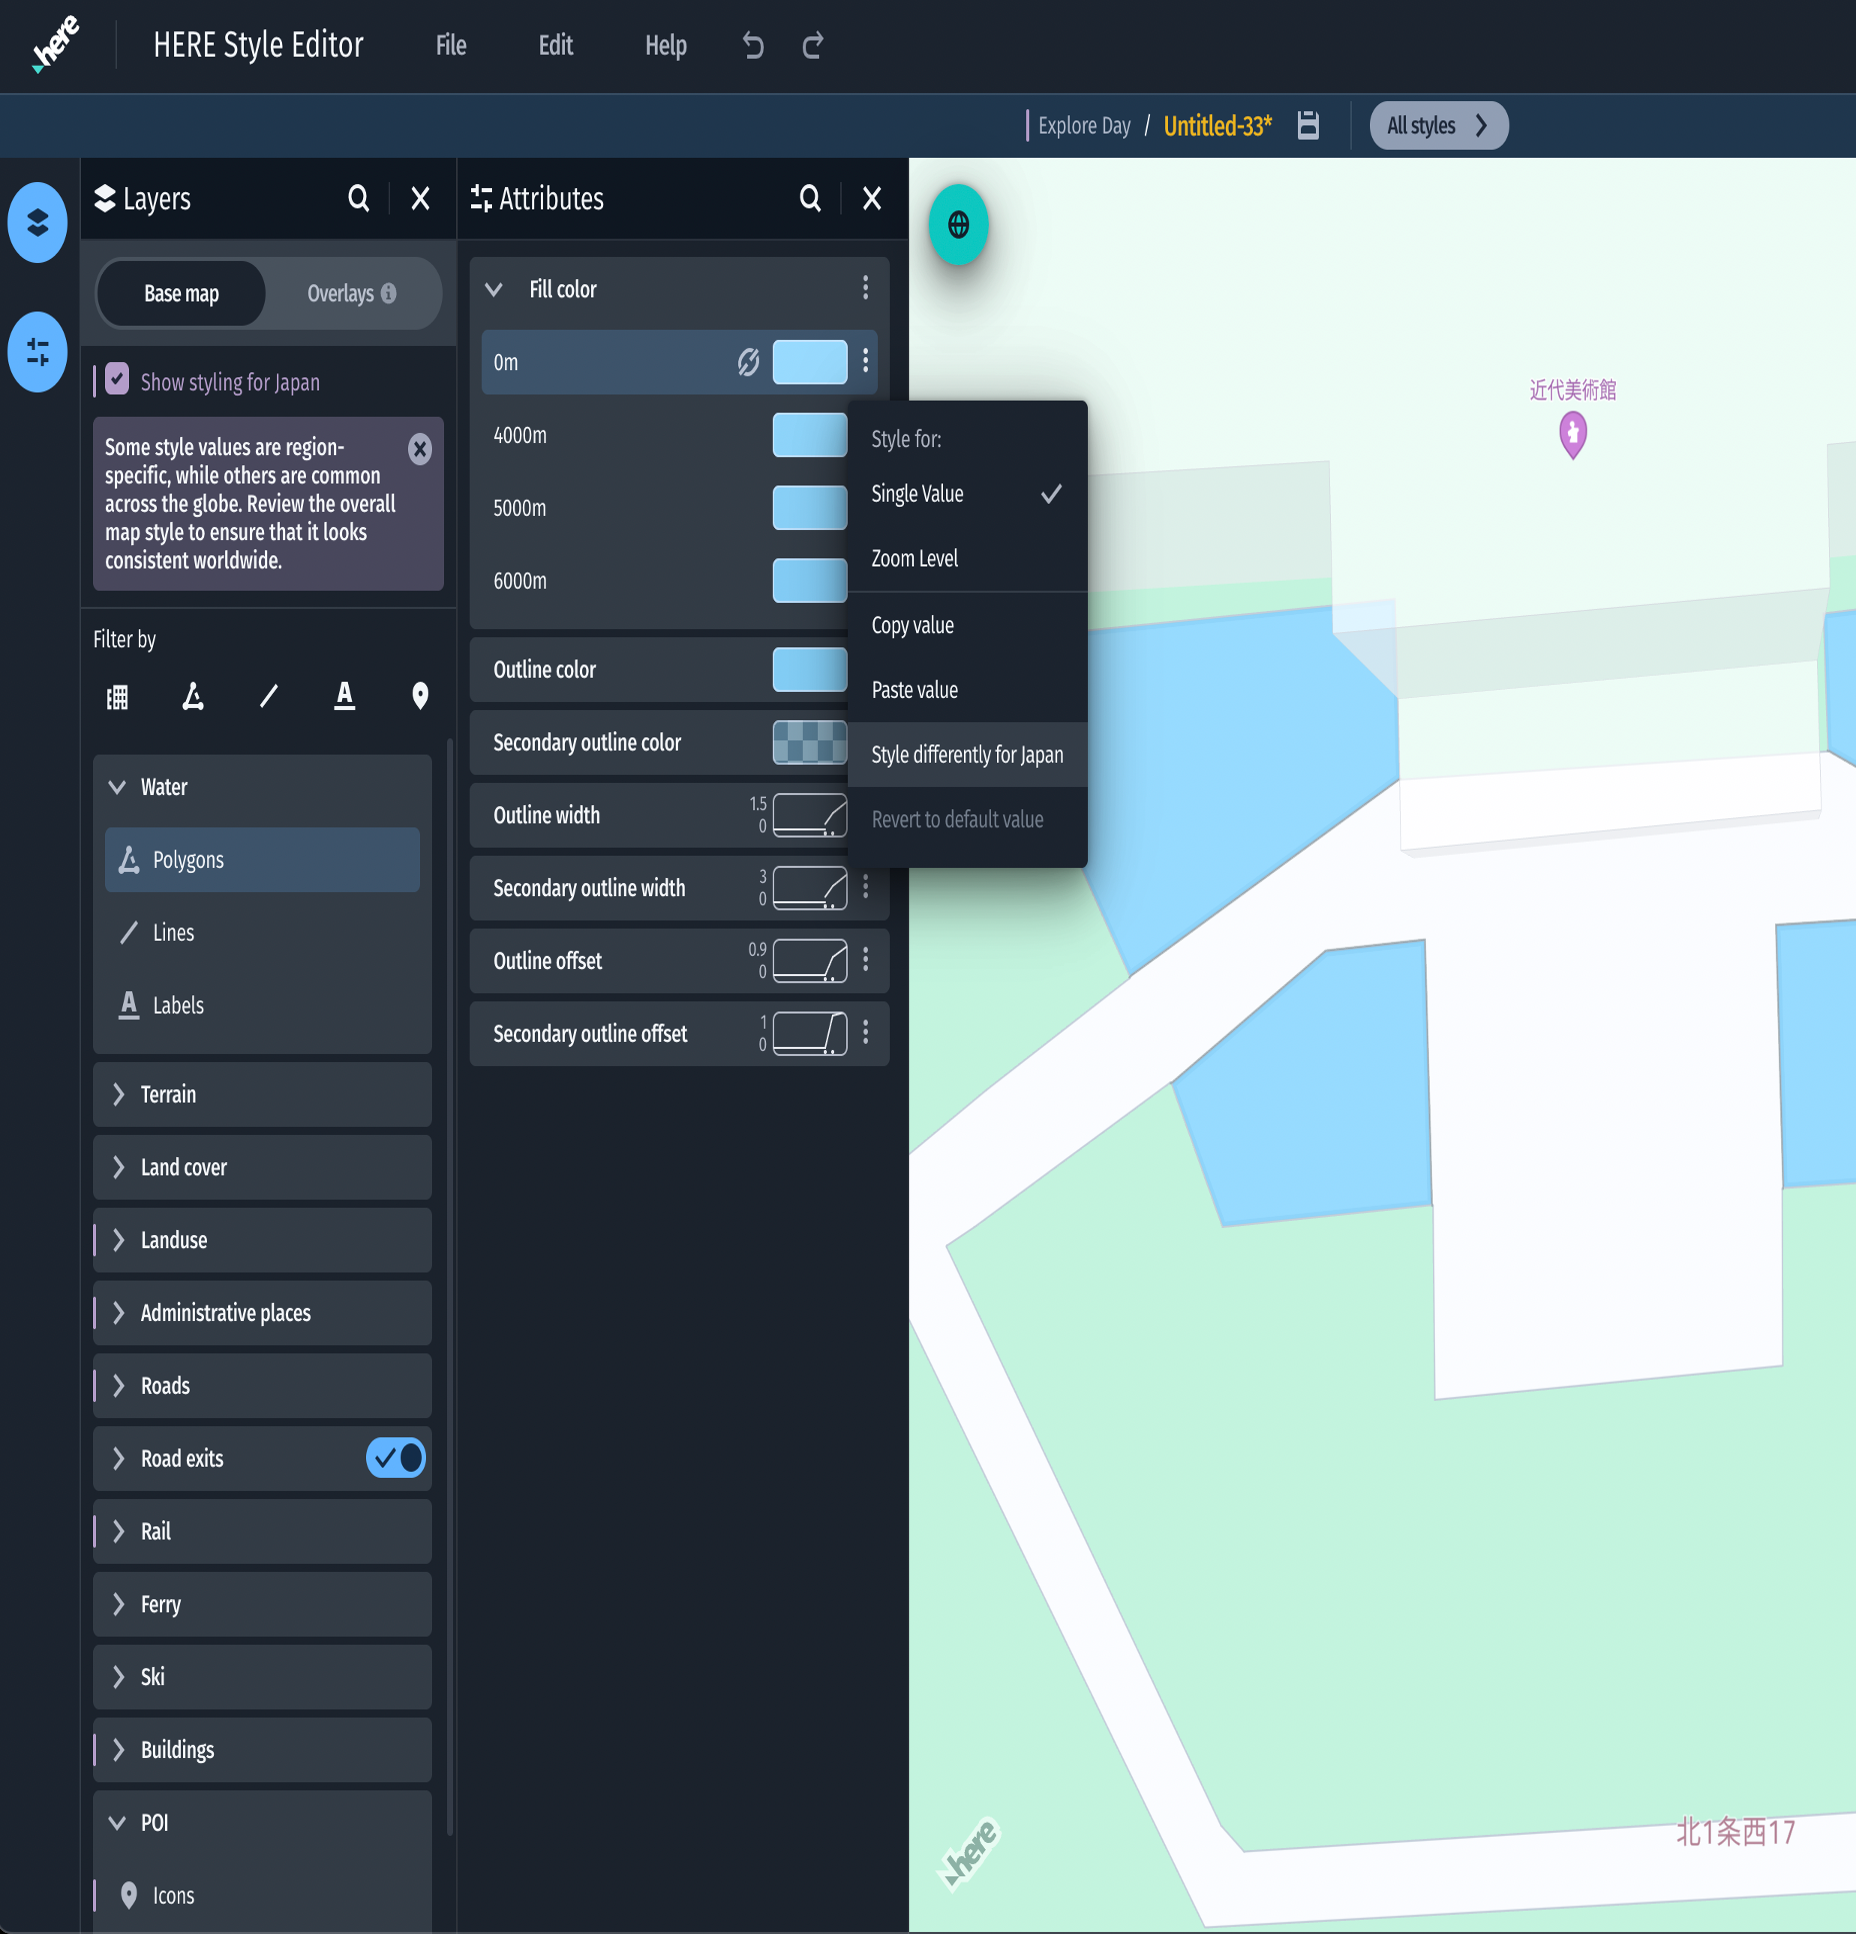
Override a value for Japan styling
Compare with global view
It's useful to compare your Japan style with the global view.
To compare the current style with the global view:
- From the Layers panel, uncheck the Show styling for Japan checkbox.
- Compare features in your Japan style against the global base style.
- Use location bookmarks to compare regions that have different map items in Japan and elsewhere.
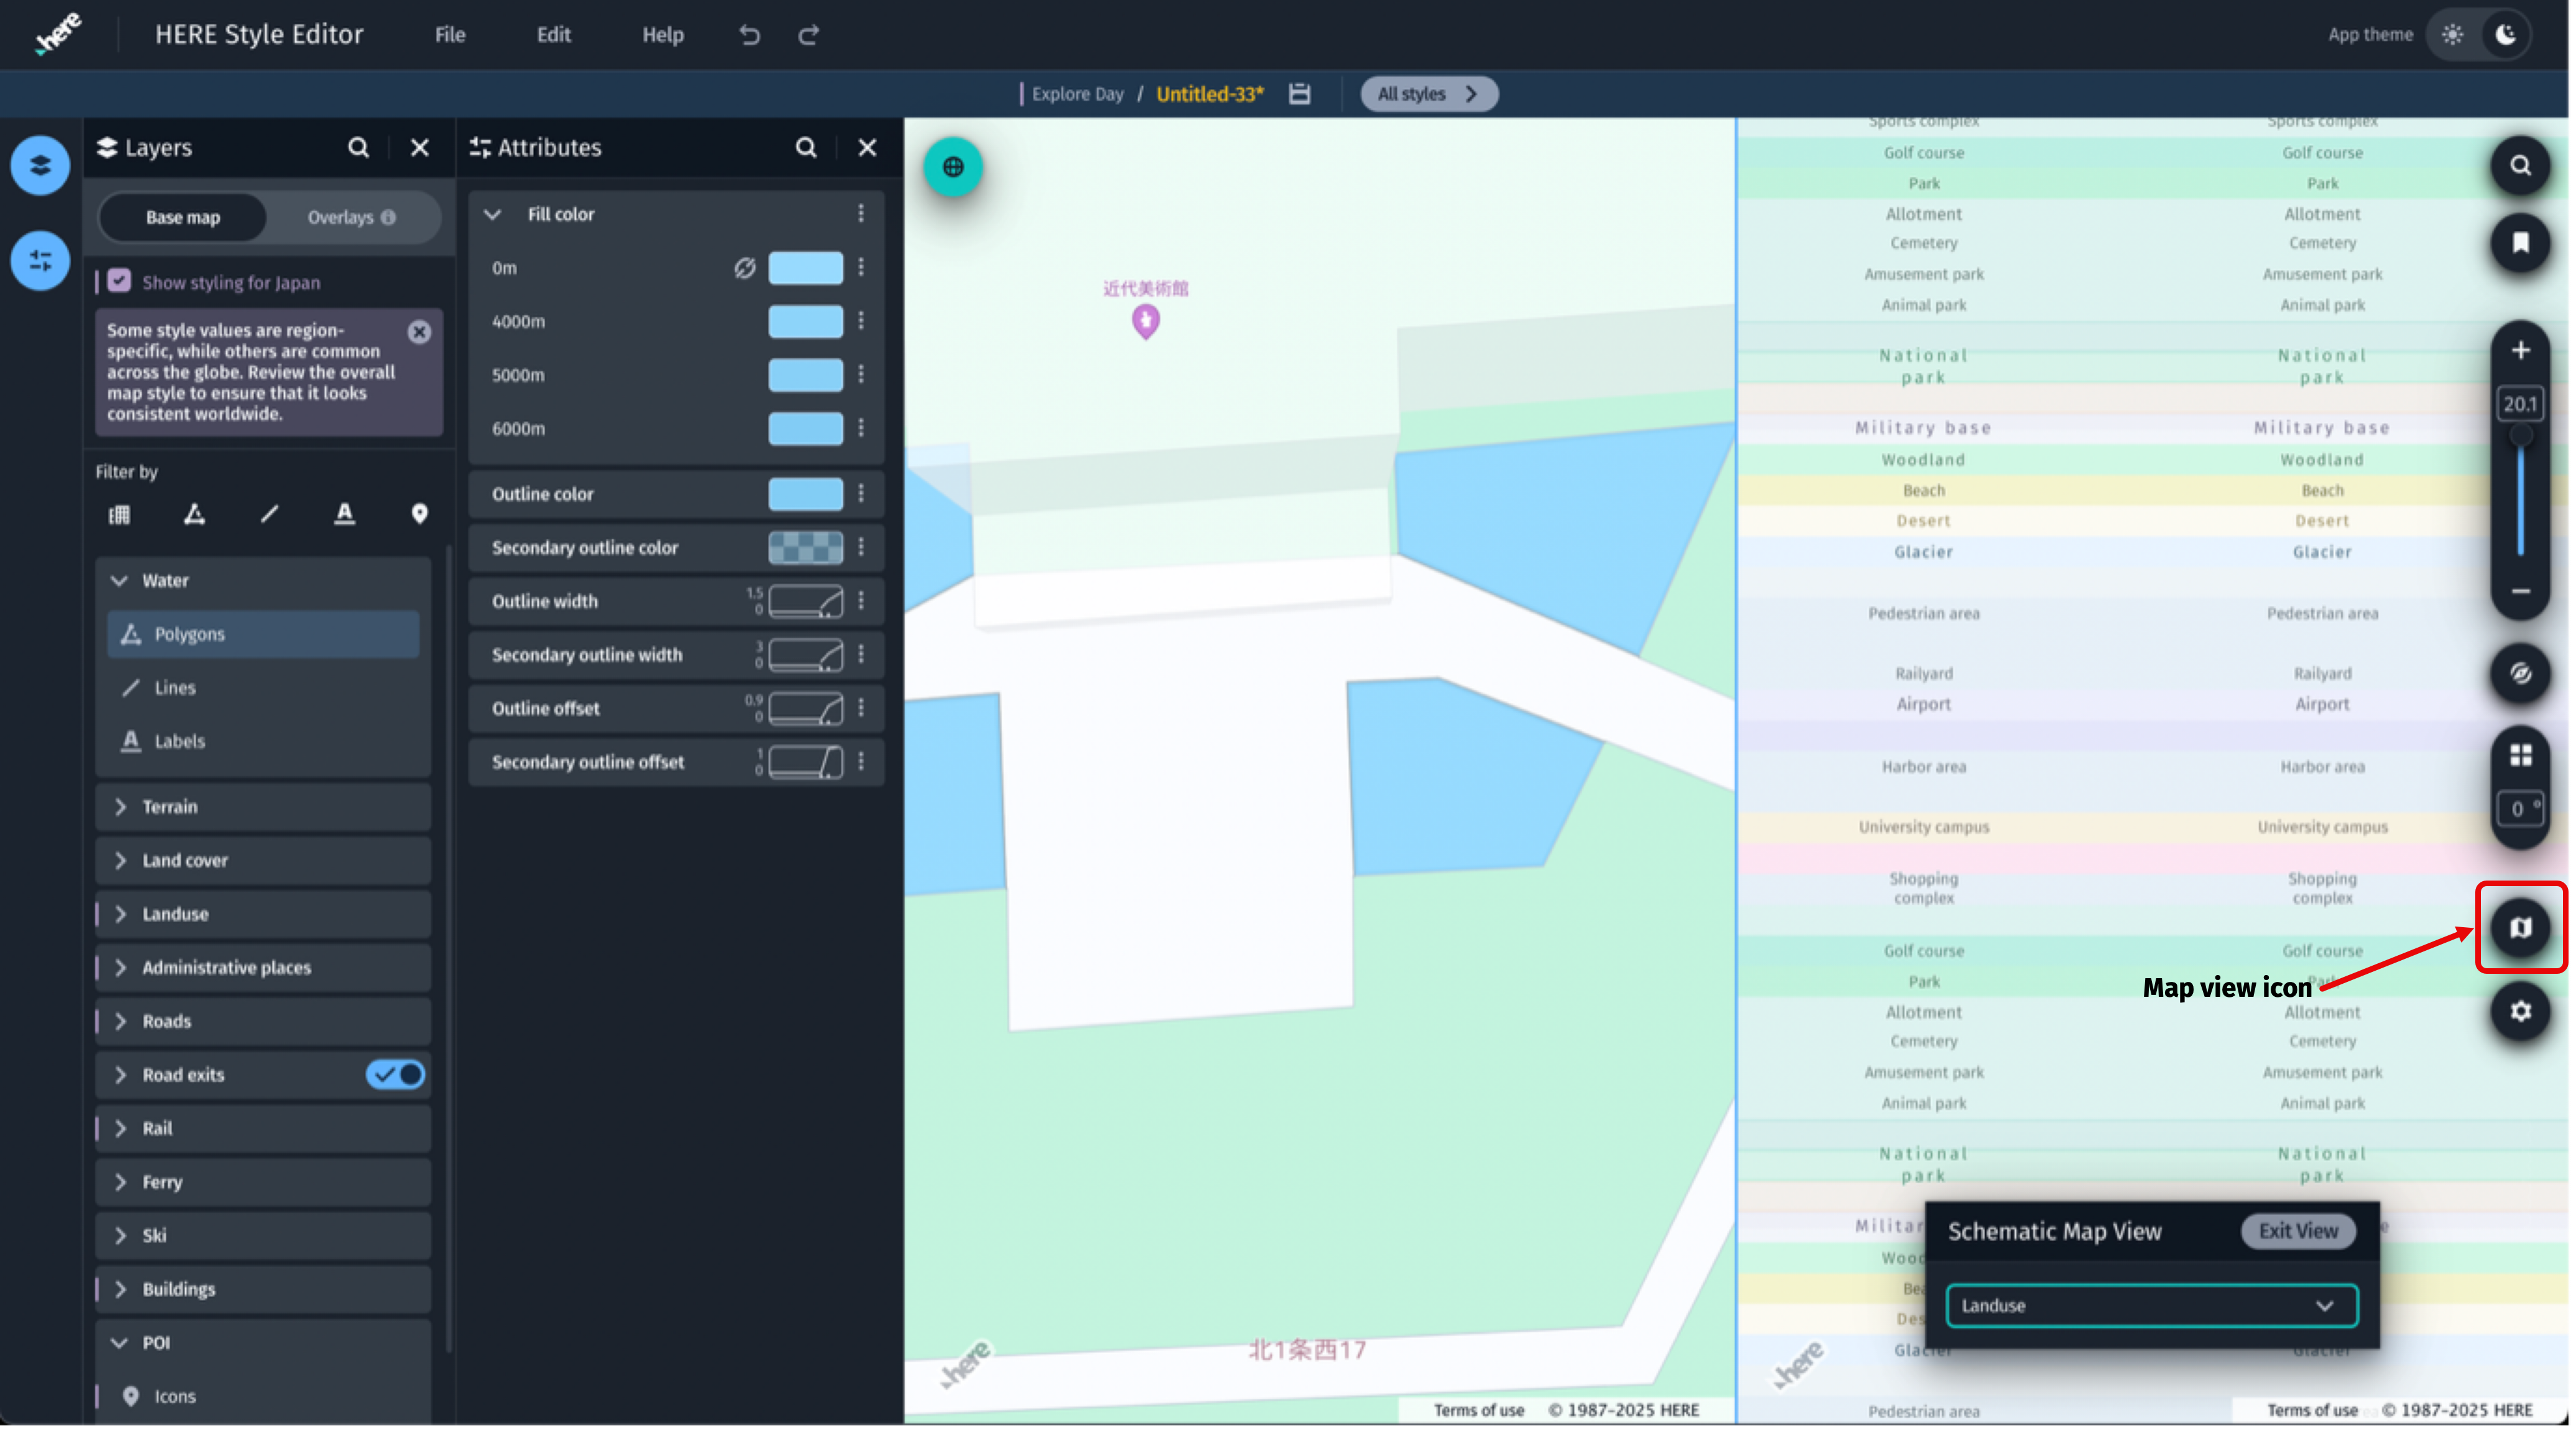
Schematic map view check
You can use the Schematic Map View to search for unstyled Japan-only features.
To search for unstyled Japan-only features:
- From the Map view controls, select the Map view icon.
- Select Schematic Map View.
- Style features that are unstyled or require editing.
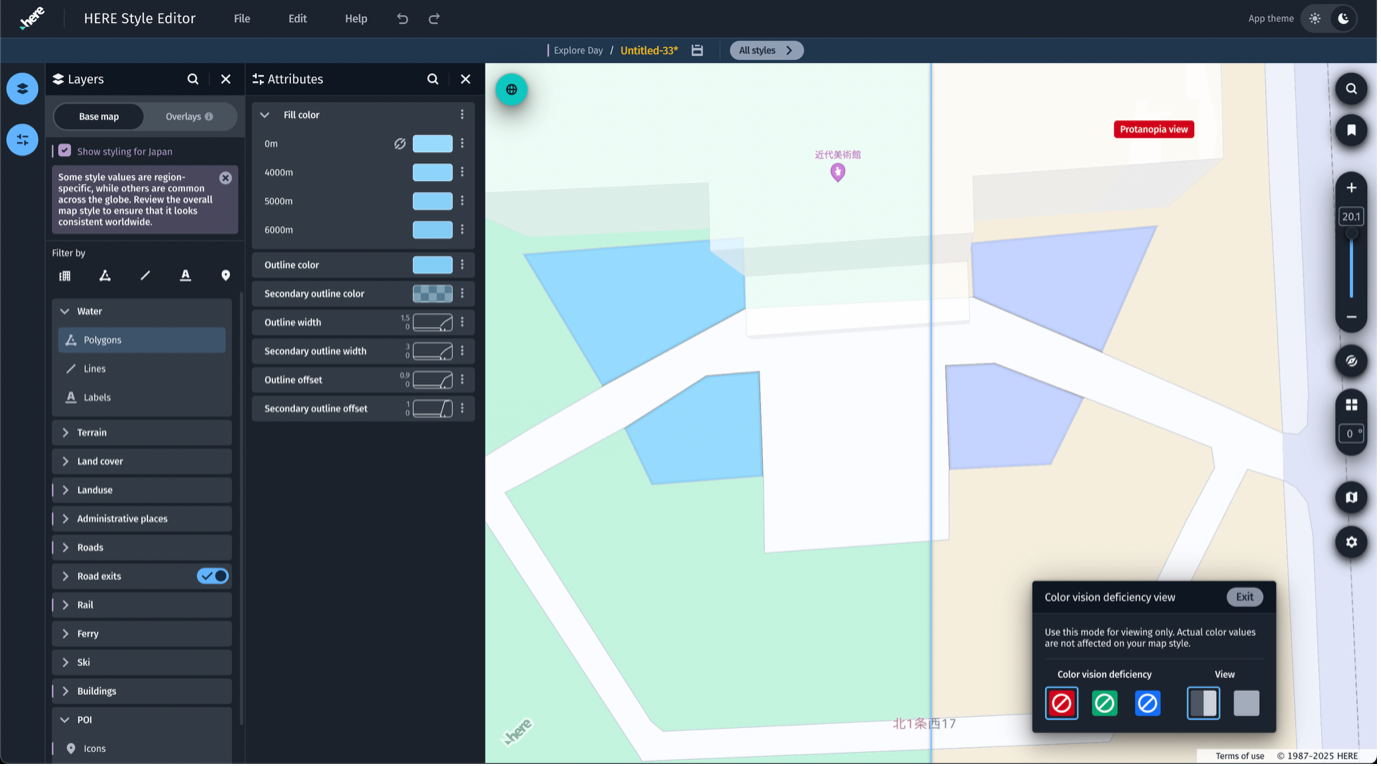
Accessibility check
You can use the Color vision deficiency view to check for Protanopia, Deuteranopia, and Tritanopia. See Map view controls for more information.
To check the Color vision deficiency view:
- From the Map view controls, select the Map view icon.
- Select Color vision deficiency view.
- Edit low contrast areas, which can occur in dense Japan city maps.
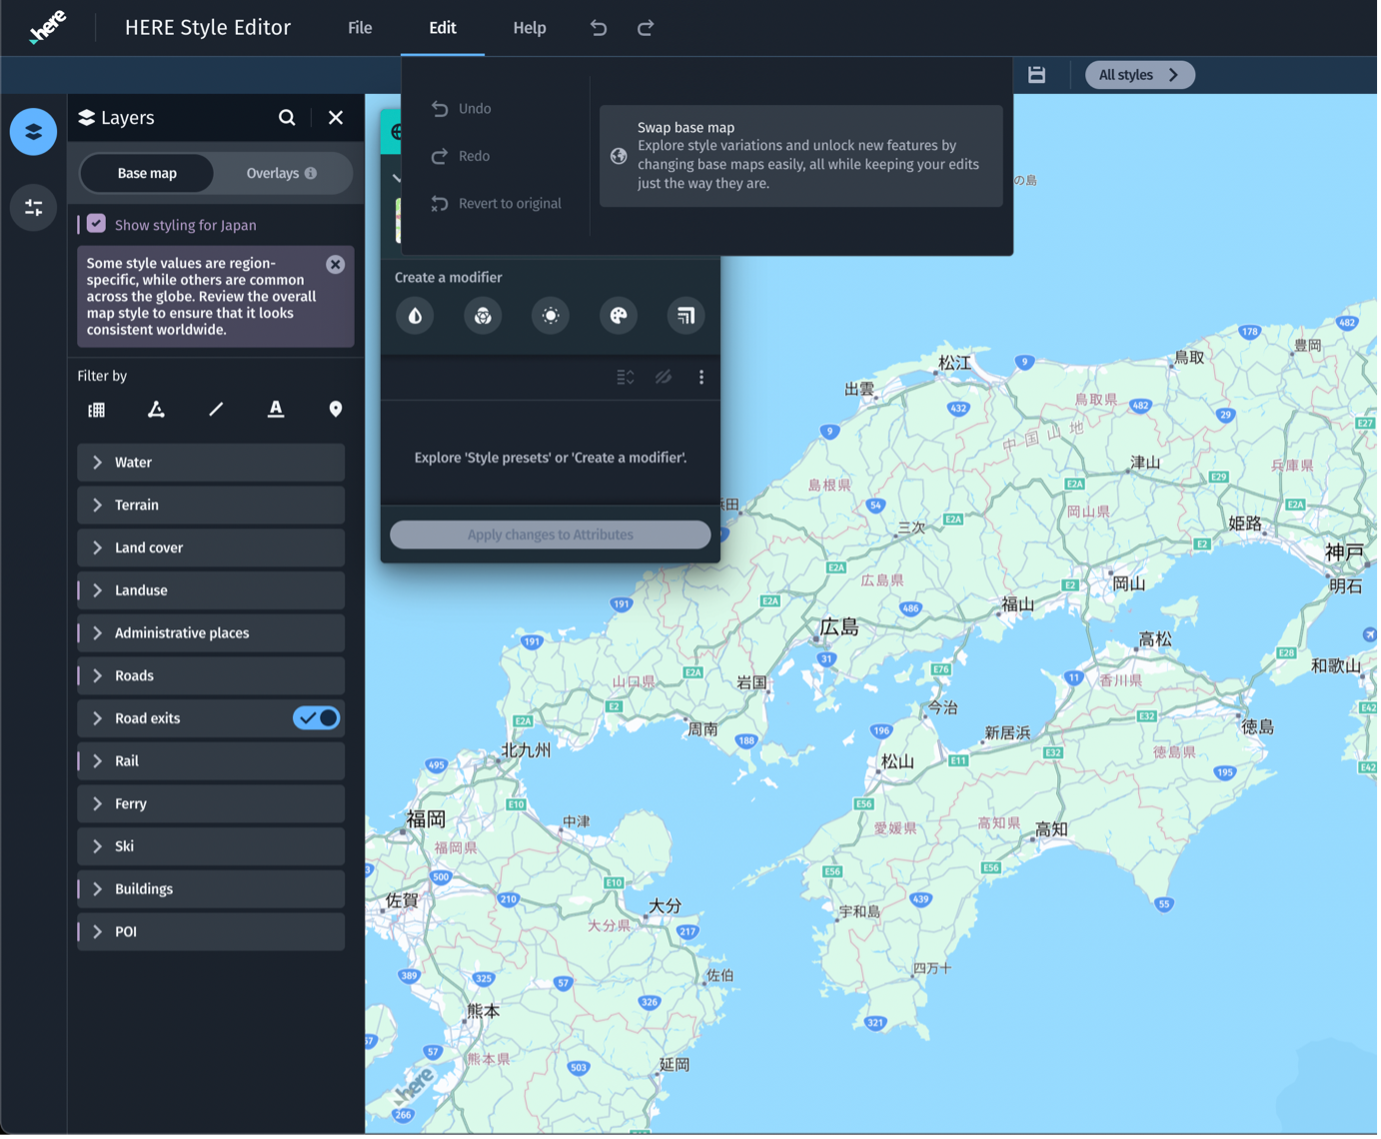
Create the night variant
You can create a night variant of your map style without losing your current style edits.
To create a night variant:
- From the Edit menu, select Swap base map.
- Select the Night base map style from the Explore family.
- Click the Create a copy button.
- Adjust colors, brightness and contrast for night driving.
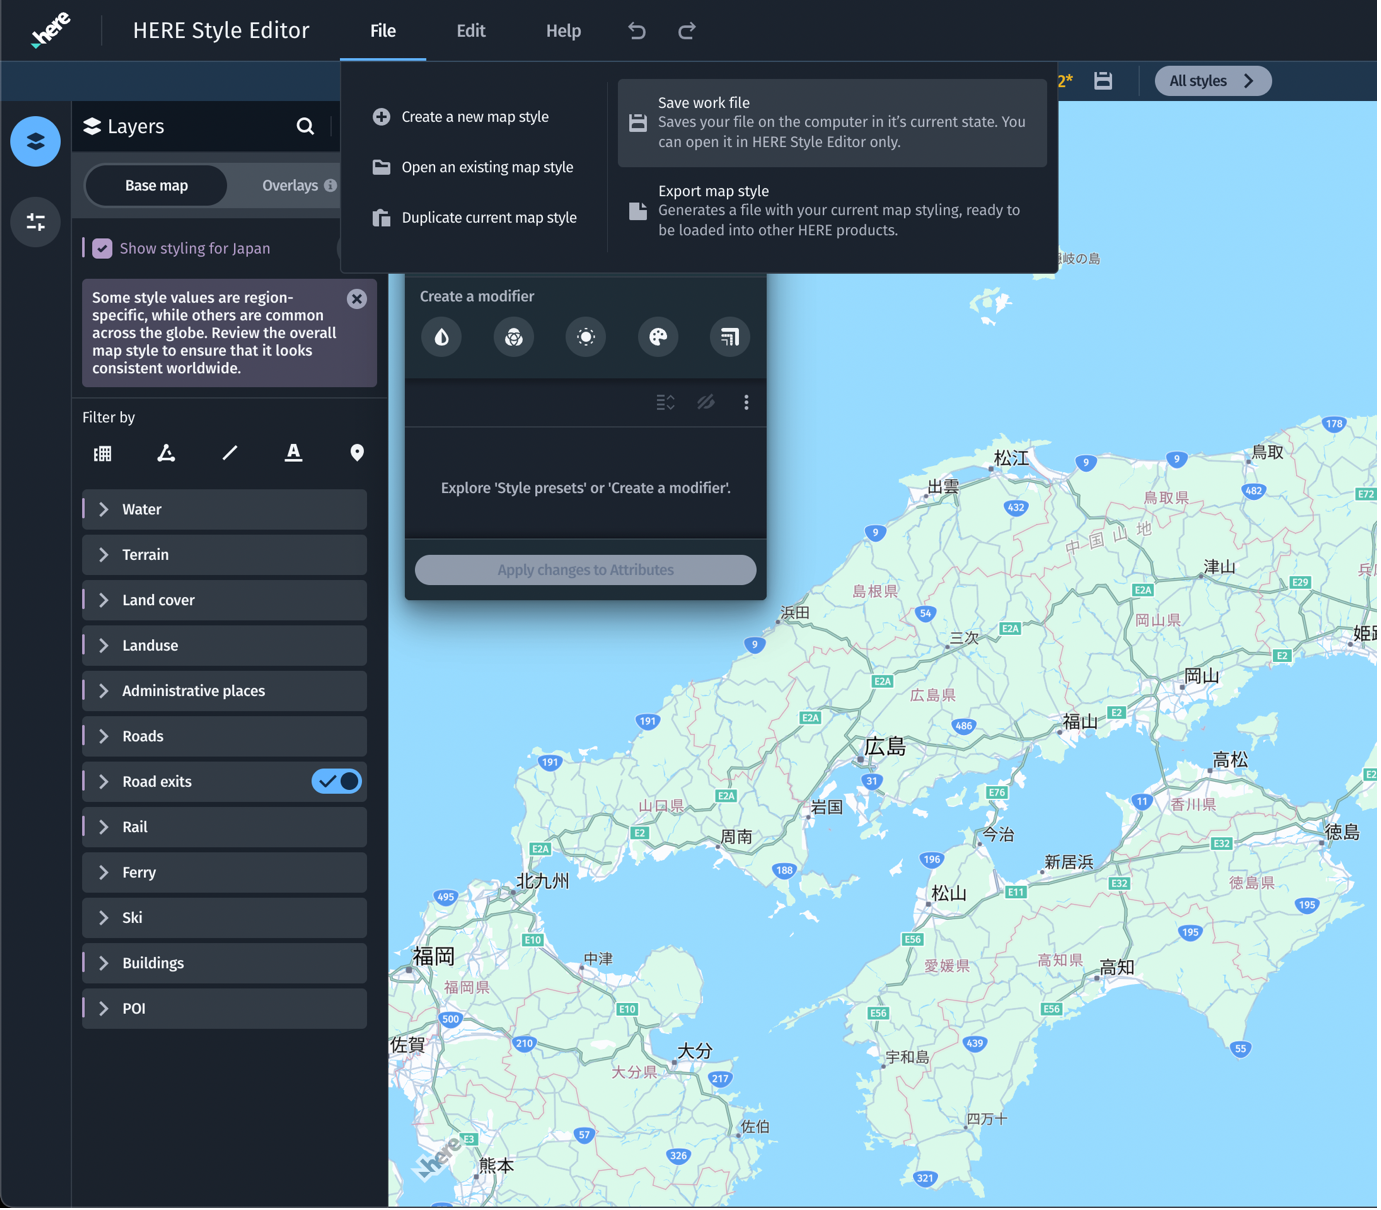
Save and export
Save a copy of your files locally on your computer. Do not rely on browser cache.
To save and export your file:
- To save, from the File menu, select Save work file.
- To export your map style in JSON file format for SDK integration, select Export map style.