Render maps with raster tiles
Note
The 3.1 version of this API has been deprecated. For continued support and feature development, upgrade to the latest 3.2 version.
In addition to the HERE Vector Tile API, which is the recommended service for delivering and rendering the HERE base map, the HERE Maps API for JavaScript offers the Raster Tile API to create rich and engaging interactive maps. The HERE Raster Tile API provides a wide range of predefined base map styles and features.
This tutorial guides you through using both the default and a custom raster tile service.
Before you begin
- Obtain an API Key: If you do not have one already, sign up for a HERE platform account and create an API key. For more information, see Get started.
- Understand the methods for rendering raster maps through Maps API for JavaScript. For more information, see Raster map types.
Build a HTML file structure which to contain your map
Create a basic HTML page as a container for the JavaScript code rendering the map.
-
Create an empty HTML file.
-
In the
<head>element of the HTML file, include references to themaps-core.js,maps-service.js, andmapsjs-mapevents.jslibraries, as shown in the following example:<!DOCTYPE html> <html> <head> <script type="text/javascript" src="https://js.api.here.com/v3/3.1/mapsjs-core.js" ></script> <script type="text/javascript" src="https://js.api.here.com/v3/3.1/mapsjs-service.js" ></script> <script type="text/javascript" src="https://js.api.here.com/v3/3.1/mapsjs-mapevents.js" ></script> </head> <body></body> </html> -
Within the
<head>element, add a<style>element that sets the width, height, and position of thebodyandmapelements:<style> body { width: 100%; height: 100%; position: absolute; margin: 0px; padding: 0px; overflow: hidden; } #map { position: absolute; top: 0; bottom: 0; width: 100%; height: 100%; } </style>Note
These style settings configure the map to occupy the full width and height of the browser window.
-
Within the
<body>element of the HTML file, include a<div>element with an id ofmap. This is where the map will be displayed. For example:<div id="map"></div> -
Within the
<body>element of the HTML file, create an empty<script>element. This element will contain JavaScript code that initializes the HERE APIs and create a new map instance. -
Save the file.
Build a raster map
Explore the available methods for building raster maps using the Maps API for JavaScript. The following sections cover the steps to create custom raster maps that suit your application's specific design and requirements.
Use a default raster tile layer
This approach involves using the rich library of predefined map styles. These map styles cater to various use cases, such as exploring cities, navigating rural areas, or visualizing specific types of data. By just selecting a map style, you can easily create compelling raster maps for your application.
Note
The default WEBGL rendering engine that the HERE Maps API for JavaScript uses to render default raster tile layers is based on the end-of-life HERE Map Tile API service.
To benefit from the new services and styles, set up your mapping application to use the HARP rendering engine.
For more information, see Migrate to the HARP engine.
-
Within the
<script>element of your HTML file, create an instance of the HERE Platform object with an API key, which is used to access the HERE services:// Your HERE API key const apiKey = "YOUR_API_KEY"; // Initiate and authenticate your connection to the HERE platform const platform = new H.service.Platform({ apikey: apiKey }); -
Instantiate and display the map on the web page:
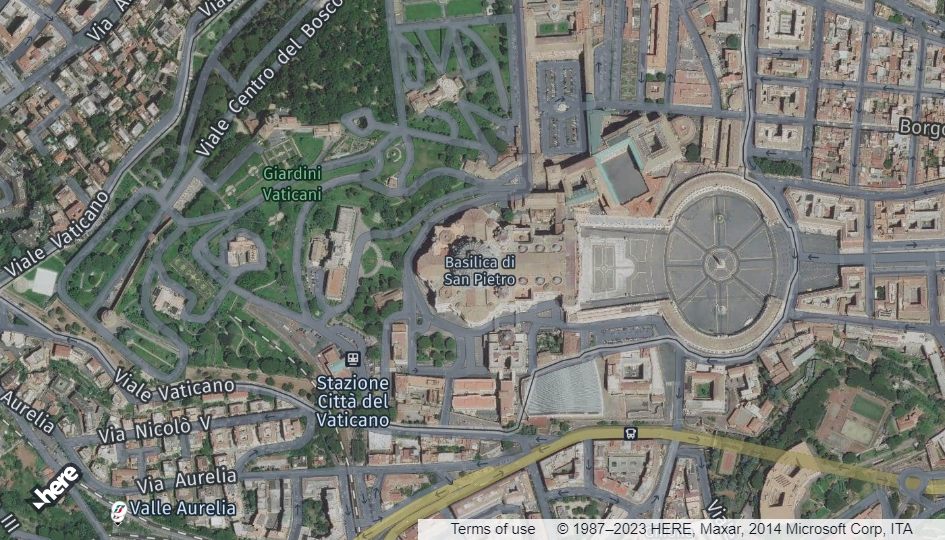
// Instantiate (and display) a map:
const map = new H.Map(
  document.getElementById("map"),
  defaultLayers.raster.satellite.map,
  {
    zoom: 16,
    center: { lat: 41.902156, lng: 12.453311 },
  }
);
In this example:
new H.Map()- Creates a new map instance using the HERE Maps JavaScript APIdocument.getElementById("map")- Selects the HTML element with the IDmapthat is the container for the map.defaultLayers.raster.satellite.map- Sets the map base layer to use. This example uses theraster.satellite.maplayer from thedefaultLayersobject.zoom: 16- Sets the initial zoom level of the map. The higher the value, the closer the map is zoomed in.center: { lat: 41.902156, lng: 12.453311 }- Sets the initial center coordinates of the map.
-
Enable basic interactions like pan and zoom to make the map interactive:
// MapEvents enables the event system. // The behavior variable implements default interactions for pan/zoom (also on touch devices). const behavior = new H.mapevents.Behavior(new H.mapevents.MapEvents(map)); -
Add a window resize event listener to ensure the map dynamically resizes based on the size of its enclosing container:
// Enable dynamic resizing of the map, based on the current size of the enclosing container window.addEventListener("resize", () => map.getViewPort().resize()); -
Save the file and open it in the browser window.
Result: The browser window displays a basic map on your web page using the Maps API for JavaScript. The map is interactive, enabling panning and zooming to explore different areas.
You can further customize the map by adding markers, overlays, or custom styling based on your application's needs and requirements. For example, you can display custom markers.
Use a custom raster tile service
This approach offers you more flexibility and control over the appearance and behavior of your raster maps. You can tailor the map's design to match your application's unique requirements by creating a custom raster tile service.
-
Within the
<script>element, create an instance of the HERE Platform object with an API key, which is used to access the HERE services:const platform = new H.service.Platform({ apikey: "Your_API_Key", }); -
Create an instance of the HERE Raster Tile Service by performing one of the following actions:
- Instantiate the service with the default behavior:
const rasterTileService = platform.getRasterTileService(); - Adjust the HERE Raster Tile Service to your needs by providing additional parameters to the
platform.getRasterTileService()method through thequeryParamsproperty, as shown in the following example:In this example:const rasterTileService = platform.getRasterTileService({ queryParams: { style: "lite.day", features: "vehicle_restrictions:active_and_inactive,pois:disabled", size: 512, }, });'style': 'lite.day'- Sets the map style tolite.day, which represents a simplified and lightweight map style designed for daytime viewing.'features': 'vehicle_restrictions:active_and_inactive,pois:disabled'- Specifies the map features to be displayed:- Enables the display of both active and inactive vehicle restrictions on the map.
- Disables the display of Points of Interest (POIs) on the map, further reducing visual clutter.
For more information about the
featuresparameter in raster maps, see the HERE Raster Tile API v3 API Reference.
'size': 512- Sets the tile size to512x512pixels. The tile size determines the granularity and level of detail displayed for each tile.
For more information about the supported parameters, see the Raster Tile API v3 API Reference.
- Instantiate the service with the default behavior:
-
Retrieve and display the map tiles by creating a Raster Tile Provider object:
const rasterTileProvider = new H.service.rasterTile.Provider( rasterTileService ); -
Create a tile layer object by using the Raster Tile Provider:
const rasterTileLayer = new H.map.layer.TileLayer(rasterTileProvider); -
Create an instance of the HERE Map object with the ID of the
<div>element that displays the map, the Tile Layer, and various options such as the zoom level and center point:const map = new H.Map(document.getElementById("map"), rasterTileLayer, { zoom: 16, center: { lat: 41.902156, lng: 12.453311 }, }); -
Enable default map interactions such as panning and zooming:
const behavior = new H.mapevents.Behavior(new H.mapevents.MapEvents(map)); -
Add an event listener to dynamically resize the map when the user resizes the browser window:
window.addEventListener("resize", () => map.getViewPort().resize()); -
Save the file and open it in a browser window.
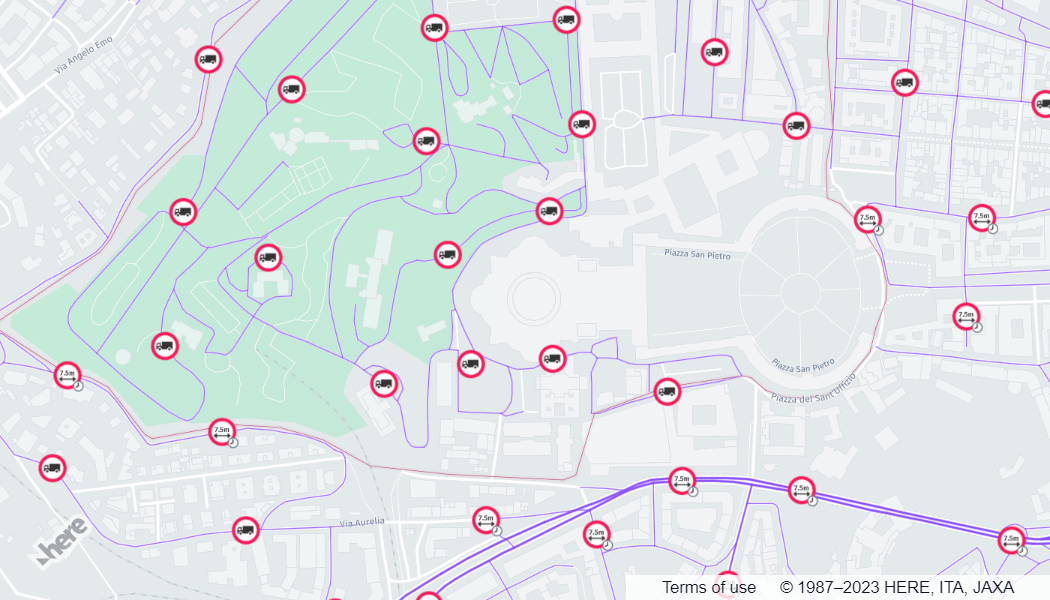
Result: The map adopts the requested style and display parameters, as shown in the following figure:
Similarly to raster maps generated with the default layers, you can further customize the map, based on your application's needs and requirements. For example, you can display routing information.
Next steps
- For more information about the Raster Tile API v3, see the corresponding Developer Guide.
- To learn more about the Maps API for JavaScript features that you can use to increase map interactivity, see the
Tutorialssection of this guide.
Updated last month