Get started with Search
Leveraging HERE's extensive global data set, which includes hundreds of millions of POIs and addresses worldwide, the HERE SDK enables fast and easy search functionality. With the HERE SDK, you can efficiently tackle a variety of search-related tasks using a single SearchEngine:
- Discover places: Search and discover places from HERE's vast database worldwide, either by category or by setting a search term.
- Generate auto suggestions: Search for places while typing a search term to offer query completion.
- Reverse geocode an address: Find the address that belongs to certain geographic coordinates.
- Geocode an address: Find the geographic coordinates correlated to an address.
- Search by ID: Search for a place identified by a HERE Place ID.
- Search along a route: Search for places along an entire route.
- Search by category along a route: Search for places based on categories along an entire route. This feature is in beta state.
- Support for what3words (only available for Navigate): Search with the help of three word addresses.
- Search offline (only available for Navigate): When no internet connection is available, you can switch to the
OfflineSearchEngineto search on already cached map data or preloaded offline maps data. - My places (only available for Navigate): Add your own places at runtime to search for them offline.
One feature that all search variants have in common is that you can specify the location or area where you want to search. Setting an area can be done by passing in a rectangle area specified by a GeoBox or even a circle area specified by a GeoCircle. Any potential search result that lies outside the specified area is ranked with lower priority, except for relevant global results - for example, when searching for "Manhattan" in Berlin. The underlying search algorithms are optimized to help narrow down the list of results to provide faster and more meaningful results to the user.
Search is based on HERE Geocoding and Search.
Example based on Geocoding & SearchSearchEngine.searchByAddress(AddressQuery, ...).
Example based on Reverse Geocode: SearchEngine.searchByCoordinates(GeoCoordinates, ...)
Example based on Discover & Search: SearchEngine.searchByText(TextQuery, ...).
Example based on Autosuggest: SearchEngine.suggestByText(TextQuery, ...).
NoteFor information about the pricing of these features, see the HERE Base Plan Pricing. If you are using the Navigate license or have other questions about pricing, contact us.
NoteEach search request is performed asynchronously. An online connection is required.
Initialize the SearchEngine
The massive database of places provided by HERE's Location Services can be easily accessed and explored using the HERE SDK's SearchEngine. Let's look at an example. Begin by creating a new SearchEngine instance:
do {
    try searchEngine = SearchEngine()
} catch let engineInstantiationError {
    fatalError("Failed to initialize SearchEngine. Cause: \(engineInstantiationError)")
}
Creating a new SearchEngine instance can throw an error. Such an error can happen, when, for example, the HERE SDK initialization failed beforehand.
Enrich EV charging searches (EVCP 3.0)
Note
EVSearchEngineis online only and needs an additional HERE EV Charge Points API v3 license on top of a Navigate license. Without that entitlement, the API will not return charging metadata.
EVSearchEngine can run independently to fetch EV charging location details by HERE Place IDs, or it can be attached to SearchEngine via SearchEngine.setEVInterface(_:) so that every standard place search automatically exposes place.details?.evChargingLocation. Choose the mode that fits your use case: if you only need EV-specific payload (tariffs, EVSE status, truck restrictions, etc.) call EVSearchEngine.search(...) directly; if you want EV metadata merged into broader POI responses, wire it into your existing SearchEngine instance.
EvSearchExample keeps both paths alive: it demonstrates wiring the engines together for enrichment, while searchEVChargingLocationsByPlaceIds() can also be invoked standalone when no SearchEngine query is involved.
final class EVSearchExample {

    // Provides EVCP 3.0 enrichment; requires an additional EV Charging license beyond Navigate.
    private let searchEngine: SearchEngine
    private let evSearchEngine: EVSearchEngine

    init() throws {
        searchEngine = try SearchEngine()
        evSearchEngine = try EVSearchEngine()
        searchEngine.setEVInterface(evSearchEngine)
    }

    // Works standalone for EV-only lookups or alongside SearchEngine to enrich generic results.
    func searchEVChargingLocationsByPlaceIds(placeIds: [String],
                                             searchOptions: SearchOptions) {
        var evOptions = EVSearchOptions()
        evOptions.additionalFeatures = [
            .energyMix,
            .openingHours
        ]

        // Set options before search call.
        evSearchEngine.setOptions(evOptions)

        // Direct EVSearchEngine call (can be used without SearchEngine involvement).
        evSearchEngine.search(ids: placeIds) { error, locations in
            if let evError = error {
                if evError == .noResultsFound {
                    print("No EV charging locations found for the given IDs.")
                    return
                }
                print("EV lookup failed: \(evError)")
                return
            }
            locations?.forEach { location in
                let metadata = Metadata()
                metadata.setString(name: "id", value: location.id)
                metadata.setString(name: "connectorGroups", value: "\(location.connectorGroups.count)")
                // Attach metadata to dedicated EV UI elements or map markers.
            }
        }

        // Optional: keep using SearchEngine so every place result surfaces evChargingLocation details.
        let area = TextQuery.Area(inBox: getMapViewGeoBox())
        let textQuery = TextQuery("charging", area: area)
        _ = searchEngine.searchByText(textQuery: textQuery,
                                      options: searchOptions) { searchError, places in
            if let searchError = searchError {
                print("Search error: \(searchError)")
                return
            }
            places?.forEach { place in
                let evDetails = place.details?.evChargingLocation
                // evDetails is populated only when the EV license is active.
            }
        }
    }
}
The same EVSearchExample implementation ships with the EVRouting example app so you can see it running end-to-end.
With this setup you can continue to use the familiar SearchEngine entry points (category, text, or along-route searches) while automatically surfacing EVCP 3.0 information such as connector counts, tariffs, and operator data wherever applicable. If you only need the EV-specific payload, you can rely solely on EVSearchEngine.
Search for places
Let's assume you want to find all "pizza" places around the current map center shown on the device. Before you can start the search, you need to specify a few more details:
let searchOptions = SearchOptions(languageCode: LanguageCode.enUs,
                                  maxItems: 30)
From the code snippet above, you created a new SearchOptions object that holds the desired data:
- You can specify the language of the returned search results by setting a
LanguageCode. maxItemsis set to define the maximum number of result items that should be delivered in the response. In the example above, you limit the results to 30. If the engine discovers more search results than requested, it will return only the 30 most relevant search results.
Do a one-box search as you want to find all results within the current viewport. The SearchEngine provides three different ways to specify the search location:
- Search at
GeoCoordinates: Performs an asynchronous search request around the specified coordinates to provide the most relevant search results nearby. - Search in a
GeoCirclearea: Similar to the above, but searches for results within the specified circle area, which is defined by center geographical coordinates and a radius in meters. - Search in a
GeoBoxarea: Similar to the above, but searches for results within the specified rectangle area, which is defined by the southwest and northeast coordinates passed as parameters.
A one-box search is ideal to discover places nearby. As input you can provide a free-form text in various and mixed languages (such as Latin, Cyrillic, Arabic, Greek).
You can specify the area together with the term you want to search for. For queryString you can set, for example, "pizza":
let queryArea = TextQuery.Area(inBox: getMapViewGeoBox())
let textQuery = TextQuery(queryString, area: queryArea)
Here we have left out the code for getMapViewGeoBox(). You can create and pass in any GeoBox that fits to your use case. A possible implementation can be found in the accompanying example apps.
Preferably, the results within the specified map area are returned. If no results were found, global search results may be returned. However, relevant global results such as prominent cities or states may be included - regardless of the specified search location.
NoteThe query string can contain any textual description of the content you want to search for. You can pass in several search terms to narrow down the search results - with or without comma separation. So, "Pizza Chausseestraße" and "Pizza, Chausseestraße" will both lead to the same results and will find only pizza restaurants that lie on the street 'Chausseestraße'. Please also note that it is an error to pass in an empty query string, and in this case, the search will fail.
Finally, you can start to search asynchronously:
_ = searchEngine.searchByText(textQuery: textQuery,
                        options: searchOptions,
                        completion: onSearchCompleted)


// Completion handler to receive search results.
func onSearchCompleted(error: SearchError?, items: [Place]?) {
    if let searchError = error {
        showDialog(title: "Search", message: "Error: \(searchError)")
        return
    }

    // If error is nil, it is guaranteed that the items will not be nil.
    showDialog(title: "Search in viewport for: 'Pizza'.",
               message: "Found  \(items!.count) results.")

    // Add a new marker for each search result on map.
    for searchResult in items! {
        //...
    }
}
NoteAlternatively, a closure expression can be used to inline the completion handler:
_ = searchEngine.searchByText(textQuery,
                        options: searchOptions) { (searchError, searchResultItems) in
   // Handle results here.
}
Of course, the same is possible for all other completion handling available in the HERE SDK. By convention, for this guide, we prefer to use function call expressions to preserve the full type information.
Note that all offered search() methods return a TaskHandle that can be optionally used to check the status of an ongoing call - or to cancel a call. If not needed, you can leave this out, as shown above.
Before you can look into the results, you should check for a possible SearchError. For example, if the device is offline, the list of search items will be nil and the error enum will indicate the cause. In this case, you call a helper method showDialog() to show the error description to the user. A possible implementation of showDialog() can be accessed from the accompanying "Search" example's source code - it does not contain any HERE SDK specific code.
Note that you can safely unwrap the search items list, as you opt out beforehand if an error occurs.
NoteThe search response contains either an error or a result:
erroranditemscan never be nil at the same time - or non-nil at the same time.
Show the results on the map
Now, it's time to look into the results. If no matching results could be found, an error would have been caught beforehand:
// If error is nil, it is guaranteed that the items will not be nil.
showDialog(title: "Search in viewport for: 'Pizza'.",
           message: "Found  \(items!.count) results.")

// Add a new marker for each search result on map.
for searchResult in items! {
    let metadata = Metadata()
    metadata.setCustomValue(key: "key_search_result", value: SearchResultMetadata(searchResult))
    // Note that geoCoordinates are always set, but can be nil for suggestions only.
    addPoiMapMarker(geoCoordinates: searchResult.geoCoordinates!, metadata: metadata)
}

...

// Class to store search results as Metadata.
private class SearchResultMetadata : CustomMetadataValue {

    var searchResult: Place

    init(_ searchResult: Place) {
        self.searchResult = searchResult
    }

    func getTag() -> String {
        return "SearchResult Metadata"
    }
}
Finally, you can iterate over the list of results. Each Place contains various fields describing the found search result.
In our example, to add a marker to the map, you are interested in the place's location. In addition, we create a Metadata object where you can store a SearchResult.
NoteThe
Metadataobject can contain various data types to allow easy association of a map marker with the result data. This way, you can hold all information related to a map marker in one object - this can be convenient when presenting this data, for example, after the user taps on a map marker. Even complex data objects can be stored by implementing theCustomMetadataValueinterface, as shown above.
A possible implementation of addPoiMapMarker() can be accessed from the accompanying "Search" example's source code; see also the section about MapMarker in this guide.
private func addPoiMapMarker(geoCoordinates: GeoCoordinates, metadata: Metadata) {
let mapMarker = createPoiMapMarker(geoCoordinates: geoCoordinates)
mapMarker.metadata = metadata
mapView.mapScene.addMapMarker(mapMarker)
mapMarkers.append(mapMarker)
}
private func createPoiMapMarker(geoCoordinates: GeoCoordinates) -> MapMarker {
guard
let image = UIImage(named: "poi"),
let imageData = image.pngData() else {
fatalError("Error: Image not found.")
}
let mapMarker = MapMarker(at: geoCoordinates,
image: MapImage(pixelData: imageData,
imageFormat: ImageFormat.png),
anchor: Anchor2D(horizontal: 0.5, vertical: 1))
return mapMarker
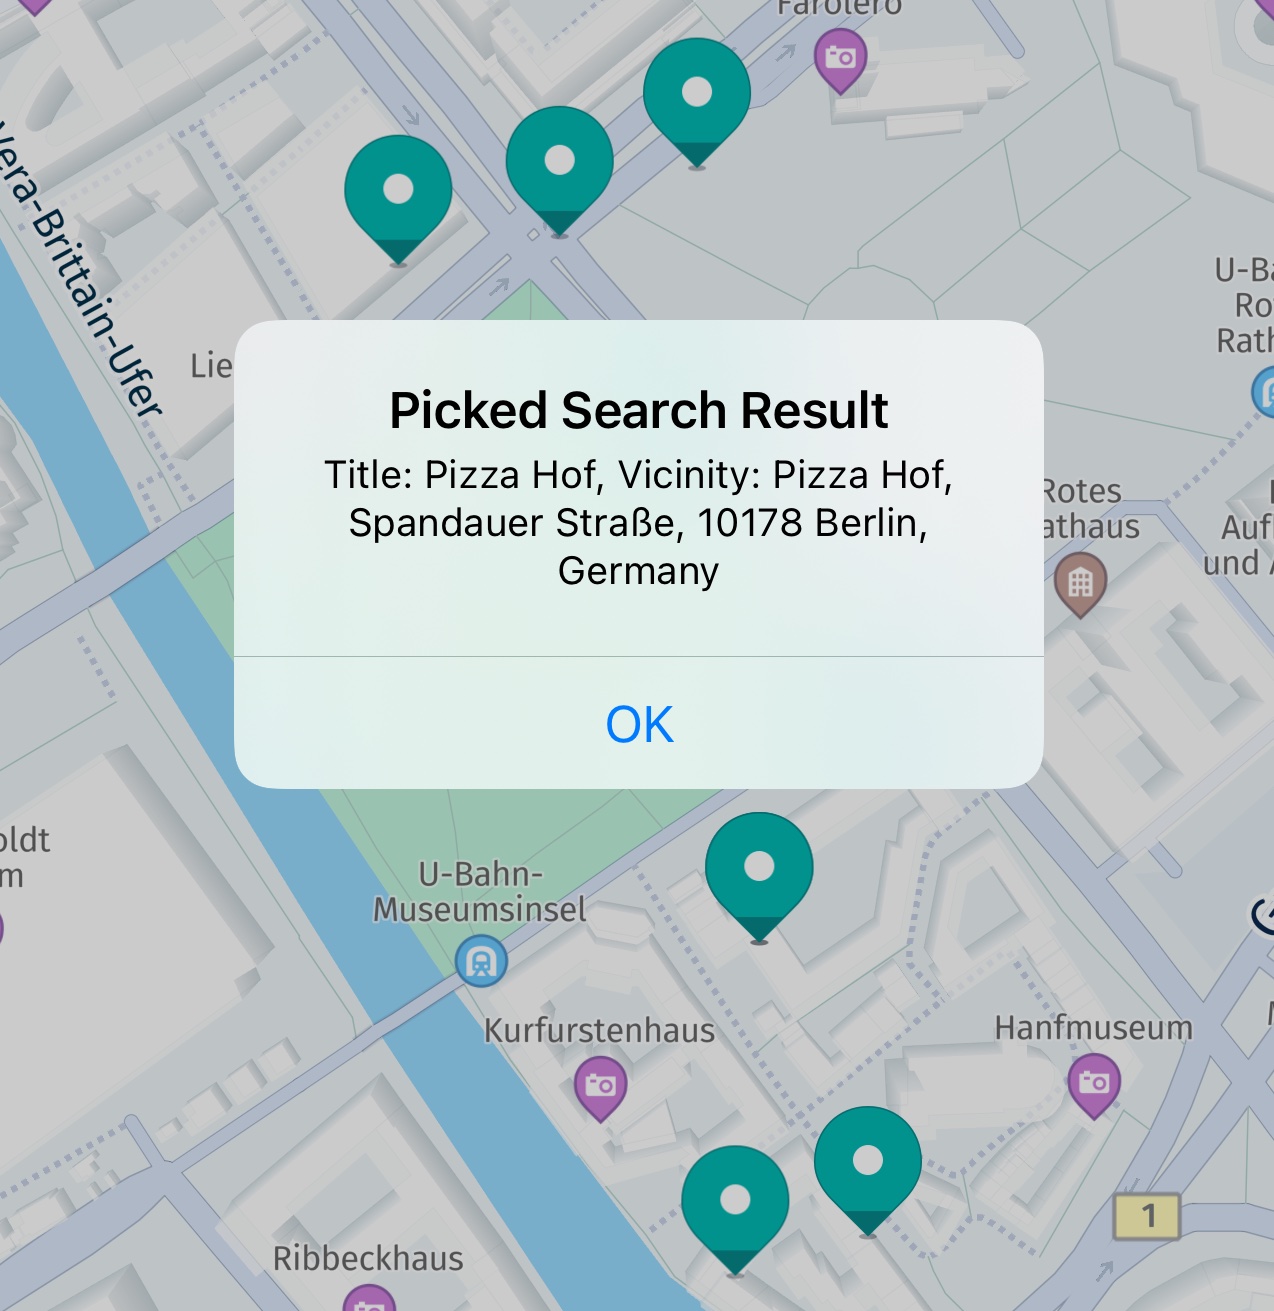
}After you have at hand the picked map marker, you can get the Metadata information that you have set in the previous step:
if let searchResultMetadata =
    topmostMapMarker.metadata?.getCustomValue(key: "key_search_result") as? SearchResultMetadata {

    let title = searchResultMetadata.searchResult.title
    let vicinity = searchResultMetadata.searchResult.address.addressText
    showDialog(title: "Picked Search Result",
               message: "Title: \(title), Vicinity: \(vicinity)")
    return
}
Not all map markers may contain Metadata. Unless you have set the Metadata beforehand, getMetadata() will return nil. In this example, you simply check if the data stored for "key_search_result" is not nil, so that you know it must contain search data. You can then downcast to our custom type SearchResultMetadata which holds the desired Place.
Consult the API Reference for a complete overview on the available optional fields.
Access web images
The HERE SDK provides a list of WebImage objects in place.Details, allowing visual exploration of each Place.
NoteTo enrich search results with web images, valid credentials are required to receive rich content from TripAdvisor. Contact your HERE representative to request access. If the license is missing, the images list will be empty.
WebImage access can be enabled like this:
searchEngine.setCustomOption(name: "discover.show", value: "tripadvisor");Once WebImage access is enabled and valid credentials for rich content are in place, images will be included in the search results. To access a WebImage from a Place, use the following approach:
func handleWebImages(searchResult: Place) {
    let webImages = searchResult.details.images
    for webImage in webImages {
        print("WebImage found for place: \(searchResult.title.trimmingCharacters(in: .whitespaces)). Link: \(webImage.source.href)")
    }
}
Users can retrieve images by accessing the href in each webImage.Source using platform-specific in-app logic. For example a href link can look like this: https://media-cdn.tripadvisor.com/media/photo-f/10/fb/d1/05/panorama.jpg.
Zoom to places
The above code uses a GeoBox to search directly in the shown map viewport, so it is not necessary to zoom to the found results. Instead of a GeoBox you can search also around a location ("search around me"), inside a GeoCircle, along a GeoCorridor or inside countries by passing a list of CountryCode values. See TextQuery.Area for all supported types.
If the search area is not equal to the shown map viewport, you can use the following code to zoom to the results by creating a GeoBox from a list of GeoCoordinates. Get the GeoBox from GeoBox.containing(geoCoordinates: geoCoordinatesList).
// Set null values to keep the default map orientation.
camera.lookAt(area: geoBox,
              orientation: GeoOrientationUpdate(bearing: nil, tilt: nil))
This instantly moves the camera. If desired, you can also apply various animation styles to fly the camera to a desired area. Look at the MapCamera section and check the "CameraKeyFrameTracks" example app on GitHub.
If you want to apply an additional padding, use an overloaded lookAt() method that accepts a viewRectangle as additional parameter. Note that the rectangle is specified in pixels referring to the map view inside which the GeoBox is displayed.
let origin = Point2D(5, 5)
let sizeInPixels = Size2D(width: mapView.viewportSize.width - 10, height: mapView.viewportSize.height - 10)
let paddedViewRectangle = Rectangle2D(origin: origin, size: sizeInPixels)
The above code creates a rectangle that can be used to add a 5 pixel padding around any GeoBox that is shown in the map viewport.
Try the Search example app
You can find the code for the above and the following sections as part of the Search example app on GitHub.
Search for what3words (only available for Navigate)
What3words is a geocoding system that assigns a unique three-word address to every three-meter square on earth. It allows a precise identification of locations through easy-to-remember word combinations and can also convert these addresses back to their exact geographic coordinates.
Let's look at an example. You can create a new W3WSearchEngine instance like so:
do {
    try w3wSearchEngine = W3WSearchEngine()
} catch let engineInstantiationError {
    fatalError("Failed to initialize W3WSearchEngine. Cause: \(engineInstantiationError)")
}
Creating a new W3WSearchEngine instance can throw an error. Such an error can happen, when, for example, the HERE SDK initialization failed beforehand.
NoteYou can find the example code for the
W3WSearchEngineas part of the "SearchHybrid" example app on GitHub.
Find the location for a given what3words term (only available for Navigate)
Start by setting searchWords. Then invoke the search method of the w3wSearchEngine, supplying the term.
Upon completing the search, the callback processes the outcome.
// Sample "dizzy.vanilla.singer" used for demonstration purposes. Replace with user input as needed.
let searchWords = "dizzy.vanilla.singer"

/* Finds the location of a known What3Words term.
* This method searches for the geographic location corresponding to a given three-word address
* (e.g., "dizzy.vanilla.singer"). It uses the What3Words API to resolve the three-word address into
* a square on the map, retrieving additional details such as the square's coordinates and language.
*/
w3wSearchEngine.search(words: searchWords) { [weak self] error, W3WSquare in
    guard let self = self else { return }
    if let error = error {
        self.showDialog(title: "W3W Search Error", message: "\(error)")
        return
    } else if let w3wSquare = W3WSquare {
        let message = """
            3-word address: \(w3wSquare.words)
            Language: \(w3wSquare.languageCode)
            Coordinates: \(w3wSquare.coordinates.latitude), \(w3wSquare.coordinates.longitude)
        """
        self.showDialog(title: "What3Words Details", message: message)
    }
}
Geocode a what3words term to a location (only available for Navigate)
Start by initializing a GeoCoordinates object with specified latitude and longitude values, along with a designated language code. Then invoke the search method of the w3wSearchEngine, supplying the coordinates, language, and a callback to manage the response.
Upon completing the geocoding search, the callback processes the outcome.
let coordinates = GeoCoordinates(latitude: 52.520798, longitude: 13.409408)
// The language code for the desired three-word address.
// ISO 639-1 code "en" specifies that the three-word address will be in English.

let w3wLanguageCode = "en";
/* Resolves geographic coordinates to a What3Words address (three-word format).
* This method uses the What3Words search engine to find a three-word address based
* on the provided coordinates (latitude and longitude). The result includes
* additional details such as the square's coordinates and language.
*/
w3wSearchEngine.search(coordinates: coordinates, language: w3wLanguageCode) { [weak self] error, W3WSquare in
    guard let self = self else { return }

    if let error = error {
        self.showDialog(title: "W3W reverse geocoding failed with error:", message: "\(error)")
        return
    } else if let w3wSquare = W3WSquare {
        let message = """
            3-word address: \(w3wSquare.words)
            Language: \(w3wSquare.languageCode)
            Coordinates: \(w3wSquare.coordinates.latitude), \(w3wSquare.coordinates.longitude)
        """
        self.showDialog(title: "Geocoding Details", message: message)
    } else {
        print("W3W reverse geocoding returned no results.")
        self.showDialog(title: "No Result", message: "W3W reverse geocoding returned no results.")
    }
}