Integrate the HERE SDK
In this tutorial, you will develop an iOS application that displays a map.
- To integrate the HERE SDK into an existing application, you can skip the initial steps of setting up a new project from scratch.
- If you prefer to start by running an example app that demonstrates some of the features of the HERE SDK, take a look at this tutorial.
Prerequisites
Make sure you have access to your credentials and the HERE SDK framework. To learn more, see Get started.
Create a new project
Use Xcode as the IDE. If you are new to iOS development, follow the guides on developer.apple.com to get started with the first steps.
NoteThe resulting code is available from GitHub.
Start Xcode (this guide is based on version 16.4) and click Create New Project.... Alternatively, go to File > New > Project... :
- For the template, select iOS as the platform, then choose App under the Application section.
- Click Next.
- Provide a Product Name, for example,
"HelloMap". - Select your Team (if applicable).
- Enter an Organization Identifier. For example:
com.your-company. - Choose Swift as the language.
- Select SwiftUI as the interface.
- Click Next, then choose an appropriate directory to save the project.
- Click Create to finish setting up your project.
In newly created project select a simulator or a real device (which is recommended) as run destination of your application.
For the example below, we have kept the default orientation settings. When running the existing example apps, make sure the Deployment target is set to a version you have installed - we have used iOS 15.2.
Now, click Build and Run the current scheme and confirm that your plain project executes as expected. If all goes well, you should see a blank view without any content.
Once we have a working application it's time to think about the features of the app. For this tutorial, we keep it simple and we want to show a map view on your emulator or device.
Here's an overview of the next steps:
- Integrate the HERE SDK.
- Set required credentials.
- Add a map view and load your first map scene.
NoteWhile all of the functionalities of the HERE SDK are accessible from the simulator, usage of a real device is strongly recommended. The overall performance will be better, and some features like gestures are just easier to use on a multi-touch enabled hardware. The rendering of the map view is optimized for mobile device GPUs.
Let's begin with the first step to see how we can add the HERE SDK to our project.
Integrate the HERE SDK framework
Get the latest release artifacts including the HERE SDK framework to include in your application (named xx.yy.zz.release_date) as shown above.
NoteWe do not yet provide artifactory support via CocoaPods and there is no SDK Dependency Management available. This means that you must manually download and integrate the HERE SDK framework folder (XCFW).
Copy the heresdk.xcframework folder to your app's root folder. Note that the XCFW folder contains more files, including a Info.plist file and two folders (ios-arm64, ios-arm64_x86_64-simulator).
In Xcode, add heresdk.xcframework to the app. Highlight your project in the Project navigator and select your app in Targets. In the General tab, scroll down to Frameworks, Libraries, and Embedded Content. Expand the section and click + -> Add other -> Add files.
NoteNote that this guide is based on HERE SDK version 4.25.5.0. If your framework version is different from the version used for this guide, the steps may vary and you may need to adapt the example's source code.
Set your credentials
When using the HERE SDK, your application must be authenticated with a set of credentials.
Once you have your credentials at hand, add your set of credentials programmatically when initializing the HERE SDK (see next step).
The credentials are not tied to the name of your app, but to the account used to obtain the credentials. When you plan to use the same credentials for multiple apps, then you also need to set a scope to differentiate your apps in our system.
Initialize the HERE SDK
The HERE SDK is not initialized automatically. Instead, you can freely decide at which point in time the HERE SDK should be initialized. Initialization happens synchronously on the main thread and takes around 100 ms.
NoteInitialization of the HERE SDK will be successful even if your credentials are invalid. The best way to check if your credentials are valid is to try a feature engine. Invalid credentials will result in a dedicated error enum value. Note that certain features may require more rights than others. For example, the credentials obtained for Explore will result in an error when being used with the
OfflineSearchEngine- which is not part of the subset of Explore.
Initialize the HERE SDK by executing the following method before you want to use any feature of the HERE SDK:
private func initializeHERESDK() {
    // Set your credentials for the HERE SDK.
    let accessKeyID = "YOUR_ACCESS_KEY_ID"
    let accessKeySecret = "YOUR_ACCESS_KEY_SECRET"
    let authenticationMode = AuthenticationMode.withKeySecret(accessKeyId: accessKeyID,
                                                              accessKeySecret: accessKeySecret)
    let options = SDKOptions(authenticationMode: authenticationMode)
    do {
        try SDKNativeEngine.makeSharedInstance(options: options)
    } catch let engineInstantiationError {
        fatalError("Failed to initialize the HERE SDK. Cause: \(engineInstantiationError)")
    }
}
Make sure to insert correct credentials for key and secret. By calling makeSharedInstance() you initialize all what is needed to use the HERE SDK. The core class of the HERE SDK is called SDKNativeEngine. Under the hood, this instance is used by any other engine that is offered by the HERE SDK.
Below is an example of how to call initializeHERESDK() in the constructor of your App class. For example, if your project is named "HelloMap", the name of the file is HelloMapApp.swift. Edit the file as shown below.
import heresdk
import SwiftUI

// This class is the entry point to an application.
// In this example, the HERE SDK initialization is done at the start of the app.
// When app is terminated, the HERE SDK is disposed.
@main
struct HelloMapApp: App {

    var body: some Scene {
        WindowGroup {
            ContentView()
        }
    }

    init() {
        observeAppLifecycle()

        // Usually, you need to initialize the HERE SDK only once during the lifetime of an application.
        initializeHERESDK()
    }

    private func observeAppLifecycle() {
        NotificationCenter.default.addObserver(forName: UIApplication.willTerminateNotification,
                                               object: nil,
                                               queue: nil) { _ in
            // Perform cleanup or final tasks here.
            print("App is about to terminate.")
            disposeHERESDK()
        }
    }

    private func initializeHERESDK() {
        // Init the HERE SDK here ...
    }

    private func disposeHERESDK() {
        // Free HERE SDK resources before the application shuts down.
        // Usually, this should be called only on application termination.

        // After this call, the HERE SDK is no longer usable unless it is initialized again.
         SDKNativeEngine.sharedInstance = nil
    }
}
Always call initializeHERESDK() on the main thread. Similarly, you can free resources by disposing the HERE SDK. In our example, we use a NotificationCenter to detect when the app is about to terminate. For our application, there are no resources to release, so we simply set SDKNativeEngine.sharedInstance to nil.
In the Engines section you can find more ways to initialize the HERE SDK.
Add a map view
Now that we have the HERE SDK integrated into the project and added the required credentials, we can add a new MapView instance.
Below, we are using SwiftUI. If you plan to use Xcode's Interface Builder using storyboards, take a look at the HelloMapWithStoryboard example app.
The MapView provided by the HERE SDK is a UIView subclass, so it needs to be wrapped to conform to a SwiftUI view using the UIViewRepresentable protocol. Make sure that the HERE SDK is initialized beforehand, as shown in the previous step.
In Xcode, create a new Swift class called MapViewUIRepresentable.swift and make sure it looks like below:
import heresdk
import SwiftUI

struct MapViewUIRepresentable: UIViewRepresentable {

    // Conform to UIViewRepresentable protocol.
    func makeUIView(context: Context) -> MapView {
        // Create an instance of the map view.
        return MapView()
    }

    // Conform to UIViewRepresentable protocol.
    func updateUIView(_ mapView: MapView, context: Context) {
        // Load a map scene here.
    }
}
The UIViewRepresentable protocol defines the makeUIView(context:) function that will be called when an instance of the view is needed. All we need to do here is to return a new instance of the map view.
After creation the hosting view might appear and updateUIView(_ mapView:context:) will be called. This is a good time to load a map scene. Without loading a map scene, no map would be visible.
Load a map scene
In the updateUIView(_ mapView:context:) method of our MapViewUIRepresentable, we add the following code to load the scene with a map scheme representing a normalDay map render style:
// Conform to UIViewRepresentable protocol.
func updateUIView(_ mapView: MapView, context: Context) {
    // Load the map scene using a map scheme to render the map with.
    mapView.mapScene.loadScene(mapScheme: MapScheme.normalDay, completion: onLoadScene)

    // Inlined completion handler for onLoadScene().
    func onLoadScene(mapError: MapError?) {
        guard mapError == nil else {
            print("Error: Map scene not loaded, \(String(describing: mapError))")
            return
        }

        // Use the camera to specify where to look at the map.
        // For this example, we show Berlin in Germany.
        let camera = mapView.camera
        let distanceInMeters = MapMeasure(kind: .distanceInMeters, value: 1000)
        camera.lookAt(point: GeoCoordinates(latitude: 52.517543, longitude: 13.408991),
                      zoom: distanceInMeters)
    }
}
We can optionally implement a completion handler to notify us whether loading the scene succeeded. Note that the completion handler is called on the main thread when scene loading is complete. Any MapError value other than nil will indicate an issue encountered during loading.
From MapView, you can access the Camera to set some custom map parameters like the location where you want the map centered on, and a zoom level which is specified by the camera's distance to earth:
let camera = mapView.camera
let distanceInMeters = MapMeasure(kind: .distanceInMeters, value: 1000)
camera.lookAt(point: GeoCoordinates(latitude: 52.517543, longitude: 13.408991),
              zoom: distanceInMeters)
You can setup the Camera as soon as you have a MapView instance available. However, you can see the changes only taking effect after the completion handler for loading a scene has finished.
As an exercise, you can try to replace the above .normalDay style with the following: .satellite. What do you get? Try out also other map schemes, like the normal night scheme.
Or experiment with one of the available map layers (only available for the Navigate). For example, to enable textured 3D models of prominent landmarks, add the following line of code to your onLoadScene() completion handler:
mapView.mapScene.enableFeatures([MapFeatures.landmarks : MapFeatureModes.landmarksTextured])Handle the lifetime
It is recommended to set the shared instance of the SDKNativeEngine to nil, so it is no longer retained as shown above in the HelloMapApp class. Note that when an app is shutting down anyways, then it is not mandatory to dispose the SDKNativeEngine, but it doesn't do harm and it is considered good practice to cancel ongoing requests and shut down ongoing HERE SDK services. On the other hand, be careful to not dispose the HERE SDK too early when only one of your screens is destroyed and other parts of your app still need the HERE SDK. In general, it is also possible to init / dispose the HERE SDK for each screen individually.
NoteNote that multiple
MapViewinstances can be created and rendered on the same screen.
The MapView listens for lifecycle events on its own, so usually, an application does not need to do any cleanup or lifecycle handling on its own.
Build and run
Now, it's time to build and run the app. If all goes well, you should see a HERE map covering the whole area of the screen. Congratulations, you have just mastered your first steps in using the HERE SDK for iOS.
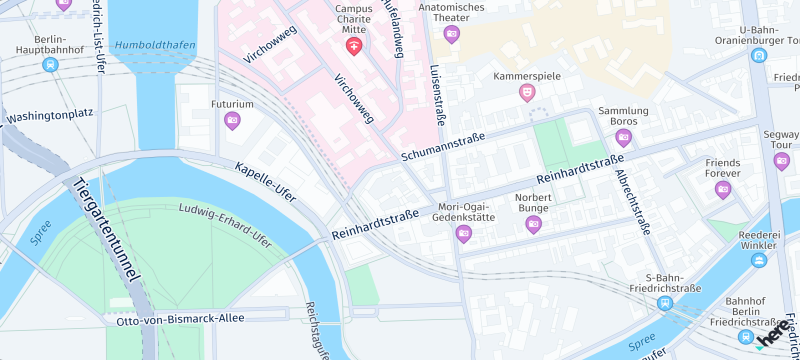
Screenshot: Showing main map scheme.

Screenshot: Showing 3D landmarks (only available for Navigate).
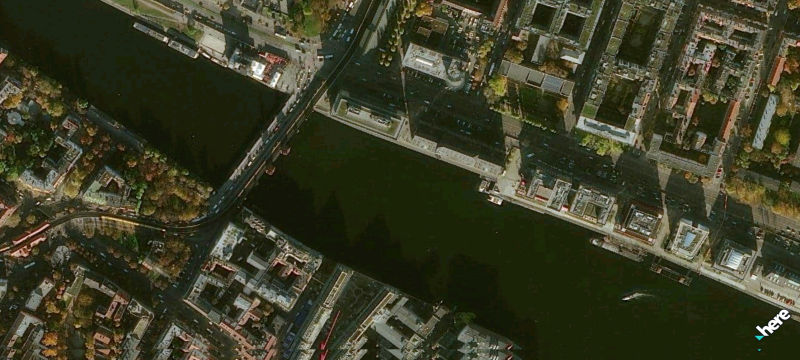
Screenshot: Showing satellite map scheme.
Next steps
- Learn more about the features of the HERE SDK. See the Feature list topic.
- Learn how to use the HERE SDK to develop for CarPlay. See Integration with CarPlay.
Updated 12 hours ago