Get started with Positioning
One of the main reasons to use a mapping application is to find out where you are. The LocationEngine provided by the HERE SDK implements a comprehensive location solution that uses the iOS platform positioning, and works with several location sources such as GPS or other Global Navigation Satellite System (GNSS) receivers.
The capability of an iOS device to achieve GNSS precision depends on its hardware. Note that not all iOS devices have the hardware to support this feature. Sub-meter accuracy is currently not supported by iOS and would require a separate receiver.
Integrating the HERE SDK location features requires at least the following steps:
- Add the required iOS permissions to your
.plistfile and request the permissions from the user. - Create a
LocationEngineand set at least oneLocationDelegate. - Start the
LocationEngineonce and set the desired accuracy level. - Receive
Locationupdates and handle them in your app.
Network Positioning is based on Network Positioning API v2. An example of a transaction based on Network Positioning is: Get location updates with the LocationEngine using cellular of WiFi positioning.
NoteFor information about the pricing of these features, see the HERE Base Plan Pricing. If you are using the Navigate license or have other questions about pricing, contact us.
Add permissions
Before you can start using the LocationEngine in your app, you will need to add the required permissions to the app's Info.plist file:
<key>UIRequiredDeviceCapabilities</key>
<array>
   <string>location-services</string>
   <string>gps</string>
</array>
<key>NSLocationAlwaysAndWhenInUseUsageDescription</key>
   <string>This app needs to access your current location to display it on the map.</string>
<key>NSLocationWhenInUseUsageDescription</key>
   <string>This app needs to access your current location to display it on the map.</string>
<key>NSMotionUsageDescription</key>
   <string>Motion detection is needed to determine more accurate locations, when no GPS signal is found or used.</string>
NoteNote that permission
NSLocationAlwaysAndWhenInUseUsageDescriptionis needed only if your application wants to request location updates while on background.
An app using native location services such as GPS will ask for the user's permission. Not all devices provide the same capabilities and may have certain hardware restrictions that can lead to varying results. Prior to using the LocationEngine, it may be a good idea to check if the native location services are enabled. On most iOS devices, a user can navigate to Settings -> Privacy -> Location Services to make sure that the location services are on.
NoteEven recent iPad devices can lack the required
UIRequiredDeviceCapabilitiesforgps. If present in theInfo.plistfile, the app will not install on such devices: if you remove this capability, the app will install, but theLocationupdates you will receive from the device will have a larger accuracy radius and are therefore quite imprecise - if there is no GPS receiver, the device may fall back to, for example, network positioning.
You can use the code snippet below to check the application's CLAuthorizationStatus and request the user authorization. Check the iOS documentation to find out more about Apple's CLAuthorizationStatus.
import CoreLocation

// ...

private func startLocating() {
    if locationEngine.start(locationAccuracy: .bestAvailable) == .missingPermissions {
        // App is missing location permission, let's request it.
        requestLocationAuthorization()
    }
}

// ...

public func requestLocationAuthorization() {
    // Get current location authorization status.
    let locationAuthorizationStatus = CLLocationManager.authorizationStatus()

    // Check authorization.
    switch locationAuthorizationStatus {
    case .restricted:
        // Access to location services restricted in the system settings.
        let alert = UIAlertController(title: "Location Services are restricted", message: "Please remove Location Services restriction in your device Settings", preferredStyle: .alert)
        let okAction = UIAlertAction(title: "OK", style: .default, handler: nil)
        alert.addAction(okAction)
        present(alert, animated: true, completion: nil)
        return

    case .denied:
        // Location access denied for the application.
        let alert = UIAlertController(title: "Location access is denied", message: "Please allow location access for the application in your device Settings", preferredStyle: .alert)
        let okAction = UIAlertAction(title: "OK", style: .default, handler: nil)
        alert.addAction(okAction)
        present(alert, animated: true, completion: nil)
        return

    case .authorizedWhenInUse, .authorizedAlways:
        // Authorization ok.
        break

    case .notDetermined:
        locationManager.requestWhenInUseAuthorization()
        break

    default:
        break
    }
}
Confirm handling of HERE Privacy notice
As of now, on iOS, the HERE SDK will not collect any data. Therefore, an application doesn't need to confirm the inclusion of a reference to the HERE Privacy Notice in an application's terms and conditions in order to use the LocationEngine.
Initialize the LocationEngine
Creating a new LocationEngine is simple:
// Create instance of location engine.
do {
    try locationEngine = LocationEngine()
} catch let engineInstantiationError {
    fatalError("Failed to initialize LocationEngine. Cause: \(engineInstantiationError)")
}
Receive locations
Once the engine is initialized, the last known location can be obtained, as long as the engine has been started at least once before and received at least one position, otherwise nil will be returned. This information will remain, so the last known location will also be available between application sessions.
if let myLastLocation = locationEngine.lastKnownLocation {
    // Log the last known location coordinates.
    print("Last known location: '%f', '%f'", myLastLocation.coordinates.latitude, myLastLocation.coordinates.longitude)
}
NoteThe
LocationEnginedoes not need to be started nor any listener needs to be set in order to get the last known location. It is enough that theLocationEnginewas successfully started once in a previous session and that a valid location event was received at least once. TheLocationobject contains atimestampthat indicates when that location was received.
Next, before starting the LocationEngine, it's a good idea to ensure that you will be notified of changes in the engine's status by conforming to the LocationStatusDelegate protocol and register it with the location engine's addLocationStatusDelegate() method. Check the API Reference for more information on the different statuses.
class PositioningExample: LocationStatusDelegate {

    func onStatusChanged(locationEngineStatus: LocationEngineStatus) {
        print("LocationEngineStatus: : \(locationEngineStatus)")
    }

    func onFeaturesNotAvailable(features: [LocationFeature]) {
        for feature in features {
            print("Feature not available: '%s'", String(describing: feature))
        }
    }

// ...

    locationEngine.addLocationStatusDelegate(locationStatusDelegate: self)

// ...

}
NoteAfter a successful start,
LocationStatusDelegatewill always receive statusLocationEngineStatus.engineStarted, and after a successful stop, it will always receive statusLocationEngineStatus.engineStopped.
Additionally, through the delegate's onFeaturesNotAvailable() callback you will be notified of any LocationFeature that is not available. If a feature that you need is not available, contact your HERE representative. Note: LocationFeature enum is currently a pending feature.
The last thing to consider before starting the engine is conforming to the LocationDelegate protocol, which provides the onLocationUpdated() callback that sends a notification once a new Location is detected. You can do so in a similar way as with the previously mentioned LocationStatusDelegate:
class PositioningExample: LocationDelegate {

    func onLocationUpdated(location: Location) {
        print("Location updated: \(location.coordinates)")
    }

// ...

    locationEngine.addLocationDelegate(locationDelegate: self)

// ...

}
NoteThe callback
onLocationUpdated()is received on the main thread - same as for all other callbacks.
Except for the current geographic coordinates and the timestamp, all other Location fields are optional. For example, the received Location object may contain the information about the bearing angle, as well as the current speed, but this is not guaranteed to be available. Unavailable values will be returned as nil.
You can add as many LocationStatusDelegate and LocationDelegate as you need by calling the respective addLocationStatusDelegate() and addLocationDelegate methods.
You are now ready to call the LocationEngine's start() method by passing in it one of the pre-defined LocationAccuracy modes, as in the code snippet below:
class PositioningExample: LocationStatusDelegate, LocationDelegate {

// ...

    private func startLocating() {
        locationEngine.addLocationStatusDelegate(locationStatusDelegate: self)
        locationEngine.addLocationDelegate(locationDelegate: self)
        if locationEngine.start(locationAccuracy: .bestAvailable) == .missingPermissions {
            requestLocationAuthorization()
        }
    }

// ...

}
NoteThe
start()method already returns aLocationStatus: even though we have set aLocationStatusDelegatein the line above, we consume the status immediately to check whether the location permission is granted for the application. If the permission is not granted, the OS will request permission from the user.
LocationEngine uses the iOS platform positioning to generate location updates. See the table below to understand how LocationAccuracy maps to iOS' own CLLocationAccuracy or check the API Reference for more information about all the available modes.
The table below shows the mapping of LocationAccuracy to CLLocationAccuracy.
| LocationAccuracy | CLLocationAccuracy |
|---|---|
| bestAvailable | kCLLocationAccuracyBest |
| navigation | kCLLocationAccuracyBestForNavigation |
| tensOfMeters | kCLLocationAccuracyNearestTenMeters |
| hundredsOfMeters | kCLLocationAccuracyHundredMeters |
| kilometers | kCLLocationAccuracyThreeKilometers |
After the LocationEngine has been started it remains in started state until you call stop() on it. You will receive LocationEngineStatus.alreadyStarted if you try to start it again without calling stop() first. You can use the method isStarted() to check if the engine is started or not. Similarly, if you have started a LocationEngine and try to start another one without stopping the first, you will get LocationEngineStatus.alreadyStarted error. Only one engine can be started at a time.
If you don't want to receive more location updates, you can stop the engine by calling the stop() method. Remember to remove the delegates when they are no longer needed:
class PositioningExample: LocationStatusDelegate, LocationDelegate {

// ...

    public func stopLocating() {
        locationEngine.removeLocationDelegate(locationDelegate: self)
        locationEngine.removeLocationStatusDelegate(locationStatusDelegate: self)
        locationEngine.stop()
    }

// ...

}
In general, it is recommended to stop the LocationEngine when an app gets disposed.
Pause updates while stationary
By default, the LocationEngine will automatically pause the location updates when location data is not expected to change. This can be used to improve battery life, for example when the device is stationary. This feature can be controlled by calling LocationEngine.setPauseLocationUpdatesAutomatically().
Show your location on the map
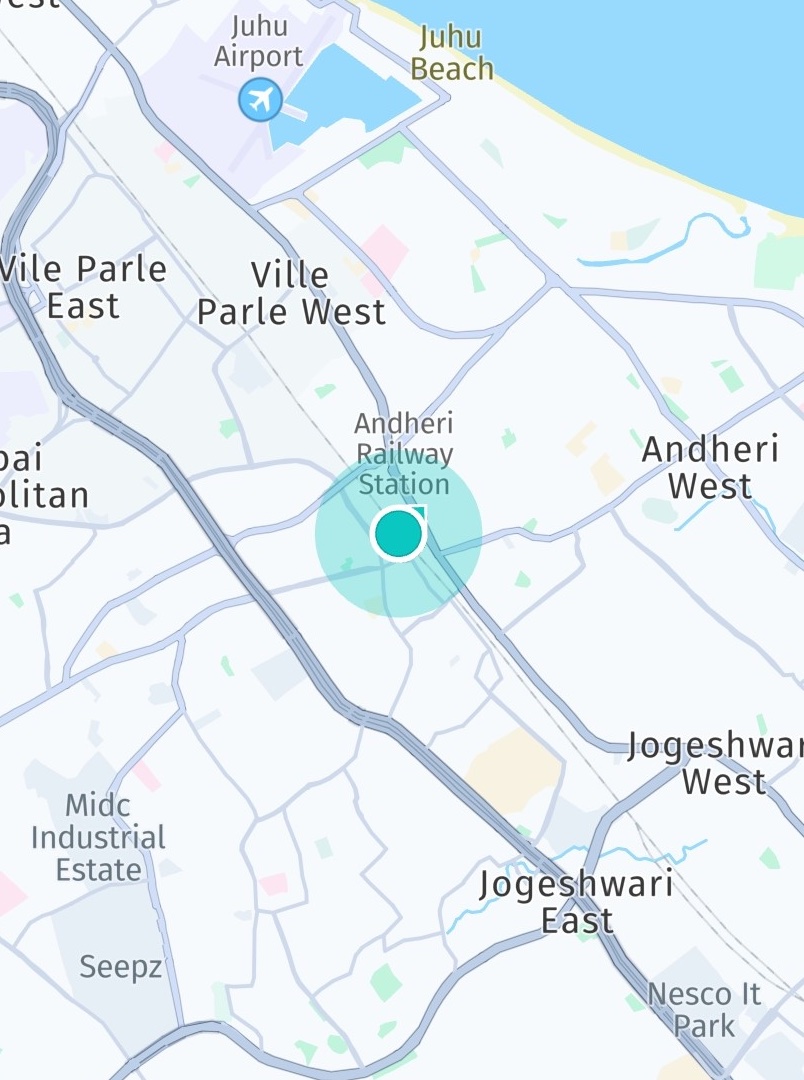
A LocationIndicator is used for representing device's current location on map. Before the indicator is updated with a current location value, a default Location is set, which can be the last known location - or just any place the user should see before the first location update arrives. By default, the horizontal accuracy is visualized with a MapCircle that has a radius of horizontalAccuracyInMeters.
//Default start-up location.
private static let defaultGeoCoordinates = GeoCoordinates(latitude: 52.520798, longitude: 13.409408)

// LocationIndicator object to represent device's current location.
private var locationIndicator: LocationIndicator!

// ...

private func addMyLocationToMap(myLocation: Location) {
    // Setup location indicator.
    locationIndicator = LocationIndicator()
    // Enable a halo to indicate the horizontal accuracy.
    locationIndicator.isAccuracyVisualized = true
    locationIndicator.locationIndicatorStyle = .pedestrian;
    locationIndicator.updateLocation(myLocation)
    locationIndicator.enable(for: mapView)
    // Point camera to current location.
    let distanceInMeters = MapMeasure(kind: .distanceInMeters,
                                      value: PositioningExample.defaultCameraDistance)
    mapCamera.lookAt(point: myLocation.coordinates,
                     zoom: distanceInMeters)
}

private func updateMyLocationOnMap(myLocation: Location) {
    // Update location indicator.
    locationIndicator.updateLocation(myLocation)
    // Point camera to current location.
    mapCamera.lookAt(point: myLocation.coordinates)
}

// ...

if let lastLocation = locationEngine.lastKnownLocation {
    addMyLocationToMap(myLocation: lastLocation)
} else {
    var defaultLocation = Location(coordinates: PositioningExample.defaultGeoCoordinates)
    defaultLocation.time = Date()
    addMyLocationToMap(myLocation: defaultLocation)
}

// ...

func onLocationUpdated(_ location: Location) {
    updateMyLocationOnMap(myLocation: location)
}
As shown in the implementation above, you can pass the Location object to the location indicator by calling updateLocation(). In this example, the goal is to track the user's current location - therefore, the map viewport's center location is updated as well.
Try the Positioning example apps
- On GitHub you can find the "Positioning" example app covering most code snippets shown above.
- The HikingDiary app shows how to record GPX traces.
Updated 12 hours ago