Display real-time traffic data
The HERE Maps API for JavaScript traffic component enables you to seamlessly integrate real-time traffic flow and traffic incident data into your map application. By utilizing the provided traffic overlay, you can create an interactive map that enables users to stay informed about current traffic conditions in their desired locations.
The following example demonstrates how HERE Maps API for JavaScript displays traffic data on a map centered on an area of Berlin, Germany:
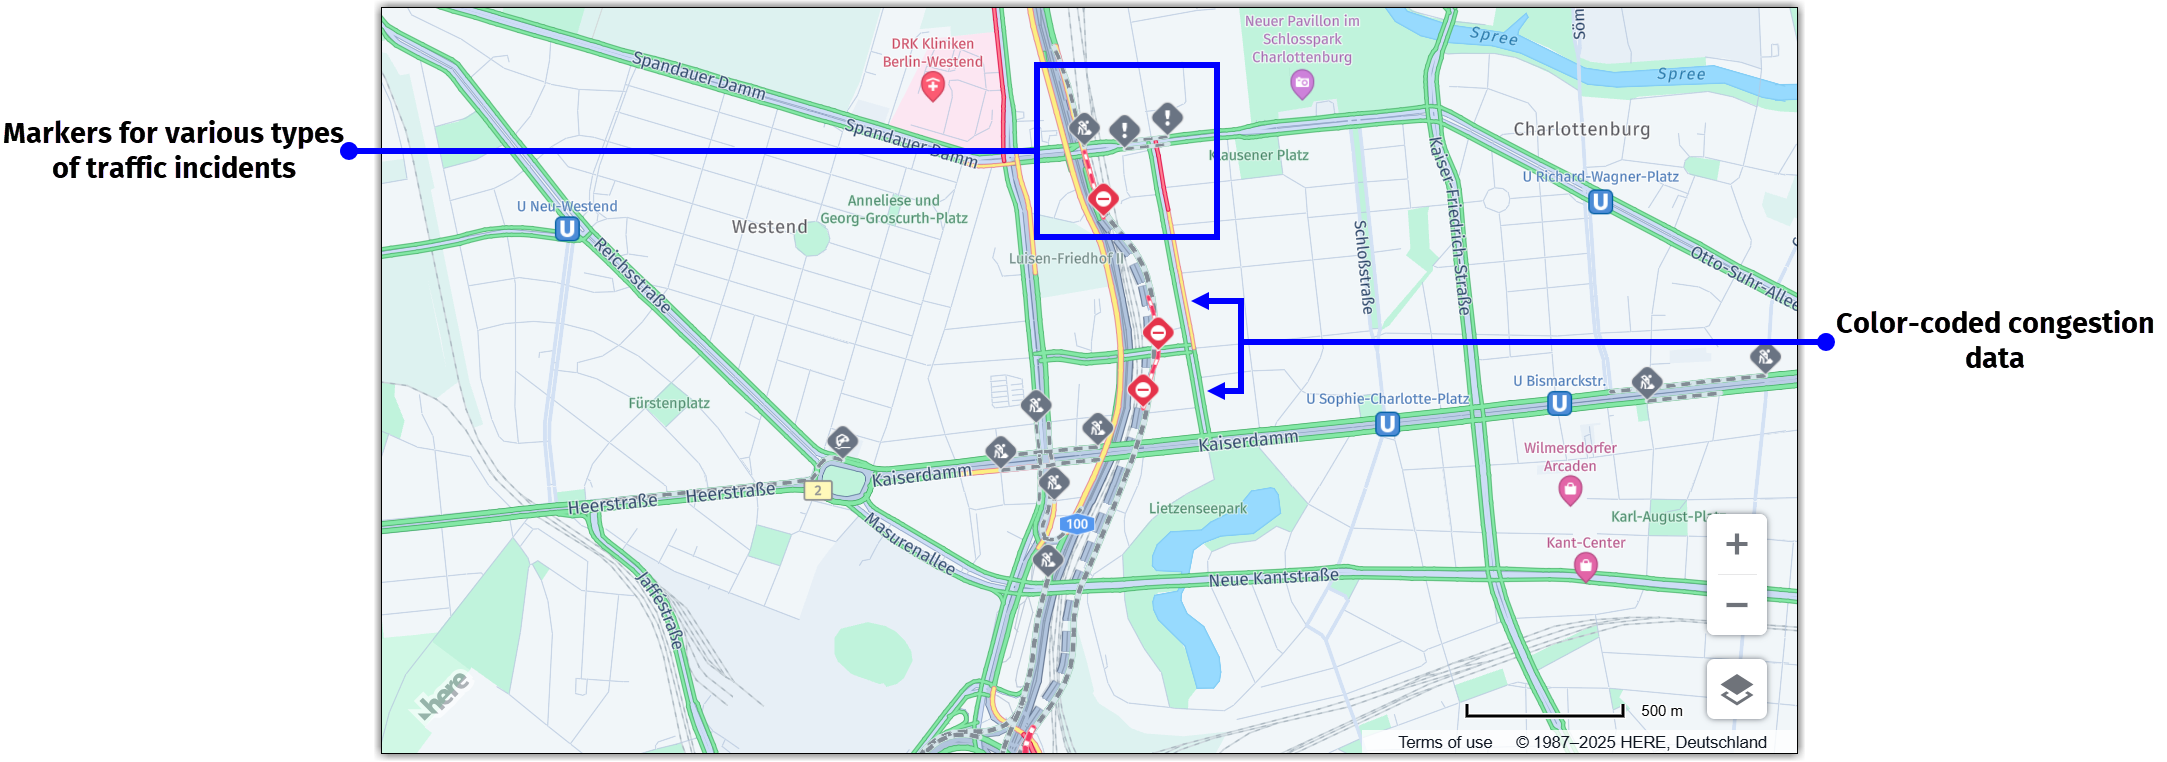
As shown in the preceding example, the HERE Maps API for JavaScript uses different color-coding for the following levels of road congestion:
- Green: Roads with smooth traffic flow.
- Orange: Roads with moderate congestion.
- Red: Congested roads.
In addition to the traffic flow, the API also provides traffic incidents data in the form of pre-configured markers on the map for various types of traffic incidents.
To display the traffic data, the API utilizes the HERE Traffic Vector Tile API, which provides map tiles with up-to-date traffic information.
The traffic overlay is automatically integrated into the default layer collection, which is provided by the createDefaultLayers() method on the H.service.Platform instance.
Toggle the traffic data through the default UI controls
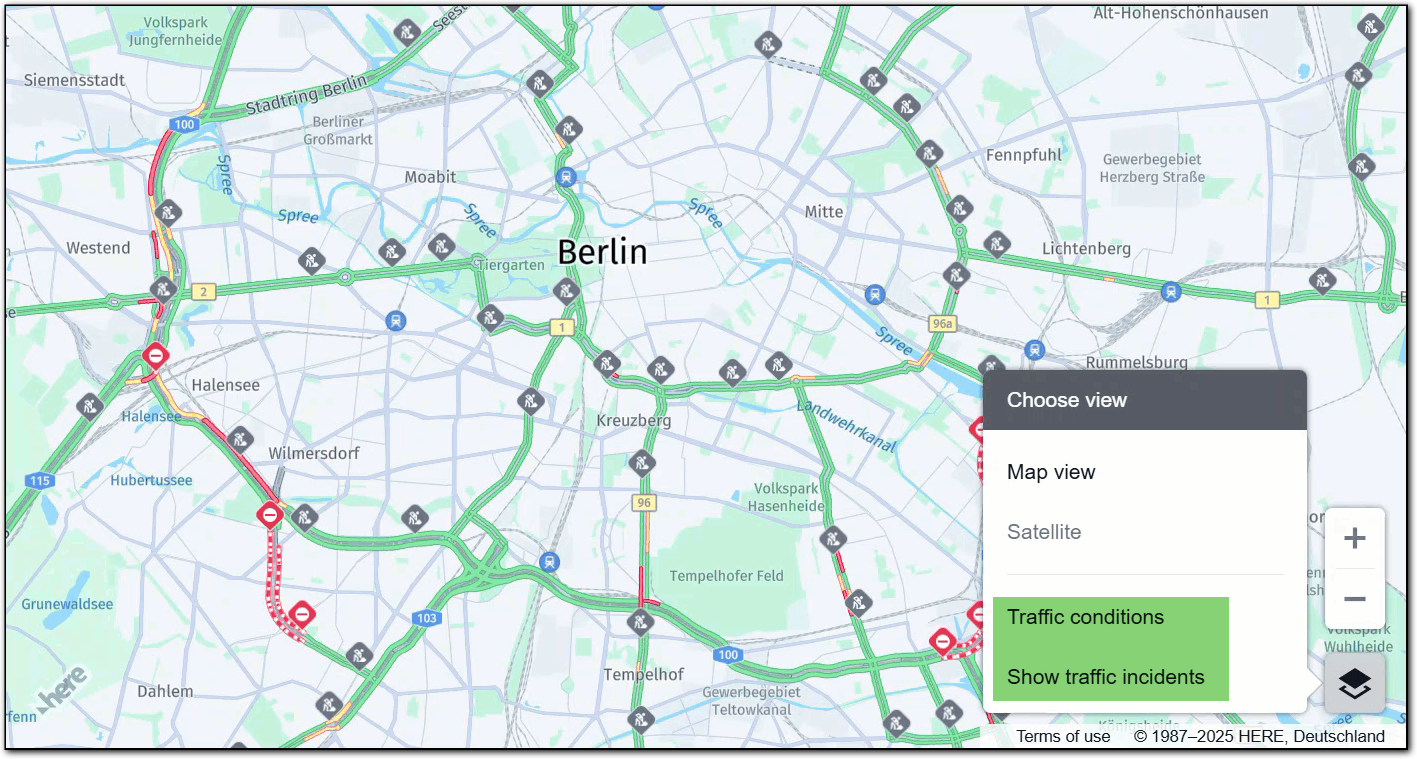
The API provides toggling capabilities for traffic congestion and incident data, which are integrated into the default user interface through the MapSettingsControl class. This UI element facilitates quick and seamless integration of additional map views within your mapping application.
By incorporating the MapSettingsControl with options to show or hide traffic-related information, you can offer a more personalized, clutter-free, and responsive experience, catering to users' preferences and diverse needs.
-
Within the
<head>object of your HTML file, include the libraries required by the HERE Maps API for JavaScript to display a map, as shown in the following example:<!DOCTYPE html> <html> <head> <script type="text/javascript" src="https://js.api.here.com/v3/3.2/mapsjs-core.js"></script> <script type="text/javascript" src="https://js.api.here.com/v3/3.2/mapsjs-service.js"></script> <script type="text/javascript" src="https://js.api.here.com/v3/3.2/mapsjs-mapevents.js"></script> <script type="text/javascript" src="https://js.api.here.com/v3/3.2/mapsjs-ui.js" ></script> </head> <body> <div id="mapContainer"></div> <script> // Your HERE Maps API for JavaScript code goes here </script> </body> </html> /> -
Within the
<script>object of your HTML file, use theH.ui.UI.createDefault()method to create and add the default UI controls, including the controls for displaying traffic data and incidents, to your map, as shown in the following example:const platform = new H.service.Platform({ apikey: 'YOUR_HERE_API_KEY' }); const defaultLayers = platform.createDefaultLayers(); const map = new H.Map( document.getElementById('mapContainer'), defaultLayers.vector.normal.map, { zoom: 10, center: { lat: 52.5, lng: 13.4 } }); const behavior = new H.mapevents.Behavior(new H.mapevents.MapEvents(map)); window.addEventListener('resize', () => map.getViewPort().resize()); // Create the default UI: const ui = H.ui.UI.createDefault(map, defaultLayers)
Result: Users can now display or hide traffic data, as shown in the following example:
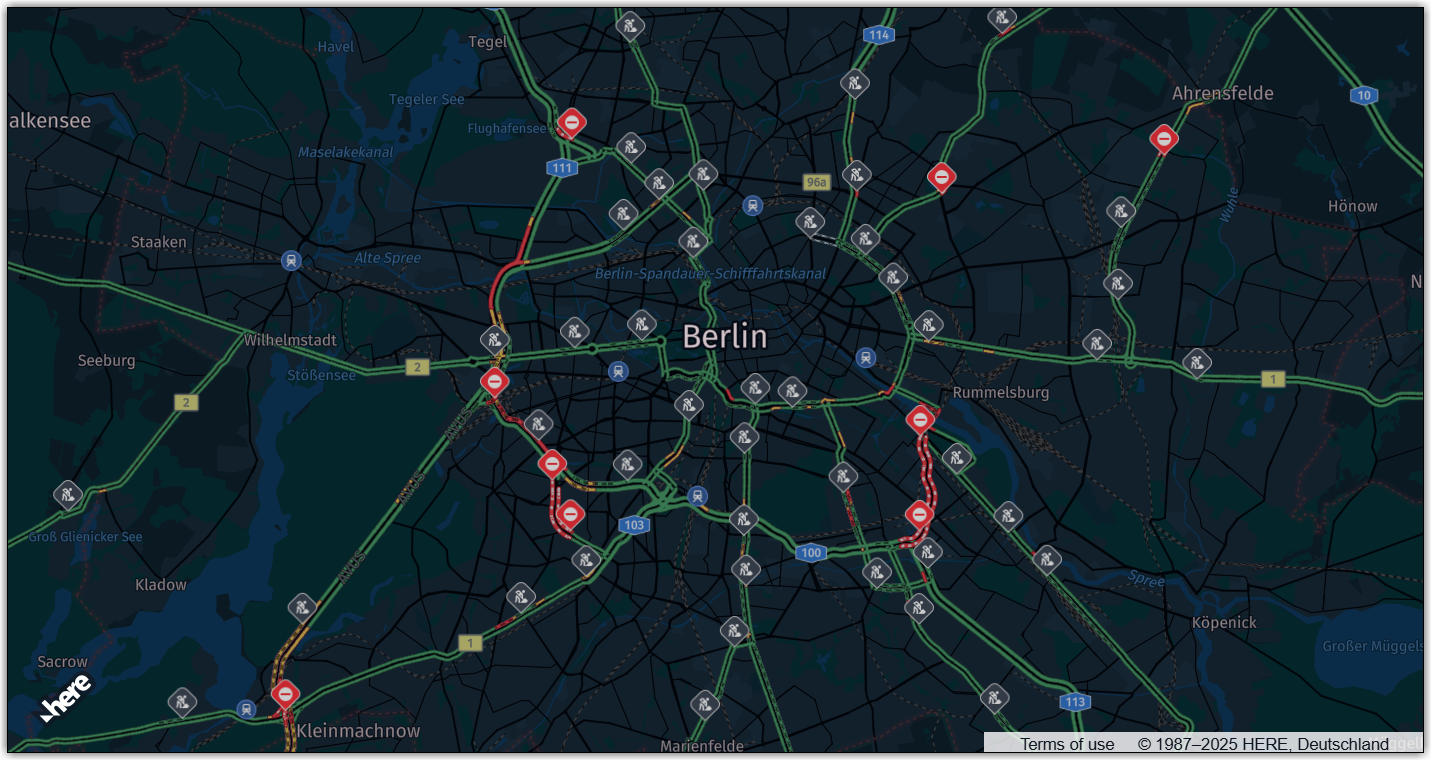
Customize the traffic layer theme
When building a custom map, for instance, that includes a "night" view, it is essential to ensure that the corresponding traffic view rendered using the default UI, if you choose to include it, is compatible with the base map layer.
To achieve this compatibility, you must customize the MapSettingsControl. The following example illustrates how to customize the control by providing a night traffic theme that is compatible with the base layer:
// Setup Map Settings and other UI controls
const ui = new H.ui.UI(map)
const mapSettingsControl = new H.ui.MapSettingsControl({
    'baseLayers': [{
        'label': 'Map',
        'layer': defaultLayers.vector.normal.litenight
    }],
    'layers': [{
        'label': 'Night Traffic Theme',
        'layer': [defaultLayers.vector.traffic.litenight]
    }],
    'alignment': H.ui.LayoutAlignment.BOTTOM_RIGHT
});
const scalebarControl = new H.ui.ScaleBar({
    'alignment': H.ui.LayoutAlignment.BOTTOM_RIGHT
});
const zoomControl = new H.ui.ZoomControl({
    'alignment': H.ui.LayoutAlignment.RIGHT_BOTTOM
});
ui.addControl('mapsettings', mapSettingsControl);
ui.addControl('zoom', zoomControl);
ui.addControl('scalebar', scalebarControl);
The following example shows the resulting map:

Render the traffic overlay on a map programmatically
When you prefer to render the traffic overlay programmatically rather than using the default user interface option, you can utilize the addLayer method to overlay a traffic layer compatible with you map's base layer, for example, if the base layer is set to vector.normal.map as is the case in the previous example, use the vector.traffic.map layer for consistent user experience.
To do that, retrieve the preferred traffic overlay from the collection of default layers, and then add the layer to the map as shown in the following example:
map.addLayer(defaultLayers.vector.traffic.map);The following example shows the following layer combination:
- base layer:
vector.normal.litenight - traffic layer:
vector.traffic.litenight
Customize the refresh interval for the traffic layer
In addition to displaying real-time traffic data on your map, the HERE Maps API for JavaScript enables you to define a refresh interval for the traffic layer. You can define this interval based on your application's needs, ensuring that your users receive the most up-to-date traffic information at a frequency that suits your use case.
To customize the refresh interval for the traffic layer, create a custom function as shown in the following example, and then adjust the refreshInterval variable to your needs. The interval is specified in milliseconds. For example, to update the traffic layer every minute (60 seconds), you can set the interval to 60 * 1000.
// Function to update traffic layer
function updateTrafficLayer() {
  // Get the provider instance from the layer
  const provider = defaultLayers.vector.traffic.map.getProvider();
  // Invalidate provider's data and force reload
  provider.reload(true);
}

// Refresh traffic layer every 1 minute (60 seconds)
const refreshInterval = 60 * 1000; // 60 seconds in milliseconds
setInterval(updateTrafficLayer, refreshInterval);
Next steps
- For more information about the
defaultLayersobject, see the createDefaultLayers method documentation in the API Reference. - For more information about the UI controls in HERE Maps API for JavaScript, see Customize maps with map controls and UI.