Build HERE Maps with Angular
Angular provides a set of powerful tools and features for building web applications. You can create an even more engaging experience for your users by combining these features with HERE SDKs and APIs.
For example, you can integrate HERE Maps with Angular to display interactive maps, geocode addresses, calculate routes, and more, all within the context of your Angular application.
See the following sections for step-by-step instructions on how to create a simple interactive map within the context of an Angular application.
Before you begin
Sign up for a HERE developer account and obtain your API credentials. For more information, see Get started.
Setup an Angular project
Facilitate the development of a new Angular application by using the Angular CLI.
-
In the Command Prompt, enter the following command to install Angular CLI:
npm install -g @angular/cli -
Initiate a new Angular project by entering the following command:
ng new jsapi-angular && cd jsapi-angular -
At the
Which stylesheet format would you like to use?prompt, select theCSSoption. -
At the
Do you want to enable Server-Side Rendering (SSR) and Static Site Generation (SSG/Prerendering)?prompt, press theNkey, to disable server-side rendering and static site generation prerendering. -
At the
Do you want to create a 'zoneless' application without zone.js?prompt, press theykey, to not include zone.js. -
At the
Which AI tools do you want to configure with Angular best practices?prompt, press theNkey, to not configure AI tools.
Result: The system installs the required packages and creates a new jsapi-angular directory, with the Angular components residing in the src sub-directory. The jsapi-angular directory has the following structure:
jsapi-angular/
├── README.md
├── .editorconfig
├── .gitignore
├── angular.json
├── package-lock.json
├── package.json
├── public
│   └── favicon.ico
├── src
│   ├── app
│   │   ├── app.config.ts
│   │   ├── app.css
│   │   ├── app.html
│   │   ├── app.routes.ts
│   │   ├── app.spec.ts
│   │   └── app.ts
│   ├── index.html
│   ├── main.ts
│   └── styles.css
├── tsconfig.app.json
├── tsconfig.json
└── tsconfig.spec.json-
In your project directory, install the
maps-api-for-javascriptNPM package which is hosted at https://repo.platform.here.com/ by adding a registry entry to the NPM configuration through the following command:npm config set @here:registry https://repo.platform.here.com/artifactory/api/npm/maps-api-for-javascript/ -
Install the package from the
@herenamespace by entering the following command:npm install @here/maps-api-for-javascript -
Navigate to the
jsapi-angularfolder, and then open thetsconfig.jsonfile in a preferred text editor. -
In the
tsconfig.jsonfile, add the following setting underangularCompilerOptions:"allowSyntheticDefaultImports": trueIn the
tsconfig.jsonfile, within thecompilerOptionsobject, add the following option:"allowJs": true -
Optional: To verify that you completed the setup successfully, perform the following actions:
-
Enter the following command:
ng serveResult: This command launches a development server with the "hot reload" functionality.
-
Initiate the Angular application by navigating to the
http://localhost:4200/address in the browser.Result: The browser displays the Angular welcome screen with the
Congratulations! Your app is running.message.
-
To terminate the
ng serveprocess for Windows operating systems, pressq + Enter. If that doesn't work, open a Windows command shell, determine the process ID withnetstat -ano | findstr 4200and kill the process withtaskkill /PID <process-ID> /F.
Add a static map component
In your Angular application, generate a static map by creating a component that contains an H.Map namespace instance. This component renders the map through the corresponding container.
-
In the Angular CLI, generate the jsmap component by entering the following command:
ng generate component jsmapResult: The command creates a
jsmapfolder in thesrc/appdirectory. The folder contains all the files required to build the component:└── src ├── app │ ├── app.config.ts │ ├── app.css │ ├── app.html │ ├── app.routes.ts │ ├── app.spec.ts │ ├── app.ts │ └── jsmap │ ├── jsmap.css │ ├── jsmap.html │ ├── jsmap.spec.ts │ └── jsmap.ts ... -
Navigate to the
jsapi-angular/src/app/jsmapdirectory, and then open thejsmap.tsfile. -
In the
jsmap.tsfile, replace the default code with the following code:import { Component, ViewChild, ElementRef } from '@angular/core'; import '@here/maps-api-for-javascript'; @Component({ selector: 'app-jsmap', imports: [], templateUrl: './jsmap.html', styleUrl: './jsmap.css' }) export class Jsmap { private map?: H.Map; @ViewChild('map') mapDiv?: ElementRef; ngAfterViewInit(): void { if (!this.map && this.mapDiv) { // Instantiate a platform, default layers and a map as usual. const platform = new H.service.Platform({ apikey: '{YOUR_API_KEY}' }); const layers = platform.createDefaultLayers(); const map = new H.Map( this.mapDiv.nativeElement, // Add type assertion to the layers object... // ...to avoid any Type errors during compilation. (layers as any).vector.normal.map, { pixelRatio: window.devicePixelRatio, center: {lat: 52.5, lng: 13.4}, zoom: 13, }, ); this.map = map; } } }This code imports the HERE Maps API for JavaScript library and instantiates the map through the
ngAfterViewInithook.Note
Replace
{YOUR_API_KEY}with a valid HERE API key. -
Open the
jsmap.htmlfile, and then replace the file contents with the following code:<div #map id="map"></div> -
Open the
jsmap.cssfile, and then add the following style:#map { width: 100%; height: 500px; } -
In the
jsapi-angular/src/appdirectory, open theapp.htmlfile, and then replace the file content with following code:<app-jsmap></app-jsmap> -
In the same directory, open the
app.tsfile and add the following elements:-
Add the
Jsmapimport statement:import { Jsmap } from './jsmap/jsmap'; -
In the
importsarray, replaceRouterOutletwithJsmap:imports: [Jsmap],
See the following updated
app.tsfile for reference:import { Component, signal } from '@angular/core'; import { Jsmap } from './jsmap/jsmap'; @Component({ selector: 'app-root', imports: [Jsmap], templateUrl: './app.html', styleUrl: './app.css' }) export class App { protected readonly title = signal('jsapi-angular'); } -
-
Verify that the map renders correctly by navigating to the
http://localhost:4200/address in the browser.
Result: The browser renders a static map centered on Berlin, at zoom level 13, in the viewport that is 500 pixels high and takes 100% of the enclosing container's width, similar to the following example:

Resize the map
A static map with a predetermined size cannot be changed during runtime.
You can improve a static map by adding dynamic resizing to make the map canvas react and adapt to the changes in the viewport size, for example, when the user expands the browser window.
To achieve that, the map needs an explicit resize() method call to adjust to the new dimensions of the container. This example uses simple-element-resize-detector to demonstrate how you can resize a map within an Angular component.
-
In Angular CLI, ensure that your working directory is the
jsapi-angulardirectory. -
Enter the following commands :
npm install simple-element-resize-detector --save npm install @types/simple-element-resize-detector --save-dev -
From the
src/app/jsmapdirectory, open thejsmap.tsfile, and then adjust the import statements by adding thesimple-element-resize-detectorlibrary, as shown in the following example:import { Component, ViewChild, ElementRef } from '@angular/core'; import '@here/maps-api-for-javascript'; import onResize from 'simple-element-resize-detector'; // New import statement -
Update
ngAfterViewInitmethod with themap.getViewPort().resize()method call, as shown in the following code snippet:ngAfterViewInit(): void { if (!this.map && this.mapDiv) { const platform = new H.service.Platform({ apikey: '{YOUR_API_KEY}' }); const layers = platform.createDefaultLayers(); const map = new H.Map( this.mapDiv.nativeElement, (layers as any).vector.normal.map, { pixelRatio: window.devicePixelRatio, center: {lat: 52.5, lng: 13.4}, zoom: 13, }, ); onResize(this.mapDiv.nativeElement, () => { map.getViewPort().resize(); }); // Sets up the event listener to handle resizing this.map = map; } }
Result: The component adjusts dynamically to the changes in the size of the enclosing browser window.
Set the map to respond to input parameters
Use another component to take your input to change the zoom level and the center of the map.
-
Create a new component by entering the following command in Angular CLI:
ng generate component mapposition -
Navigate to the
src/app/mappositiondirectory, and then open themapposition.htmlfile. -
Replace the default content of the
mapposition.htmlfile with the following code:<div class="input-group"> <label for="zoom">Zoom:</label> <input id="zoom" (change)="notify.emit($event)" name="zoom" type="number" value="13" /> </div> <div class="input-group"> <label for="lat">Latitude:</label> <input id="lat" (change)="notify.emit($event)" name="lat" type="number" value="52.5" /> </div> <div class="input-group"> <label for="lng">Longitude:</label> <input id="lng" (change)="notify.emit($event)" name="lng" type="number" value="13.4" /> </div>Note
The
mappositioncomponent has three input fields:zoom,latitudeandlongitude. The new code introduces achangeevent listener that redispatches events for each input field to the parent component. -
From the
src/app/mapposition/directory, open themapposition.cssfile, and then replace the default contents with the following basic style configuration:.input-group { margin-bottom: 5px; margin-top: 5px; display: flex; align-items: center; } label { width: 100px; font-weight: bold; } input[type="number"] { width: 100px; padding: 5px; margin-left: 10px; border: 1px solid #ccc; border-radius: 4px; } input[type="number"]:focus { border-color: #007bff; outline: none; } -
From the
src/app/mapposition/directory, open themapposition.tsfile, and then replace the file content with the following code:import { Component, Output, EventEmitter } from '@angular/core'; @Component({ selector: 'app-mapposition', imports: [], templateUrl: './mapposition.html', styleUrl: './mapposition.css' }) export class Mapposition { @Output() notify = new EventEmitter(); }Note
This TypeScript part of the component uses the
@Outputdecorator and theEventEmitterclass to notify the parent component about the changes in the user input. -
From the
src/appdirectory, open theapp.htmlfile, and then replace the file contents with the following code:<app-jsmap [zoom]="zoom" [lat]="lat" [lng]="lng" ></app-jsmap> <app-mapposition (notify)="handleInputChange($event)" ></app-mapposition>Note
This code uses the parent
appcomponent to pass the values between the map and input fields. -
From the
src/appdirectory, open theapp.tsfile, and then add a change handler by replacing the file content with the following code:import { Component } from '@angular/core'; import { Jsmap } from './jsmap/jsmap'; import { Mapposition } from './mapposition/mapposition'; // Imports Mapposition @Component({ selector: 'app-root', imports: [Jsmap, Mapposition], // Adds Mapposition to the App template templateUrl: './app.html', styleUrl: './app.css' }) export class App { title = 'jsapi-angular'; // Initialized by the constructor, these properties store the current zoom level and coordinates (latitude and longitude) for the map constructor() { this.zoom = 13; this.lat = 52.5; this.lng = 13.4; } zoom: number; lat: number; lng: number; // Updates the zoom, lat, and lng properties based on user input. handleInputChange(event: Event) { const target = <HTMLInputElement> event.target; if (target) { if (target.name === 'zoom') { this.zoom = parseFloat(target.value); } if (target.name === 'lat') { this.lat = parseFloat(target.value); } if (target.name === 'lng') { this.lng = parseFloat(target.value); } } } }Result: The change handler updates the values according to the user's input and Angular passes these values to the
jsmapcomponent. -
From the
src/app/jsmapdirectory, open thejsmap.tsfile, and then perform the following actions:- Adjust the first import statement to include
InputandSimpleChangesclasses, as shown in the following example:import { Component, ViewChild, ElementRef, Input, SimpleChanges } from '@angular/core'; - Within the
Jsmapclass, after the existingngAfterViewInithook definition, add@Inputdecorators for zoom, latitude, and longitude, and then add thengOnChangeshook definition, as shown in the following code snippet:@Input() public zoom = 13; @Input() public lat = 52.5; @Input() public lng = 13.4; ngOnChanges(changes: SimpleChanges) { if (this.map) { if (changes['zoom'] !== undefined) { this.map.setZoom(changes['zoom'].currentValue); } if (changes['lat'] !== undefined) { this.map.setCenter({lat: changes['lat'].currentValue, lng: this.lng}); } if (changes['lng'] !== undefined) { this.map.setCenter({lat: this.lat, lng: changes['lng'].currentValue}); } } }
- Adjust the first import statement to include
Result: Now, your Angular application can take your input with the help of the mapposition component, store the state in the app component, and then update the jsmap component so that the map responds to the input.
Enable dragging and zooming
Further increase the interactivity of your map by enabling map manipulation in the form of dragging or zooming in or out of the view.
To achieve this behavior, add the mapviewchange listener to the H.Map instance, and then update the app state with the help of the EventEmitter.
-
In the
app.tsfile, update theAppstate by adding the following code:handleMapChange(event: H.map.ChangeEvent) { if (event.newValue.lookAt) { const lookAt = event.newValue.lookAt; this.zoom = lookAt.zoom; this.lat = lookAt.position.lat; this.lng = lookAt.position.lng; } } -
In the
app.htmlfile, replace the current content with the following code:<app-jsmap [zoom]="zoom" [lat]="lat" [lng]="lng" (notify)="handleMapChange($event)" ></app-jsmap> <app-mapposition [zoom]="zoom" [lat]="lat" [lng]="lng" (notify)="handleInputChange($event)" ></app-mapposition> -
Update the
jsmap.tsfile by performing the following actions:-
In the
jsmap.tsfile, adjust the import statement by adding theOutputandEventEmitterclasses, as shown in the following example:import { Component, ViewChild, ElementRef, Input, SimpleChanges, Output, EventEmitter } from '@angular/core'; -
Update the
ngAfterViewInithook by attaching the listener that enables the interactive behavior after the map instantiation:map.addEventListener('mapviewchange', (ev: H.map.ChangeEvent) => { this.notify.emit(ev) }); new H.mapevents.Behavior(new H.mapevents.MapEvents(map)); -
Update the
ngOnChangesmethod to throttle the unnecessary map updates:private timeoutHandle: any; @Output() notify = new EventEmitter(); ngOnChanges(changes: SimpleChanges) { clearTimeout(this.timeoutHandle); this.timeoutHandle = setTimeout(() => { if (this.map) { if (changes['zoom'] !== undefined) { this.map.setZoom(changes['zoom'].currentValue); } if (changes['lat'] !== undefined) { this.map.setCenter({lat: changes['lat'].currentValue, lng: this.lng}); } if (changes['lng'] !== undefined) { this.map.setCenter({lat: this.lat, lng: changes['lng'].currentValue}); } } }, 100); }
-
-
In the
mapposition.tsfile, update the component to reflect the current position of the map:- Import the
Inputdecorator from the@angular/core, as shown in the following example:import { Component, Output, EventEmitter, Input } from '@angular/core'; - Add the following input parameters in the class body:
@Input() public zoom = 13; @Input() public lat = 52.5; @Input() public lng = 13.4;
- Import the
-
In the
mapposition.htmlfile, adjust the template by replacing the file content with the following code:<div class="input-group"> <label for="zoom">Zoom:</label> <input id="zoom" (change)="notify.emit($event)" name="zoom" type="number" [value]="zoom" /> </div> <div class="input-group"> <label for="lat">Latitude:</label> <input id="lat" (change)="notify.emit($event)" name="lat" type="number" [value]="lat" /> </div> <div class="input-group"> <label for="lng">Longitude:</label> <input id="lng" (change)="notify.emit($event)" name="lng" type="number" [value]="lng" /> </div>
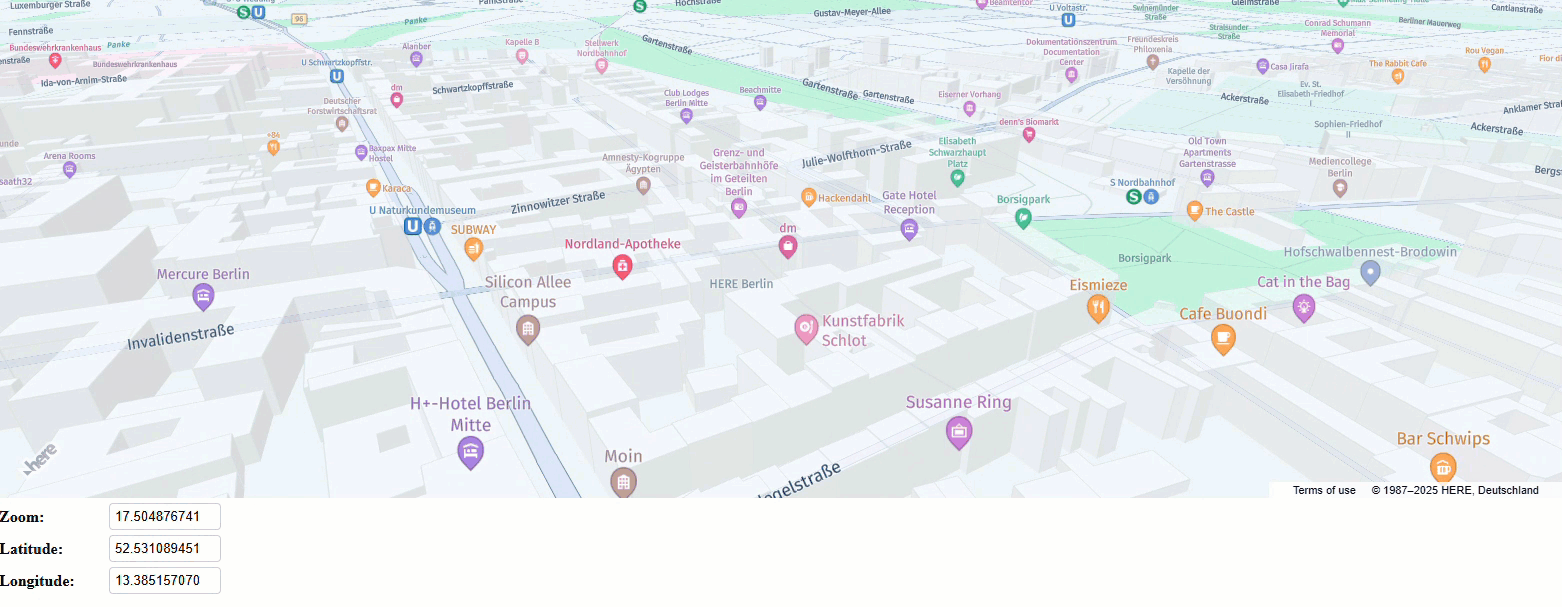
Result: The resulting application consist of the interactive map and input fields. When you interact with the map, the application automatically updates the input fields, as shown in the following example:
Code samples
The following sections contains the full code samples for Jsmap, App, and Mapposition, which are the main Angular components used in this tutorial.
Jsmap component
View the jsmap.ts source code.
import { Component, ViewChild, ElementRef, Input, SimpleChanges, Output, EventEmitter } from '@angular/core';
import '@here/maps-api-for-javascript';
import onResize from 'simple-element-resize-detector';
@Component({
selector: 'app-jsmap',
imports: [],
templateUrl: './jsmap.html',
styleUrl: './jsmap.css'
})
export class Jsmap {
private map?: H.Map;
@ViewChild('map') mapDiv?: ElementRef;
ngAfterViewInit(): void {
if (!this.map && this.mapDiv) {
const platform = new H.service.Platform({
apikey: 'YOUR_HERE_API_KEY'
});
const layers = platform.createDefaultLayers();
const map = new H.Map(
this.mapDiv.nativeElement,
(layers as any).vector.normal.map,
{
pixelRatio: window.devicePixelRatio,
center: {lat: 52.53074, lng: 13.38492},
zoom: 19,
},
);
onResize(this.mapDiv.nativeElement, () => {
map.getViewPort().resize();
});
this.map = map;
map.addEventListener('mapviewchange', (ev: H.map.ChangeEvent) => {
this.notify.emit(ev)
});
new H.mapevents.Behavior(new H.mapevents.MapEvents(map));
}
}
@Input() public zoom = 13;
@Input() public lat = 52.5;
@Input() public lng = 13.4;
private timeoutHandle: any;
@Output() notify = new EventEmitter();
ngOnChanges(changes: SimpleChanges) {
clearTimeout(this.timeoutHandle);
this.timeoutHandle = setTimeout(() => {
if (this.map) {
if (changes['zoom'] !== undefined) {
this.map.setZoom(changes['zoom'].currentValue);
}
if (changes['lat'] !== undefined) {
this.map.setCenter({lat: changes['lat'].currentValue, lng: this.lng});
}
if (changes['lng'] !== undefined) {
this.map.setCenter({lat: this.lat, lng: changes['lng'].currentValue});
}
}
}, 100);
}
}Note
Replace
YOUR_HERE_API_KEYin the previous code sample with a valid API key.
App component
View the app.ts source code.
import { Component } from '@angular/core';
import { RouterOutlet } from '@angular/router';
import { JsmapComponent } from './jsmap/jsmap.component';
import { MappositionComponent } from './mapposition/mapposition.component';
@Component({
selector: 'app-root',
imports: [Jsmap, Mapposition], // Adds Mapposition to the App template
templateUrl: './app.html',
styleUrl: './app.css'
})
export class App {
title = 'jsapi-angular';
constructor() {
this.zoom = 13;
this.lat = 52.5;
this.lng = 13.4;
}
zoom: number;
lat: number;
lng: number;
handleInputChange(event: Event) {
const target = <HTMLInputElement> event.target;
if (target) {
if (target.name === 'zoom') {
this.zoom = parseFloat(target.value);
}
if (target.name === 'lat') {
this.lat = parseFloat(target.value);
}
if (target.name === 'lng') {
this.lng = parseFloat(target.value);
}
}
}
  handleMapChange(event: H.map.ChangeEvent) {
    if (event.newValue.lookAt) {
      const lookAt = event.newValue.lookAt;
      this.zoom = lookAt.zoom;
      this.lat = lookAt.position.lat;
      this.lng = lookAt.position.lng;
    }
  }
}Mapposition component
View the mapposition.ts source code.
import { Component, Output, EventEmitter, Input } from '@angular/core';
@Component({
selector: 'app-mapposition',
imports: [],
templateUrl: './mapposition.html',
styleUrl: './mapposition.css'
})
export class Mapposition {
@Output() notify = new EventEmitter();
  @Input() public zoom = 13;
  @Input() public lat = 52.5;
  @Input() public lng = 13.4;
}Next steps
To further explore the design and features of the HERE Maps API for JavaScript, see the API Reference.