Customize maps with styles exported from the HERE Style Editor
Present your data in a unique and visually appealing way that matches your branding and design requirements by using a style exported from the HERE Style Editor. The HERE Style Editor provides a range of options for modifying various map elements, such as colors, textures, and labels. This flexibility enables you to create a unique look that suits your specific business use case.
Note
The following sections build upon the base map described in Get started with HERE Maps API for JavaScript as the foundation for introducing code additions.
Before you begin
Create your custom style in the HERE Style Editor and then export that style. For more information, see the HERE Style Editor User guide.
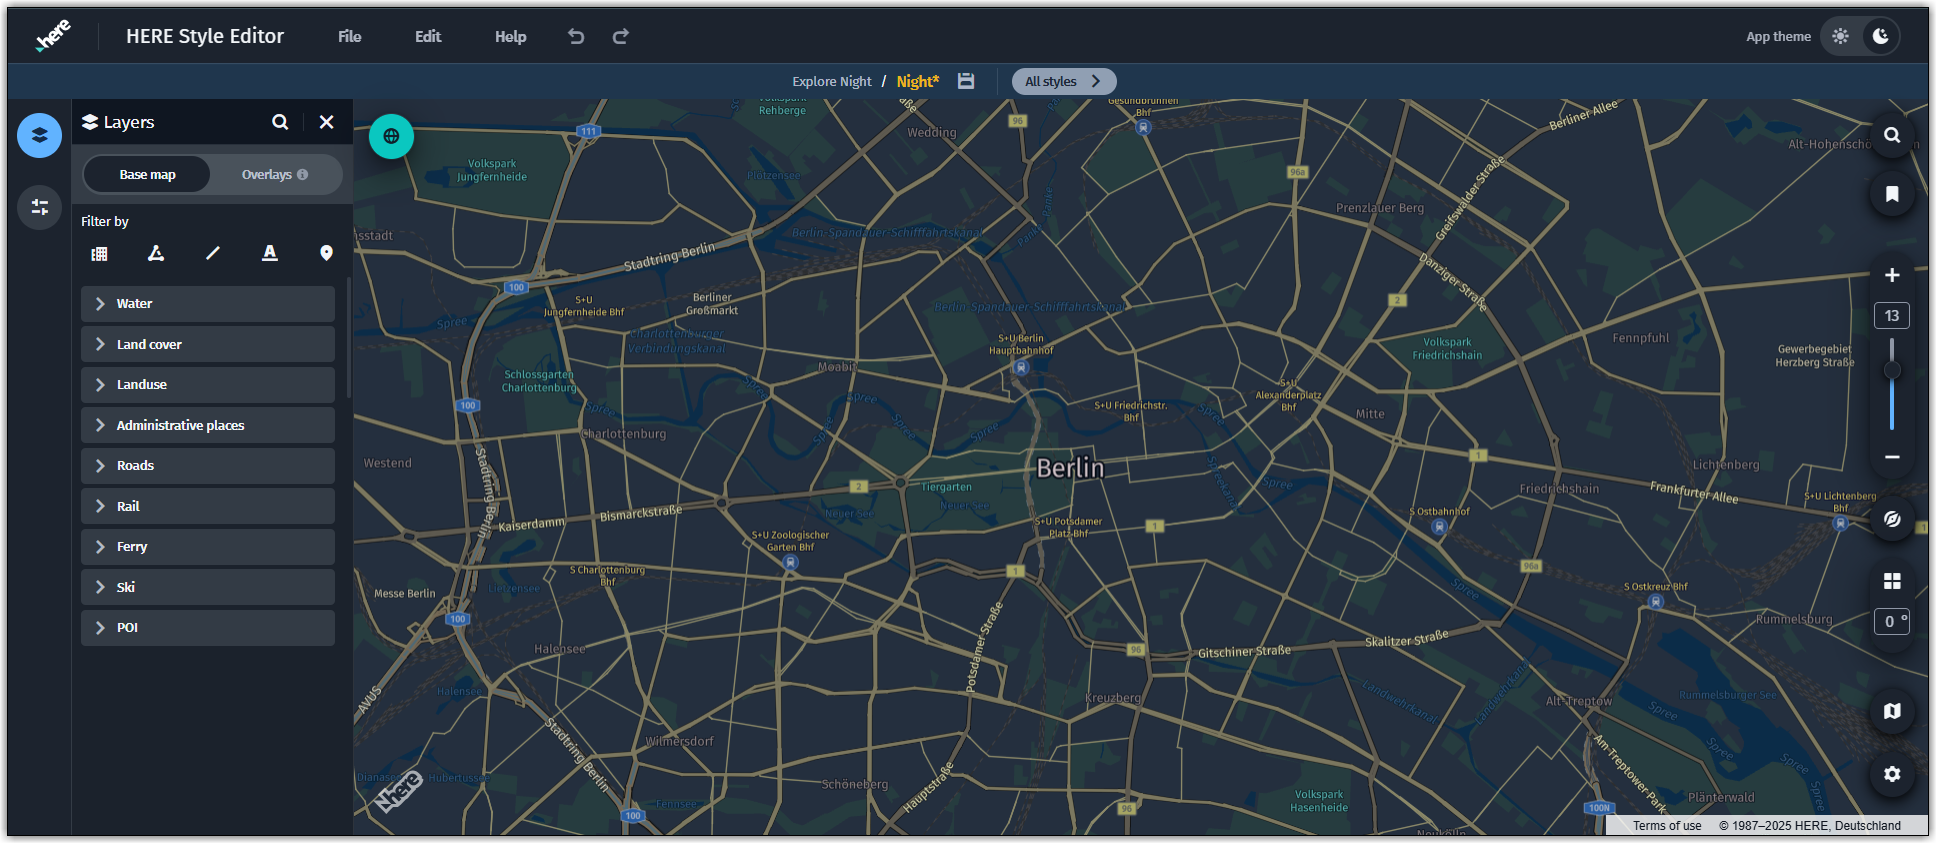
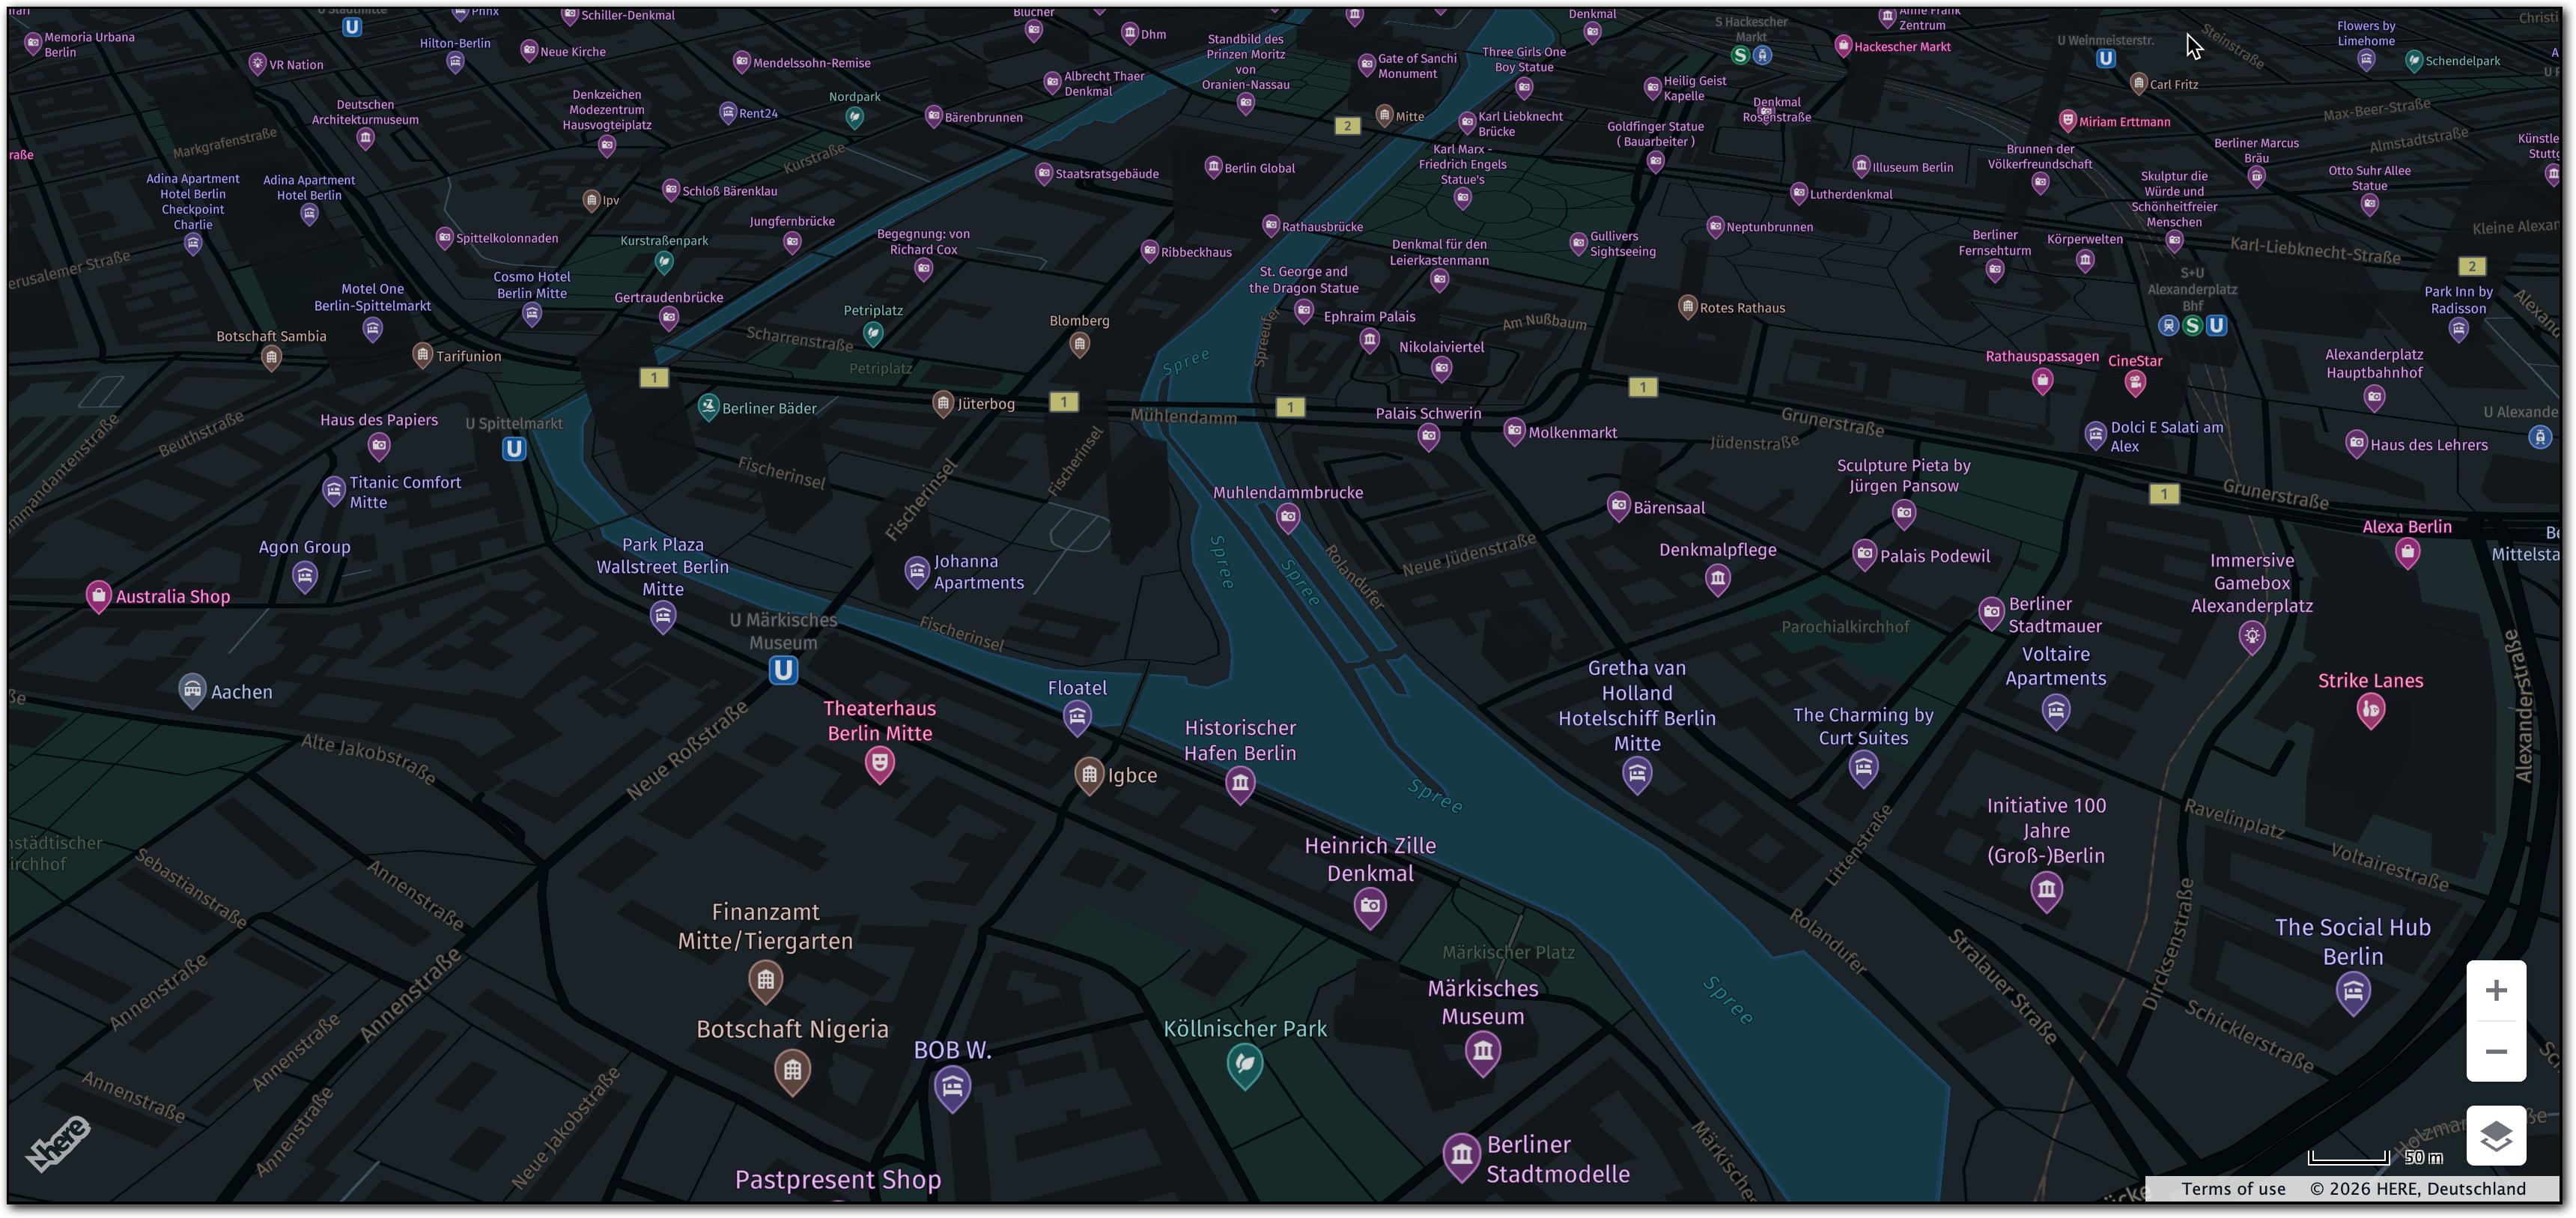
The following tutorial uses a custom dark style, suitable for display in low-light environments, as shown in the following example:
Load a map with custom style
Ensure that the custom HERE Style Editor map style is imported and instatiated as part of the HERE Maps API for JavaScript map layers.
-
In your JavaScript code, declare a variable to hold the style definition. Ensure that this variable is an instance of
H.map.render.harp.Styleand its value is set to your custom style definition, either by referencing it through a path or providing a URL. The following example shows how to reference a custom style through a URL:const style = new H.map.render.harp.Style('https://heremaps.github.io/maps-api-for-javascript-examples/change-harp-style-at-load/data/night.json'); -
Create a custom vector layer using the style that you imported in the previous step:
const vectorLayerDark = platform.getOMVService().createLayer(style);Note
This variable replaces the
defaultLayersvariable, if your are using the code provided as part of the Get started with HERE Maps API for JavaScript article. -
Adjust the
mapvariable to instantiate and display the map by using the custom style layer, as shown in the following example:const map = new H.Map( document.getElementById("mapContainer"), vectorLayerDark, { zoom: 10, center: { lat: 52.5, lng: 13.4 } });
The following figure shows the resulting map, with the custom style applied:
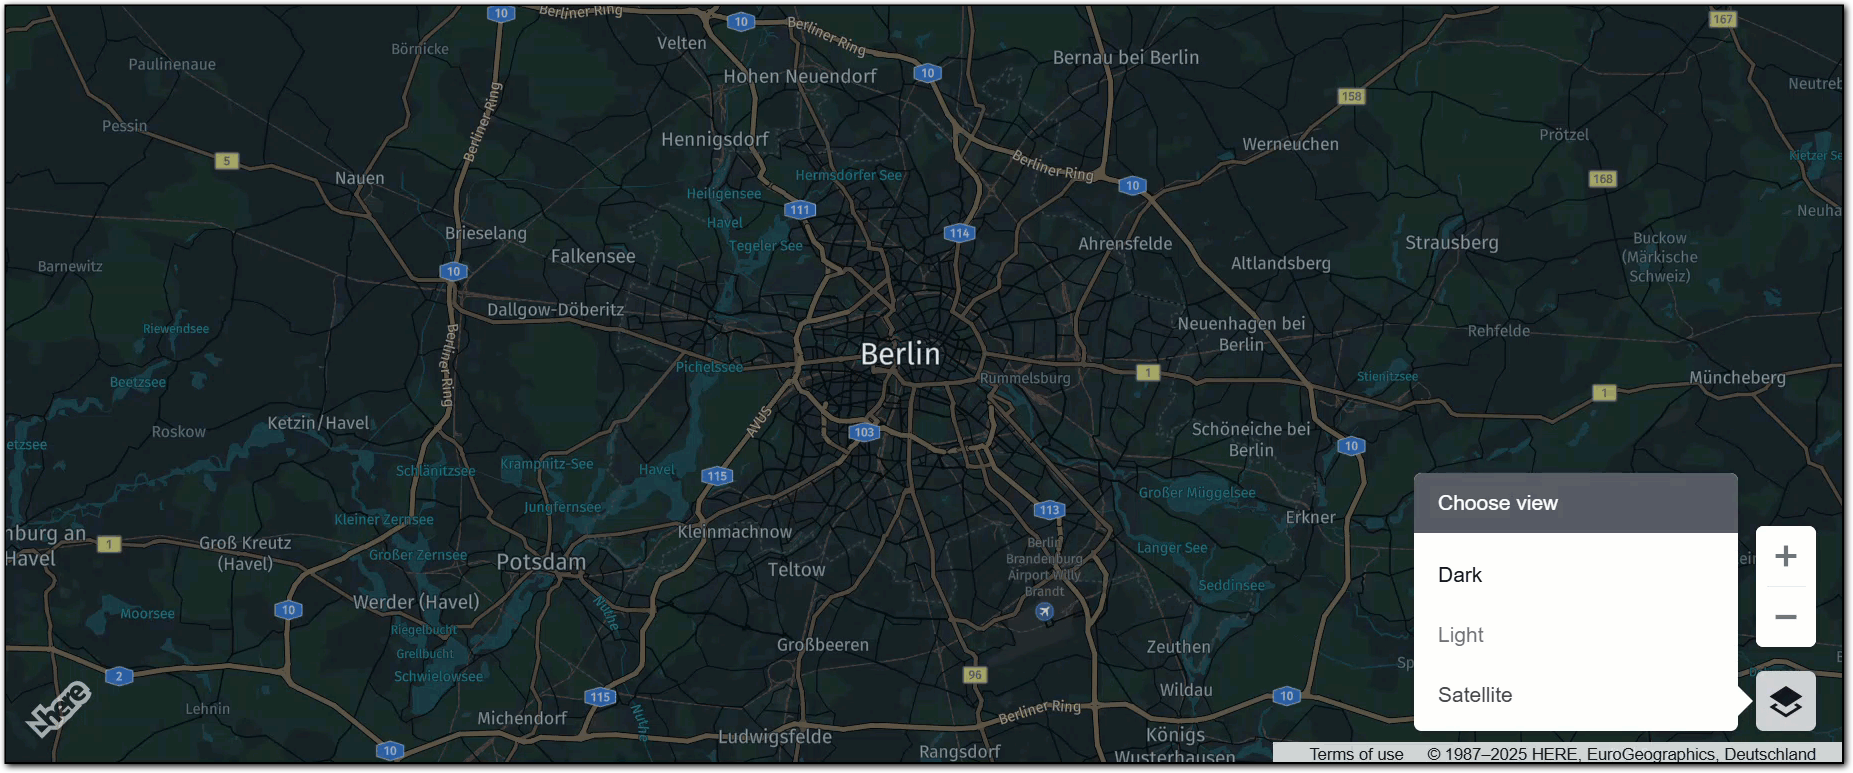
Optional: Adjust the default UI elements
The MapSettingsControl UI element allows you to toggle various map layers. When using a customized map style, ensure that the MapSettingsControl behavior aligns with your chosen map style by adjusting its settings to use the custom style.
-
Import the default map layers to use for non-customized map layers:
const defaultLayers = platform.createDefaultLayers(); -
Configure the
MapSettingsControlto use the custom map style. Configure other controls as needed, as shown in the following example:const mapSettingsControl = new H.ui.MapSettingsControl({ 'baseLayers': [ { 'label': 'Dark', 'layer': vectorLayerDark }, { 'label': 'Light', 'layer': defaultLayers.vector.normal.lite }, { 'label': 'Satellite', 'layer': [defaultLayers.hybrid.liteday.raster, defaultLayers.hybrid.liteday.vector] } ], 'alignment': H.ui.LayoutAlignment.BOTTOM_RIGHT }); const scalebarControl = new H.ui.ScaleBar({ 'alignment': H.ui.LayoutAlignment.BOTTOM_RIGHT }); const zoomControl = new H.ui.ZoomControl({ 'alignment': H.ui.LayoutAlignment.RIGHT_BOTTOM });In this example, the
MapSettingsControlenables switching between three styles:"Dark"(which utilizes a custom style),"Light"(which employs thevector.normal.litestyle), and"Satellite"(which combines hybrid vector and rasterlitestyles). -
Create the custom UI and add the controls:
const ui = new H.ui.UI(map); ui.addControl('zoom', zoomControl); ui.addControl('mapsettings', mapSettingsControl); ui.addControl('scalebar', scalebarControl);
For more information about UI elements in the HERE Maps API for JavaScript, see Customize maps with map controls and UI.
The following figure shows the default UI elements, now using the custom style to toggle the "Dark" map style:
Full source code
The following section provides the full JavaScript code that was used in this tutorial:
Note
Replace the value of the
apikeyattribute with your own HERE API key.
// Initiate and authenticate your connection to the HERE platform:
const platform = new H.service.Platform({
'apikey': 'YOUR_HERE_API_KEY'
});
// Import the custom style
const style = new H.map.render.harp.Style('https://heremaps.github.io/maps-api-for-javascript-examples/change-harp-style-at-load/data/night.json');
const vectorLayerDark = platform.getOMVService().createLayer(style);
// Instantiate (and display) a map:
const map = new H.Map(
    document.getElementById("mapContainer"),
    vectorLayerDark, {
        zoom: 10,
        center: {
            lat: 52.5,
            lng: 13.4
        }
    });
// MapEvents enables the event system.
// The behavior variable implements default interactions for pan/zoom (also on mobile touch environments).
const behavior = new H.mapevents.Behavior(new H.mapevents.MapEvents(map));
// Enable dynamic resizing of the map, based on the current size of the enclosing cntainer
window.addEventListener('resize', () => map.getViewPort().resize());
// Import the default layers to use for some of the UI map views:
const defaultLayers = platform.createDefaultLayers();
//Setup Map Settings and other UI controls
const mapSettingsControl = new H.ui.MapSettingsControl({
    'baseLayers': [
    {
        'label': 'Dark',
        'layer': vectorLayerDark
    },
    {
        'label': 'Light',
        'layer': defaultLayers.vector.normal.lite
    },
    {
        'label': 'Satellite',
        'layer': [defaultLayers.hybrid.liteday.raster, defaultLayers.hybrid.liteday.vector]
    }
    ],
    'alignment': H.ui.LayoutAlignment.BOTTOM_RIGHT
});
const scalebarControl = new H.ui.ScaleBar({
    'alignment': H.ui.LayoutAlignment.BOTTOM_RIGHT
});
const zoomControl = new H.ui.ZoomControl({
    'alignment': H.ui.LayoutAlignment.RIGHT_BOTTOM
});
// Create the custom UI and add the controls
const ui = new H.ui.UI(map);
ui.addControl('zoom', zoomControl);
ui.addControl('mapsettings', mapSettingsControl);
ui.addControl('scalebar', scalebarControl);Next steps
For more information see the following documentation in the API Reference: