How to develop a Spark application
How to develop a Spark application
Objectives: Develop a simple Spark application.
Complexity: Beginner
Time to complete: 30 min
Source code: Download
This tutorial demonstrates how to develop, debug, and run a simple Spark application that reads data from the versioned
layer, and logs this data using log4j.
The tutorial covers the following topics:
- Set up the Maven project
- Write the source code
- Run the application
- Attach the debugger
- Project generation using Maven archetype
Set up the Maven project
Download the source code at the beginning of the tutorial and save it in a folder of your choice, or create a folder
structure for your project from scratch:
develop-spark-application
└── src
    └── main
        ├── java
        └── resources
        └── scala
You can do this with a single bash command:
mkdir -p develop-spark-application/src/main/{java,resources,scala}The Maven POM file is similar to the one in the
Verify Maven Settings example, however, with an updated parent POM and dependencies
sections:
The Parent POM is sdk-batch-bom_${scala.compat.version}, because we need to use Spark-related libraries.
<parent>
    <groupId>com.here.platform</groupId>
    <artifactId>sdk-batch-bom_2.13</artifactId>
    <version>2.88.6</version>
    <relativePath/>
</parent>
The following dependencies are used:
com.here.platform.data.client:local-support_${scala.compat.version}to read data from a local data catalog.com.here.platform.data.client:spark-support_${scala.compat.version}to read data from the data catalogs on the
platform.org.apache.spark:spark-core_${scala.compat.version}to run a Java/Scala Spark Applicationcom.here.platform.pipeline:pipeline-interface_${scala.compat.version}to get information about input catalogs from thePipelineContext.
Dependencies:
<dependencies>
    <dependency>
        <groupId>com.here.platform.data.client</groupId>
        <artifactId>spark-support_${scala.compat.version}</artifactId>
    </dependency>
    <dependency>
        <groupId>org.apache.spark</groupId>
        <artifactId>spark-core_${scala.compat.version}</artifactId>
    </dependency>
    <dependency>
        <groupId>at.yawk.lz4</groupId>
        <artifactId>lz4-java</artifactId>
        <scope>provided</scope>
    </dependency>
    <dependency>
        <groupId>com.here.platform.pipeline</groupId>
        <artifactId>pipeline-interface_${scala.compat.version}</artifactId>
    </dependency>
    <dependency>
        <groupId>com.here.platform.data.client</groupId>
        <artifactId>local-support_${scala.compat.version}</artifactId>
    </dependency>
    <dependency>
        <groupId>com.here.hrn</groupId>
        <artifactId>hrn_${scala.compat.version}</artifactId>
    </dependency>
    <dependency>
        <groupId>org.slf4j</groupId>
        <artifactId>slf4j-reload4j</artifactId>
    </dependency>
</dependencies>
Once you have added all the necessary dependencies to the pom.xml file, the next step would be to write the code of
the application and run it.
Write the source code
As mentioned before, the tutorial shows how to write a simple Spark application that reads data from a version layer and
outputs the data to the console. The data is added to the versioned layer before the execution of your batch application
using the OLP CLI. All data read from the layer is logged to the console
using log4j. The configuration of log4j is located in
the src/main/resources/log4j.propertiesfile.
Let's look at the implementation of this Spark application. In the code snippet below, you can see that
the JavaSparkContext / SparkContext are used to distribute local collections to form a resilient distributed dataset (RDD),
which is a fault-tolerant collection of elements that can be operated on in parallel.
The RDD collection with Partition objects is created using the parallelizing() call in the queryMetadata method
which queries data from the versioned layer using the QueryApi and then parallelizes this data to get RDD.
Once we got the RDD collection with the partition metadata,
the next steps are downloading partitions and mapping these partitions to the human-readable string and then logging to the console.
For more information on what the application does, see the comments in the code below.
/*
 * Copyright (c) 2018-2026 HERE Europe B.V.
 *
 * Licensed under the Apache License, Version 2.0 (the "License");
 * you may not use this file except in compliance with the License.
 * You may obtain a copy of the License at
 *
 *     http://www.apache.org/licenses/LICENSE-2.0
 *
 * Unless required by applicable law or agreed to in writing, software
 * distributed under the License is distributed on an "AS IS" BASIS,
 * WITHOUT WARRANTIES OR CONDITIONS OF ANY KIND, either express or implied.
 * See the License for the specific language governing permissions and
 * limitations under the License.
 */

import com.here.hrn.HRN;
import com.here.platform.data.client.engine.javadsl.DataEngine;
import com.here.platform.data.client.javadsl.DataClient;
import com.here.platform.data.client.javadsl.Partition;
import com.here.platform.data.client.javadsl.QueryApi;
import com.here.platform.data.client.spark.DataClientSparkContextUtils;
import com.here.platform.pipeline.PipelineContext;
import java.io.Serializable;
import java.util.ArrayList;
import java.util.Collections;
import java.util.OptionalLong;
import org.apache.pekko.actor.ActorSystem;
import org.apache.pekko.actor.CoordinatedShutdown;
import org.apache.spark.SparkConf;
import org.apache.spark.api.java.JavaRDD;
import org.apache.spark.api.java.JavaSparkContext;
import org.slf4j.Logger;
import org.slf4j.LoggerFactory;

public class DevelopSparkApplication {

  private static final Logger LOGGER = LoggerFactory.getLogger(DevelopSparkApplication.class);
  private static final String LAYER_ID = "versioned-layer-custom-data";

  public static void main(String[] args) {

    // Create Spark context
    JavaSparkContext sparkContext =
        new JavaSparkContext(new SparkConf().setAppName("SparkPipeline"));

    // Create pipeline context
    PipelineContext pipelineContext = new PipelineContext();

    // Get input catalog hrn from the pipeline-config.conf file
    HRN inputCatalog = pipelineContext.getConfig().getInputCatalogs().get("input-catalog");

    // Create Spark Actor System
    ActorSystem sparkActorSystem = ActorSystem.create("DevelopSparkApplication");

    try {
      // Load the list of available partitions
      // from a catalog layer of a given version as an RDD
      JavaRDD<Partition> layerMetadata =
          queryMetadata(inputCatalog, sparkContext, sparkActorSystem);

      // Create object of the CatalogReader class
      // that allows to read data from the versioned layer
      CatalogReader catalogReader = new CatalogReader(inputCatalog);

      // Read data from the latest version of the catalog,
      // map to human-readable string and save
      // as JavaRDD dataset
      JavaRDD<String> partitionData = layerMetadata.map(catalogReader::read);

      // Log human-readable content
      // from the versioned layer to the console using log4j
      partitionData.foreach(
          partitionContent -> {

            // Fail application if partition content includes `THROW_EXCEPTION` text
            // This condition is used to demonstrate how to create your own Grafana alert
            // and get email if your pipeline failed
            if (partitionContent.contains("THROW_EXCEPTION")) {
              throw new RuntimeException("About to throw an exception");
            }
            LOGGER.info(System.lineSeparator() + partitionContent);
          });

    } finally {
      // Close Spark Actor System
      CoordinatedShutdown.get(sparkActorSystem)
          .runAll(CoordinatedShutdown.unknownReason())
          .toCompletableFuture()
          .join();
    }
  }

  private static JavaRDD<Partition> queryMetadata(
      HRN catalog, JavaSparkContext sparkContext, ActorSystem sparkActorSystem) {

    // Create queryApi for the source catalog
    QueryApi query = DataClient.get(sparkActorSystem).queryApi(catalog);

    // Get latest version of the source catalog
    OptionalLong latestVersion =
        query.getLatestVersion(OptionalLong.of(0)).toCompletableFuture().join();

    ArrayList<Partition> partitions = new ArrayList<>();

    // Get partitions metadata from the versioned layer
    // using the catalog latest version and add
    // their to the partitions list
    query
        .getPartitionsAsIterator(latestVersion.getAsLong(), LAYER_ID, Collections.emptySet())
        .toCompletableFuture()
        .join()
        .forEachRemaining(partitions::add);

    // Distribute a local Java collection to form a resilient distributed dataset
    return sparkContext.parallelize(partitions);
  }
}

// The CatalogReader class is Serializable as instance of this class is executed
// in a Spark lambda and all of the variables it refers to (its closure)
// are serialized to the workers
class CatalogReader implements Serializable {
  private final HRN catalog;

  CatalogReader(HRN catalog) {
    this.catalog = catalog;
  }

  // Download partition_content and map to human-readable string
  String read(Partition partition) {

    // Download partition_content
    byte[] downloadedPartition = readRaw(partition);
    // Map to human-readable string
    String partitionContent = new String(downloadedPartition);

    return partitionContent;
  }

  // Download partition_content
  private byte[] readRaw(Partition partition) {
    return DataEngine.get(DataClientSparkContextUtils.context().actorSystem())
        .readEngine(catalog)
        .getDataAsBytes(partition)
        .toCompletableFuture()
        .join();
  }
}
/*
* Copyright (c) 2018-2026 HERE Europe B.V.
*
* Licensed under the Apache License, Version 2.0 (the "License");
* you may not use this file except in compliance with the License.
* You may obtain a copy of the License at
*
* http://www.apache.org/licenses/LICENSE-2.0
*
* Unless required by applicable law or agreed to in writing, software
* distributed under the License is distributed on an "AS IS" BASIS,
* WITHOUT WARRANTIES OR CONDITIONS OF ANY KIND, either express or implied.
* See the License for the specific language governing permissions and
* limitations under the License.
*/
import org.apache.pekko.actor.{ActorSystem, CoordinatedShutdown}
import com.here.hrn.HRN
import com.here.platform.data.client.engine.javadsl.DataEngine
import com.here.platform.data.client.javadsl.{DataClient, Partition}
import com.here.platform.data.client.model.AdditionalFields
import com.here.platform.data.client.spark.DataClientSparkContextUtils
import com.here.platform.pipeline.PipelineContext
import org.apache.spark.{SparkConf, SparkContext}
import org.apache.spark.api.java.JavaSparkContext
import org.apache.spark.rdd.RDD
import org.slf4j.LoggerFactory
import java.io.Serializable
import java.util
import java.util.OptionalLong
object DevelopSparkApplicationScala {
private val Logger = LoggerFactory.getLogger(classOf[DevelopSparkApplication])
private val LayerId = "versioned-layer-custom-data"
def main(args: Array[String]): Unit = {
// Create Spark context
val sparkContext = new SparkContext(new SparkConf().setAppName("SparkPipeline"))
// Create pipeline context
val pipelineContext = new PipelineContext
// Get input catalog hrn from the pipeline-config.conf file
val inputCatalog = pipelineContext.getConfig.getInputCatalogs.get("input-catalog")
// Create Spark Actor System
val sparkActorSystem = ActorSystem.create("DevelopSparkApplication")
try {
// Load the list of available partitions
// from a catalog layer of a given version as an RDD
val layerMetadata = queryMetadata(inputCatalog, sparkContext, sparkActorSystem)
// Create object of the CatalogReader class
// that allows to read data from the versioned layer
val catalogReader = new CatalogReaderScala(inputCatalog)
// Read data from the latest version of the catalog,
// map to human-readable string and save
// as JavaRDD dataset
val partitionData = layerMetadata.map(catalogReader.read)
// Log human-readable content
// from the versioned layer to the console using log4j
partitionData.foreach(partitionContent => {
// Fail application if partition content includes `THROW_EXCEPTION` text
// This condition is used to demonstrate how to create your own Grafana alert
// and get email if your pipeline failed
if (partitionContent.contains("THROW_EXCEPTION")) {
throw new RuntimeException("About to throw an exception")
}
Logger.info(System.lineSeparator() + partitionContent)
})
} finally {
// Shutdown Spark application
CoordinatedShutdown
.get(sparkActorSystem)
.runAll(CoordinatedShutdown.unknownReason)
.toCompletableFuture
.join
}
}
private def queryMetadata(catalog: HRN,
sparkContext: JavaSparkContext,
sparkActorSystem: ActorSystem): RDD[Partition] = {
// Create queryApi for the source catalog
val query = DataClient.get(sparkActorSystem).queryApi(catalog)
// Get latest version of the source catalog
val latestVersion =
query.getLatestVersion(OptionalLong.of(0)).toCompletableFuture.join
val partitions = new util.ArrayList[Partition]()
// Get partitions metadata from the versioned layer
// using the catalog latest version and add
// their to the partitions list
query
.getPartitionsAsIterator(latestVersion.getAsLong, LayerId, AdditionalFields.AllFields)
.toCompletableFuture
.join
.forEachRemaining(part => partitions.add(part))
// Distribute a local Scala collection to form an resilient distributed dataset
sparkContext.parallelize(partitions)
}
}
// The CatalogReader class is Serializable as instance of this class is executed
// in a Spark lambda and all of the variables it refers to (its closure)
// are serialized to the workers
class CatalogReaderScala(val catalog: HRN) extends Serializable {
// Download partition_content and map to human-readable string
def read(partition: Partition) = {
// Download partition_content
val downloadedPartition = readRaw(partition)
// Map to human-readable string
val partitionContent = new String(downloadedPartition)
partitionContent
}
// Download partition_content
private def readRaw(partition: Partition) =
DataEngine
.get(DataClientSparkContextUtils.context.actorSystem)
.readEngine(catalog)
.getDataAsBytes(partition)
.toCompletableFuture
.join
}Once the code is complete, you can prepare the resources and run the application.
Run the application
To run the application, you need to prepare the resources - create a catalog with a versioned layer and put some custom data to the layer.
In this tutorial, we will run our application locally, therefore, it will be enough for us to create a local catalog. No
authentication or access to the external network are needed to run this tutorial as we use local catalogs. Since
they are contained in a local machine, they are not subject to naming conflicts within your realm and you can use any
name you want.
To create a local input catalog with a versioned layer and generic partitioning scheme, you will need the catalog-configuration.json config file that
contains configuration allowing you to create a catalog with a layer using only one OLP CLI command. You can find this file in
the archive you downloaded at the beginning of the tutorial.
Run the following OLP CLI command from the root of the tutorial folder to create a local catalog:
olp local catalog create batch-catalog batch-catalog --config catalog-configuration.jsonThe structure of the catalog-configuration.json file is as follows:
{
  "id": "develop-spark-input",
  "name": "Simulated road topology data archive (From tutorial) spark-connector-input",
  "summary": "Archive of simulated road topology data",
  "description": "Archive of simulated road topology data.",
  "layers": [
    {
      "id": "versioned-layer-custom-data",
      "name": "versioned-layer-custom-data",
      "summary": "Simulated data.",
      "description": "Simulated road topology data for versioned-layer-custom-data",
      "contentType": "application/octet-stream",
      "layerType": "versioned",
      "volume": {
        "volumeType": "durable"
      },
      "partitioning": {
        "scheme": "generic"
      }
    }
  ]
}
NoteIf a billing tag is required in your realm, update the config file by adding the
billingTags: ["YOUR_BILLING_TAG"]property to thelayersection.
As mentioned in the Set up the Maven project chapter, the PipelineContext is used
to get information about the input catalog from the pipeline-config.conf file.
The structure of the pipeline-config.conf file is as follows:
pipeline.config {

  output-catalog {hrn = "OUTPUT_CATALOG_HRN"}

  input-catalogs {

    input-catalog {hrn = "INPUT_CATALOG_HRN"}
  }
}
Although we do not use the output catalog in our tutorial,
we need to create it to fill the output-catalog field in the config file, otherwise you will get an error about an invalid catalog HRN.
To create a local output catalog, you will need the output-catalog-configuration.json config file that
contains configuration allowing you to create a catalog with a layer using only one OLP CLI command.
You can find this file in the archive you downloaded at the beginning of the tutorial.
The structure of the output-catalog-configuration.json file is as follows:
{
  "id": "develop-spark-output",
  "name": "Simulated road topology data archive (From tutorial) spark-connector-input",
  "summary": "Archive of simulated road topology data",
  "description": "Archive of simulated road topology data.",
  "layers": [
    {
      "id": "versioned-layer-custom-data",
      "name": "versioned-layer-custom-data",
      "summary": "Simulated data.",
      "description": "Simulated road topology data for versioned-layer-custom-data",
      "contentType": "application/octet-stream",
      "layerType": "versioned",
      "volume": {
        "volumeType": "durable"
      },
      "partitioning": {
        "scheme": "generic"
      }
    }
  ]
}
Run the following OLP CLI command from the root of the tutorial folder to create a local catalog:
olp local catalog create output-batch-catalog output-batch-catalog --config output-catalog-configuration.jsonThe next step is to push some data to the input catalog.
To do so, run the following OLP CLI command from the root of the tutorial folder:
olp local catalog layer partition put hrn:local:data:::batch-catalog versioned-layer-custom-data --partitions partition:data/partition_contentAs a result, the following content is published to the versioned layer:
###########################################
## First HERE Platform Spark Application ##
###########################################
Once the input and output catalogs are created and data is published, you need to replace the INPUT_CATALOG_HRN and OUTPUT_CATALOG_HRN placeholders in the pipeline-config.conf file
with the catalog HRNs from the previous command responses.
After you have replaced the placeholders, run the application from the root of the downloaded tutorial using the following
command:
mvn compile exec:exec \
    -Dexec.args="--add-opens=java.base/sun.nio.ch=ALL-UNNAMED -cp %classpath \
    -Dpipeline-config.file=pipeline-config.conf \
    -Dspark.master=local[*] \
    -Dhere.platform.data-client.endpoint-locator.discovery-service-env=local DevelopSparkApplication"
mvn compile exec:exec \
-Dexec.args="--add-opens=java.base/sun.nio.ch=ALL-UNNAMED -cp %classpath \
-Dpipeline-config.file=pipeline-config.conf \
-Dspark.master=local[*] \
-Dhere.platform.data-client.endpoint-locator.discovery-service-env=local DevelopSparkApplicationScala"The command has the following parameters:
The command has the following parameters:
exec.args="-cp %classpath ... DevelopSparkApplication[Scala]– Defines the arguments passed to thejavacommand:--add-opens=java.base/sun.nio.ch=ALL-UNNAMED- add-opens configuration to be able to run Spark application with Java 17.cp %classpath– Sets the classpath to include all dependencies managed by Maven.%classpathis automatically expanded by theexec-maven-pluginto include the compiled classes and dependencies.-Dpipeline-config.file=pipeline-config.conf– Sets a system property to specify the pipeline configuration file.-Dspark.master=local[*]– Configures Apache Spark to run in local mode, utilizing all available CPU cores ([*]).-Dhere.platform.data-client.endpoint-locator.discovery-service-env=local- Configures the Data Client Library to only use local catalogs.DevelopSparkApplication[Scala]– Specifies the main class to be executed.
After the application finishes successfully, you can see the data that was added to the versioned layer in the console.
Attach the debugger
In this chapter you will learn how to debug Spark applications using the capabilities of Intellij IDEA, or rather you
will learn how to attach to the process
to start debugging if you run your program through the console.
In order to configure the debugger, you need to set up the MAVEN_OPTS variable. To do so, stop the running application
and run the following command:
export MAVEN_OPTS=-agentlib:jdwp=transport=dt_socket,server=y,suspend=y,address=5005export MAVEN_OPTS=-agentlib:jdwp=transport=dt_socket,server=y,suspend=y,address=*:5005The option has the following parameters:
address– the port that will be used for debugging. The tutorial uses port5005, however, you can use any
free port.server=y– specifies that the process should listen for incoming debugger connections (act as a server).suspend=y– specifies that the process should wait until the debugger has been connected.
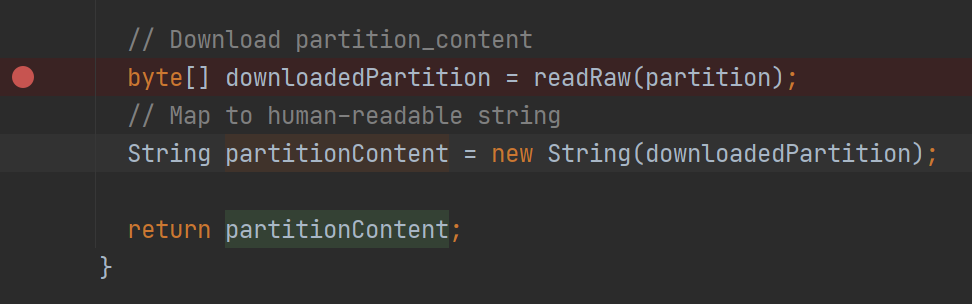
Let's set the breakpoint before we attach to the running application, for example, in the CatalogReader class where we download and map the partition.
From this line, you can get a lot of useful information about the partition you downloaded:
Now you can run your application from the root folder using the following command:
mvn compile exec:exec \
    -Dexec.args="--add-opens=java.base/sun.nio.ch=ALL-UNNAMED -cp %classpath \
    -Dpipeline-config.file=pipeline-config.conf \
    -Dspark.master=local[*] \
    -Dhere.platform.data-client.endpoint-locator.discovery-service-env=local DevelopSparkApplication"
mvn compile exec:exec \
-Dexec.args="--add-opens=java.base/sun.nio.ch=ALL-UNNAMED -cp %classpath \
-Dpipeline-config.file=pipeline-config.conf \
-Dspark.master=local[*] \
-Dhere.platform.data-client.endpoint-locator.discovery-service-env=local DevelopSparkApplicationScala"Make sure that line Listening for transport dt_socket at address: 5005 appears in the logs.
Now we can attach to the process using Run > Attach to Process and select the process with the specified 5050
port.

Once you attach to the process, the debugger should stop at the breakpoint as soon as application starts to download the partition.
Now you can step through the code and inspect the content of the variables and the stack trace.

You can also use the
standard Java Debugger
instead of the debugger in the Intellij IDEA.
Project generation using Maven archetype
You can use a Maven archetype to bootstrap a Maven project for a Spark application. In this case, the project is set up faster with the following tasks completed automatically:
- Inclusion of the SDK BOM file.
- Creation of the Maven profile that generates the fat JAR for the platform.
The HERE Data SDK offers the following archetypes:
batch-direct1ton-java-archetypeandbatch-direct1ton-scala-archetypefor Direct1toN compilation for Java and Scalabatch-directmton-java-archetypeandbatch-directmton-scala-archetypefor DirectMtoN compilation for Java and Scalabatch-reftree-java-archetypeandbatch-reftree-scala-archetypefor RefTree compilation for Java and Scalabatch-mapgroup-java-archetypeandbatch-mapgroup-scala-archetypefor MapGroup compilation for Java and Scala
For more information on batch pipeline design patterns, see the Data Processing Library
and Compilation Patterns.
To create a Spark application project using the DirectMtoN compiler, use the following command for the Java project:
mvn archetype:generate -DarchetypeGroupId=com.here.platform \
-DarchetypeArtifactId=batch-directmton-java-archetype \
-DarchetypeVersion=1.0.1060 \
-DgroupId=com.here.platform.tutorial \
-DartifactId=develop-spark-application \
-Dversion=1.0-SNAPSHOT \
-Dpackage=com.here.platform.tutorial
mvn archetype:generate -DarchetypeGroupId=com.here.platform ^
-DarchetypeArtifactId=batch-directmton-java-archetype ^
-DarchetypeVersion=1.0.1060 ^
-DgroupId=com.here.platform.tutorial ^
-DartifactId=develop-spark-application ^
-Dversion=1.0-SNAPSHOT ^
-Dpackage=com.here.platform.tutorialFor the Scala project use the following command:
mvn archetype:generate -DarchetypeGroupId=com.here.platform \
-DarchetypeArtifactId=batch-directmton-scala-archetype \
-DarchetypeVersion=1.0.1060 \
-DgroupId=com.here.platform.tutorial.scala \
-DartifactId=develop-spark-application \
-Dversion=1.0-SNAPSHOT \
-Dpackage=com.here.platform.tutorial.scala
mvn archetype:generate -DarchetypeGroupId=com.here.platform ^
-DarchetypeArtifactId=batch-directmton-scala-archetype ^
-DarchetypeVersion=1.0.1060 ^
-DgroupId=com.here.platform.tutorial.scala ^
-DartifactId=develop-flink-application ^
-Dversion=1.0-SNAPSHOT ^
-Dpackage=com.here.platform.tutorial.scalaTo generate a project using another compiler, change the value of the -DarchetypeArtifactId property to the desired archetype ID.
Build your project to run locally
To build your project, run the following command in your project folder.
mvn installBuild your project to run on the platform
To run your pipeline on the platform, you need to build a fat jar first. To build it, use the following command.
mvn install -PplatformFor more information on building a fat jar, see the Include the SDK in your project.
Conclusion
In this tutorial, you have learned the stages of the Spark application development. To learn how to run a Spark application
on the platform and to get acquainted with such monitoring tools as Splunk, Grafana, Spark UI, and Platform Billing
Page, see the Run a Spark application on the platform tutorial.
Further information
For more details on the topics covered in this tutorial, see the following sources:
- For more information on how to develop Spark applications, see the
Apache Spark Programming Guides. - For more information on how to work with local catalogs using OLP CLI, see the
OLP CLI Guide. - For more information on how to attach to process to debug your application, see the
Debugging code Developer Guide
Updated last month