Get started with Data Inspector Library
This topic outlines how to get started quickly using the Data Inspector Library on the HERE platform.
Get a HERE account
Obtain access to the HERE platform through your organization administrator's invitation or contact us to get started.
- If your company has already established a HERE platform organization, contact your organization admin who can invite you to join the organization.
- If your company hasn’t established a HERE platform organization yet, contact us.
Get your credentials
After you have created your HERE account, you must get your credentials. See Authentication and Authorization for more information.
Install Node.js
Install Node.js version 12.x and above. You must install at least version 10.14.0.
Configure the npm package manager
Configure the npm package manager bundled with Node.js. This is necessary to run the commands in this guide.
Install a WebGL enabled browser to see visualizations
Google Chrome, Mozilla Firefox, and Apple Safari support WebGL. You can test your browser at https://get.webgl.org/.
Install the Data Inspector Library
The Data Inspector Library consists of packages that you can obtain from the HERE Artifactory Repository. For a complete list of Data Inspector Library modules, see Library Modules Overview.
Create a simple web app
Create a simple web app that visualizes static GeoJSON data with tooltips.
You can complete this example in three steps as follows:
An integrated development environment (IDE) with TypeScript support is required to create this sample app, such as Visual Studio Code.
Authentication and authorization
Before you can use the Data INspector Library, as well as run the embedded example applications, you need to obtain platform and repository credentials from the HERE platform.
HERE platform credentials
The local Data Inspector application requires HERE platform credentials to authenticate and access data in catalogs and layers.
Platform credentials are the here.access.key.id and here.access.key.secret from the credentials.properties file downloaded from the platform.
For more information, see Manage API and OAuth access.
Repository credentials
You need credentials to access the HERE Artifactory Repository that serves Data Inspector Library projects from a private npm registry.
Repository credentials are stored in a Maven settings.xml file. You can generate and download this file from the HERE platform. Then, place the file into the .m2 folder in your home repository. The username and password tags in settings.xml contain your credentials to the HERE Artifactory Repository.
For more information, see the Repository credentials chapter of the Identity and Access Management Guide.
Basic authentication flow
A basic HERE platform authentication flow is as follows:
- The client app creates a signed request with
here.access.key.idandhere.access.key.secret. - The client app sends a request to the HERE account.
- The HERE account responds with a JWT token for valid credentials.
- All client app requests are signed by the JWT token.
- The data service authorizes access with the JWT token.
You can use an alternative flow to avoid entering credentials at each app launch. For protected servers with other means of authentication, such as an intranet login, a token can be returned to a client app.
Enter your HERE platform credentials
Enter your HERE platform credentials into the Authentication form in the local Data Inspector window, which can be found when when running {{Data Inspector Library}} example applications. 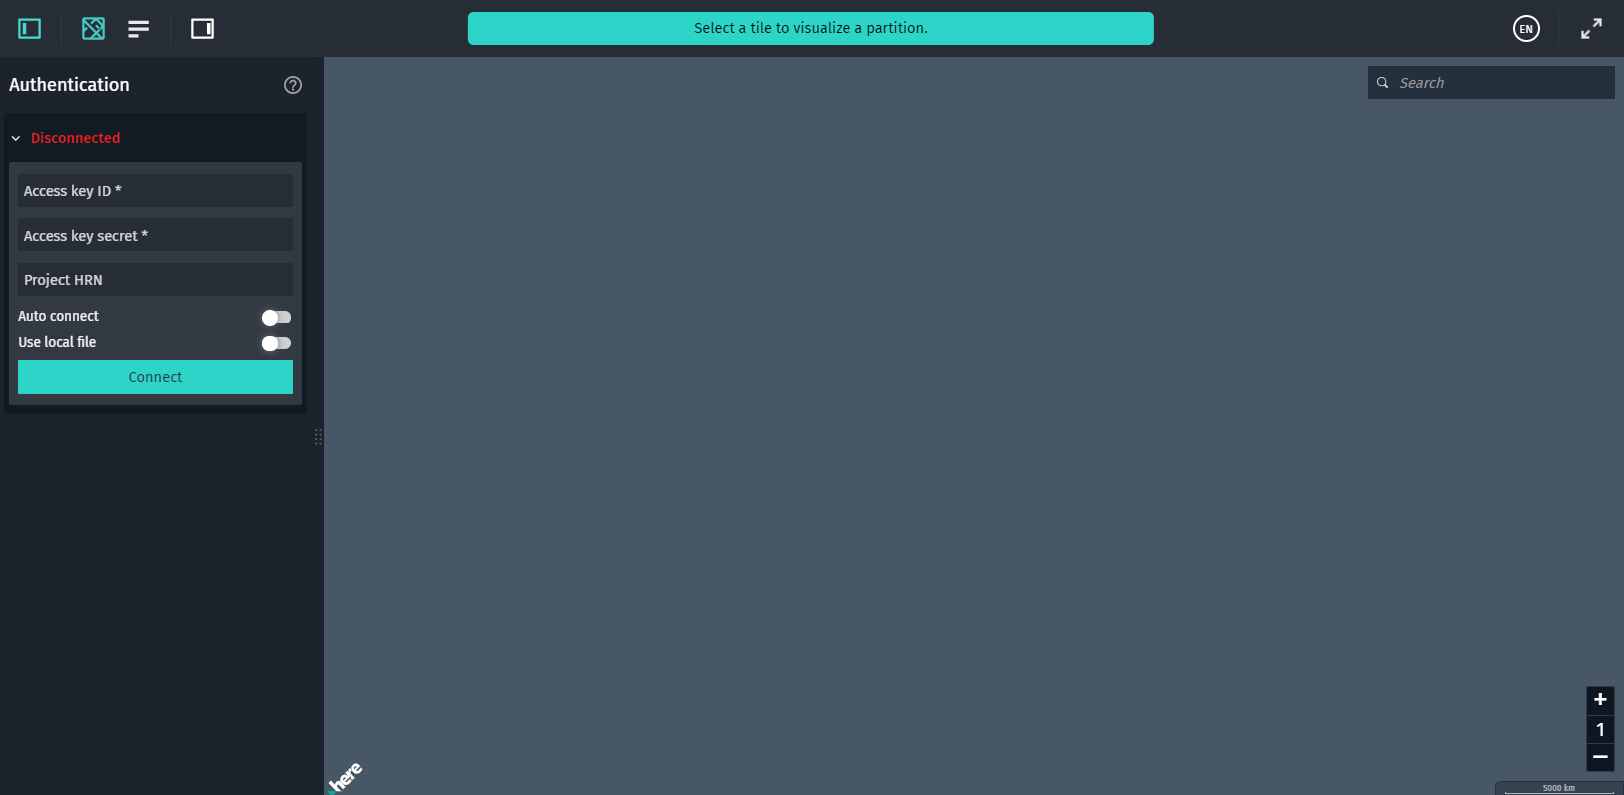 First, you must enter the values of the
 here.access.key.id and here.access.key.secret properties into the Authentication form. You can get these details from your personal credentials.properties file.The web app automatically generates an access token for you, and once the token expires, the web app automatically requests a new one.
Second, if you want your app to access catalog data from within a specific project, you'll need the HERE Resource Name (HRN) of that project. Projects are used to track the usage of catalogs that are on the credit-usage report. You can get the project HRN you need by going to the Project Manager on the HERE platform.
Note
To work with catalogs and layers, your application needs access permissions that are granted by catalog owners. For more information, see Manage apps.
Auto connect
This feature is available for both authentication modes. It allows you to persist the connection to the HERE platform.
Once you establish a connection and toggle this switch on, the web app automatically reconnects whenever you refresh your browser window. The web app reuses the credentials of the first successful connection.
Note
Auto connect is disabled after you end your session by closing the tab in your browser.
Use a local authentication file
This method uses an access key ID and access key secret, but you store them in a config.json file.
Using this method, you do not have to enter the details into the Authentication form.
You will find an example of this file called config.json.example in the root directory of the web app. Save a copy of this file as config.json, remove the commented header, and replace the placeholder values with your credentials.
To use this option, select the Use local file option. Fields for entering your access key and secret hide, and the application switches to the local config.json file.
Note
Do not share your local authentication file. This method of authentication should be used for local development only. If you plan to host the application, or share access to your web app with other users, remove the
config.jsonfile from the web application folder. Otherwise, your access credentials will be visible to anyone who has access to the web app.
Configuration
After obtaining your repository credentials, you must change the default npm registry to the one from which Data Inspector Library projects are served. To change the registry, run the following command:
npm config set @here:registry https://repo.platform.here.com/artifactory/api/npm/here-node/Then log in to the HERE Artifactory Repository with the following command:
npm login --registry=https://repo.platform.here.com/artifactory/api/npm/here-node/ --scope=@hereEnter your repository username and password from the settings.xml, as well as your email address.
Note
The command-line interface might not provide any visual feedback while you are entering your password. For example, you cannot see placeholder characters while typing your password, and > the cursor might stay in the same position.
Set up npm to work through a proxy
To set up npm to work through a proxy, you need to set the proxy and https-proxy settings with the following commands:
npm config set proxy http://proxy.company.com:8080and
npm config set https-proxy http://proxy.company.com:8080Replace the URL http://proxy.company.com:8080 with the URL of your proxy server.
Note
If you have an authenticated proxy, then the URL must contain a
Username:Passwordpair. If you have special characters in your password, enclose theUsername:Passwordpair in double quotes as follows:npm config set proxy http://"Username:Password"@proxy.company.com:8080and
npm config set https-proxy http://"Username:Password"@proxy.company.com:8080
Once you have access to the HERE Artifactory Repository, you can find the projects for the Data Inspector Library under the @here namespace. Changelog API reference