Pipelines API pipeline lifecycle
The operational lifecycle of a typical pipeline follows a consistent pattern. Whether you use the portal GUI or the CLI, this pattern has three major phases:
The first two steps are summarized in Figure 1. Phase 1 is done in a local development environment. Phase 2 can be done using the portal GUI or the OLP CLI.

Create the pipeline application
The goal of Phase 1 is to create a pipeline JAR file. This JAR file contains the code for the pipeline framework, the data ingestion, the data output, and all of the data transformation logic required to implement the intended data processing workflow.
To simplify this task, HERE provides project archetypes to supply as much of the boilerplate code as possible, and a framework to contain everything else. Different Maven archetypes set up a project for either a batch pipeline or a stream pipeline. These archetypes also provide all of the interface code needed to execute the pipeline in the proper framework within the platform. The only thing you need to provide is the data processing code itself. The pipeline JAR file is actually a Fat JAR file containing all of the libraries and other assets needed by the pipeline.
-
Define the business requirements for the pipeline: data source, data type/schema, process flow, and desired results of data processing.
-
Based on the business requirements, determine the workflow, formally define the data schema, and develop the data transformation algorithms. The algorithms and data ingestion/output are implemented in Java or Scala language and integrated into the pipeline project.
-
The Java/Scala code is compiled. The result is a JAR file that contains the code for data ingestion, data processing, and outputting the processed data. All the required libraries and other assets are added to make a Fat JAR file. The resulting pipeline JAR file is unique, transportable, and reusable.
NoteCredentials required
You must register every pipeline application with the HERE platform before it can be used. This process is described in the Identity & Access Management Guide. For specific procedural information, see the article Manage apps.
The Phase 1 process shown here is actually more complex than Phase 2, since it is not a simple task to design the transformation algorithms and translate them into compilable code. Nor does this process address the ancillary steps of testing, reviewing, or validating the pipeline code.
A good description of the detailed process of creating a batch pipeline can be found in the Data Processing Library Developer Guide using both Java and Scala.
See the following articles for more information:
Deploy the pipeline
You use pipeline JAR files to deploy a pipeline. Pipeline JAR Files are designed for either batch or stream processing. They are also designed to implement a specific data processing workflow for a specific data schema. There are also runtime considerations that are specified during deployment.
Select the pipeline JAR file to be deployed and do the following to prepare it for deployment:
-
Create a pipeline object - Set up an instance of a pipeline and obtain a pipeline ID (or pipeline HRN if Pipelines API v3 is used).
-
Create a template - Upload the pipeline JAR file and obtain a template ID (or template HRN if Pipelines API v3 is used)'. Specify the input and output catalog identifiers.
-
Create a pipeline version - Create an executable instance of the pipeline and register the runtime requirements for the deployed pipeline. A pipeline version ID (UUID for Pipelines API v2 or a sequence number for Pipelines API v3)' and is assigned upon successful completion of this step. The pipeline is now deployed and ready to be activated.

Activate the pipeline
To execute a pipeline, you must activate one of its pipeline versions.
To activate the pipeline version, perform an Activate operation on the pipeline version ID. A batch pipeline can be activated to run On-demand (Run Now) OR it can be Scheduled. With the Scheduled option, the batch pipeline version can be executed when the input catalogs are updated with new data or based on a time schedule. See the following for details on various modes of execution.
Execution modes for activating a pipeline
There are several execution modes available for activating a pipeline version, as summarized in the following table:
| Pipeline type | Execution mode: On-demand | Execution mode: Scheduled | Execution mode: Time Schedule |
|---|---|---|---|
| Batch | The pipeline enters the Scheduled state and immediately changes to the Running state to attempt to process the specified input data catalogs. When the job is done, the pipeline returns to the Ready state. No further processing is done, even if the input catalogs receive new data. Additional processing must be initiated manually. | The pipeline version enters the Scheduled state for a brief period of time and then changes to the Running state to begin processing the existing data in the input catalogs. After the job is completed, it returns to the Scheduled state where it waits for new data to be available in the input catalogs. Only new data is processed for each subsequent run. | The pipeline enters the Scheduled state and waits for the next attempt time of the time schedule. Once the next attempt time has arrived, it changes to the Running state to begin processing the existing data in the input catalogs. After the job is completed, it returns to the Scheduled state where it waits for next attempt time. |
| Stream | Not supported. At the moment, there's no option to specify an end time for a stream pipeline. Therefore, it cannot be run once. | The pipeline begins in the Scheduled state for a brief period of time and then changes to the Running state to begin processing the data stream from the specified input catalog. The pipeline continues to run (and stays in the Running state) until it is paused, canceled, or deactivated. | Not supported because stream pipelines process data continuously. |
When you activate a pipeline version, a request is made to the pipeline service to initiate the execution of pipeline version. A job is created to start the execution and a job ID is generated. When the job starts, a URL for all the logs of the job is returned by the pipeline service.

Job failures in Scheduled and Time Scheduled batch pipelines
If an individual job in a Scheduled batch pipeline version fails, the pipeline version returns to the Scheduled state. If the failure occurred after the job published a new version of the output catalog, the pipeline runs if new data is present in the input catalog. Alternatively, the pipeline will run immediately, reprocessing the same data as the failed job.
Individual job failures in a Time Scheduled batch pipeline are processed the same as successful completions. The pipeline version returns to the Scheduled state and runs again at the next attempt per the scheduled time.
This mechanism provides resiliency to intermittent failure. There are cases however, where a pipeline fails consistently and requires direct intervention to fix (for example, corrupted data in the input catalog). If several jobs in a pipeline version fail consecutively, the pipeline version returns to a Ready state and must be activated again after addressing the failures.
The consecutive failure count is reset by Activate, Resume, and Upgrade operations. The number of failures at which the pipeline version is deactivated varies by realm, with 10 being the default.
A notification email is sent to the email address configured for the pipeline when it's deactivated due to consecutive failures.
NoteDeployment tips
- The logging URL is returned automatically when you activate from the web portal or the CLI.
- Additional pipeline versions can be created using the same template or another template. Each pipeline version is distinguished by its own unique pipeline version ID.
- A pipeline can have only one (1) pipeline version
running/activeat any time. This life cycle applies, with minor variations, to both batch and stream pipelines.
For more detailed information on how this all works, see:
Manage the pipeline
Once the pipeline is activated and running, it responds to the following operations:
- Cancel
- Deactivate
- Delete
- Pause
- Resume
- Show
- Upgrade
To check the current state of the pipeline version, you can review it in the web portal or use the CLI commands.
The basic pipeline runtime environment looks like this:

Terminate a pipeline version
A running pipeline version can be terminated via the following operations:
-
Pause
-
For a batch pipeline version, the current job is completed and future jobs are paused. Thus, the pause may not happen quickly.
-
For a batch pipeline version that is run on-demand, the Pause operation is not available. Such a pipeline can only be canceled.
-
For a stream pipeline version, the current state is saved and the job is gracefully terminated.
-
-
Cancel
- For a batch or stream pipeline version, the running job is immediately terminated without saving the state and the pipeline version moves to the
Readystate.
- For a batch or stream pipeline version, the running job is immediately terminated without saving the state and the pipeline version moves to the
-
Terminate (internal)
- This is an internal operation only. The current job terminates with a success or failure. If the pipeline version is configured to run again, it will be set to a
Scheduledstate, otherwise it will be set toReadystate.
- This is an internal operation only. The current job terminates with a success or failure. If the pipeline version is configured to run again, it will be set to a
NoteResume a paused pipeline version
A paused pipeline version can be restarted using the Resume operation. For a stream pipeline version, the job resumes from the saved state of the paused job. For a batch pipeline version, the pipeline version state is changed toScheduledand the next job is created based on the execution mode.
A canceled pipeline version cannot be resumed. Instead, it must be activated to return to aRunningorScheduledstate.
Delete a pipeline
To delete a pipeline, its set of pipeline versions and associated content, please follow these instructions.
Note that no running or paused pipeline versions can be deleted, which means that all pipeline versions to be deleted must be in the Ready state.
An error is returned if one or more of its pipeline versions are either running or paused.
Upgrade a pipeline
The purpose of upgrading a pipeline is to replace the existing pipeline version with a new pipeline version that is based on a different pipeline JAR file and/or configuration than the original.
Upgrading a pipeline is possible for both Stream and Batch pipelines, but there are subtle differences:
- In case of a stream pipeline, a savepoint will be taken of the running job and processing will be terminated immediately. The savepoint will be passed to the upgraded pipeline version to start processing from.
- In case of a batch pipeline, the running job will not be terminated. Instead, it is allowed to complete its processing, after which the pipeline version will return to the
Readystate, while the upgraded pipeline version will be in theScheduledstate. In other words, the upgrade does not take effect until the next time the pipeline is scheduled to run.
Upgrade states
Stream or batch pipelines can only be upgraded when the version is in the Running or Paused state. The version used to upgrade to will be in the Ready state, since there can be only one version of the pipeline that is not in that state. If you wish to upgrade a pipeline that is in he Scheduled state, you can simply deactivate it and then activate the version you wish to upgrade to.
Upgrade sequence
-
Create a new pipeline version using an existing or new template.
-
Execute the Upgrade operation from the portal.
As part of the upgrade process, the old pipeline version is paused and the new pipeline version is activated. After a couple of minutes, the old pipeline version moves to the Ready state and the new pipeline version moves to the Scheduled state.
See the image below to understand the process.

Update a pipeline
You can change the name, description, and contact email properties associated with your pipeline instance. All other properties cannot be updated.
Update sequence
- Cancel the running pipeline version. The job will stop processing and transition the pipeline version into a
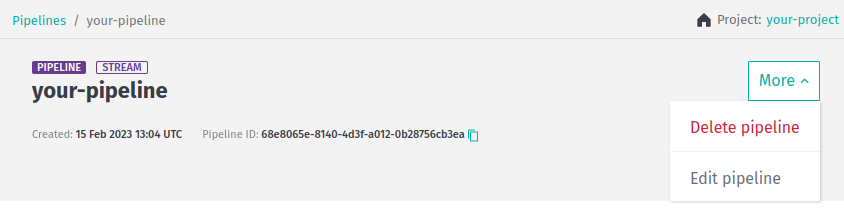
Readystate. - Use the
Edit pipelineoption of theMoremenu in the top right-hand corner of the page related to specific pipeline to start editing it:
- After you save the changes, the pipeline instance has its metadata updated and pipeline versions associated with that pipeline can now be run with the new metadata associated with them.
Group ID/Project ID
Whenever you create a pipeline, you must either assign it to a group by specifying the group ID or a project by specifying the project ID.
Only users and applications that are part of the group or project can access the pipeline. To keep your pipelines private,
restrict the access to yourself or to a group of registered users. These users are identified by the group ID or project ID.
You must have a valid group ID or project ID to work with a pipeline.
For more details on groups and projects, see the Identity and Access Management Guide.
CautionStream pipelines must use a unique application ID
A potential problem exists when you use the same group (or project) ID for a given combination of an application ID, layer ID,
and catalog ID that can lead to partial data consumption issues. To avoid this situation, create a different group
or project for every stream pipeline, thus ensuring that each pipeline uses a unique application ID.
For more information, see Stream processing best practices.