Vector tiles with the HERE Maps API for JavaScript
The HERE Maps API for JavaScript provides seamless integration with the HERE Vector Tile API, enabling you to display high-quality, scalable maps in web applications. Vector tiles offer superior performance and flexibility compared to raster tiles, delivering crisp visuals at any zoom level while supporting dynamic styling and interactivity.
This tutorial demonstrates how to integrate the HERE Vector Tile API with the HERE Maps API for JavaScript to create interactive web maps.
Set up the HTML structure and dependencies
Create the basic HTML document and include the required HERE Maps API for JavaScript libraries:
<!DOCTYPE html>
<html>
  <head>
    <script type="text/javascript" src="https://js.api.here.com/v3/3.2/mapsjs-core.js"></script>
    <script type="text/javascript" src="https://js.api.here.com/v3/3.2/mapsjs-service.js"></script>
    <script type="text/javascript" src="https://js.api.here.com/v3/3.2/mapsjs-mapevents.js"></script>
    <script type="text/javascript" charset="utf-8" src="https://js.api.here.com/v3/3.2/mapsjs-ui.js"></script>
    <link rel="stylesheet" type="text/css" href="https://js.api.here.com/v3/3.2/mapsjs-ui.css" />
    <meta name="viewport" content="initial-scale=1.0, width=device-width" />
    <style>
        body {width: 100%; height: 100%; position: absolute; margin: 0px; padding: 0px; overflow: hidden;}
        #mapContainer {position:absolute; top:0; bottom:0; width:100vw; height: 100vh;}
    </style>
  </head>
  <body>
    <div id="mapContainer"></div>
  </body>
</html>
This HTML structure includes all necessary libraries, sets up responsive styling, and creates a container for the map.
Initialize the platform and create the map
Add JavaScript to authenticate with HERE services and create the map:
// Initialize the platform with your API key
const platform = new H.service.Platform({
'apikey': 'YOUR_HERE_APIKEY'
});
// Get the default map layers
const defaultLayers = platform.createDefaultLayers();
// Create the map
const map = new H.Map(
document.getElementById("mapContainer"),
defaultLayers.vector.normal.map, {
zoom: 16,
center: {
lat: 52.5,
lng: 13.4
}
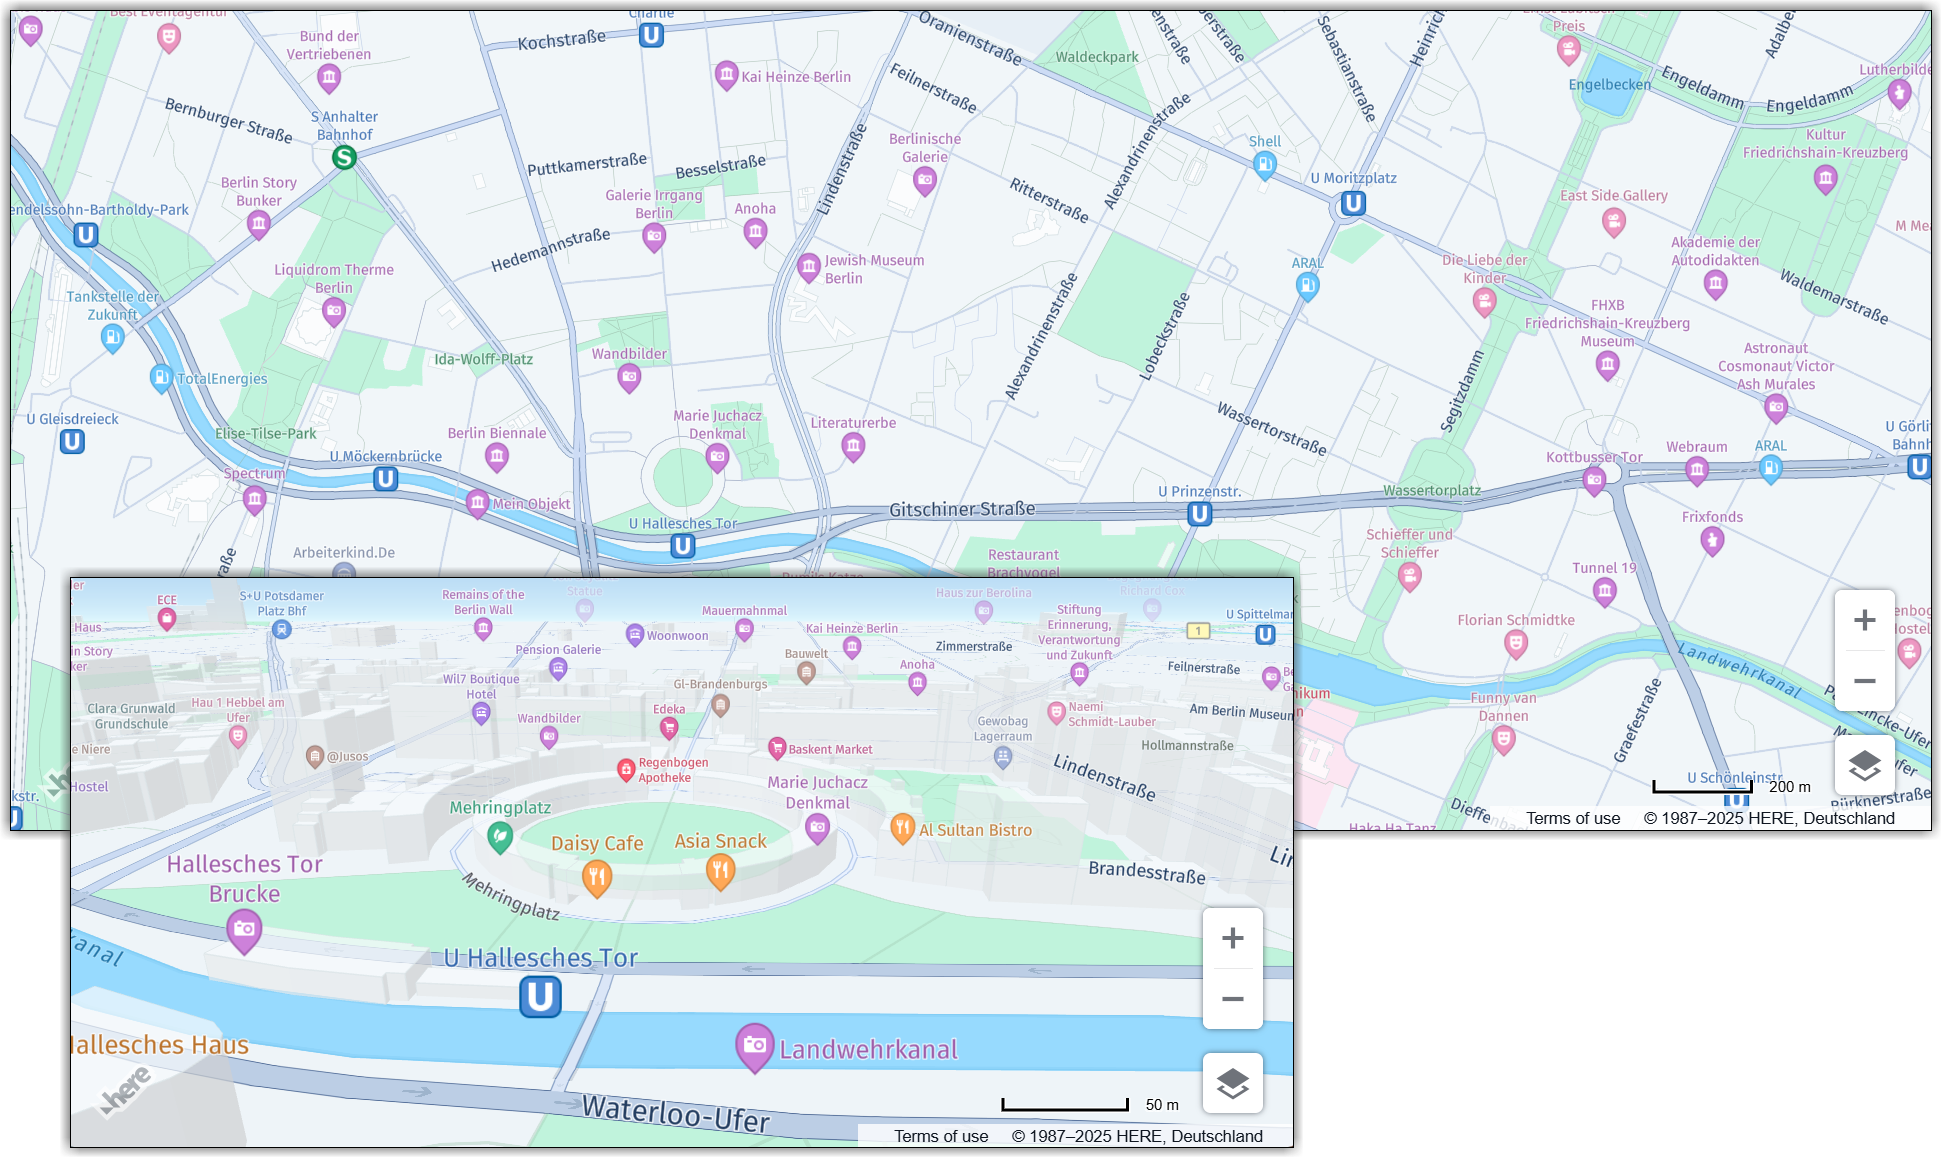
});The code from the previous example creates a vector tile map centered on Berlin, Germany.
Note
Replace
YOUR_HERE_APIKEYwith your actual API key from the HERE Developer Portal.
Add interactivity and UI controls
Enable user interactions and add standard map controls:
// Enable map interactions (pan, zoom, etc.)
const behavior = new H.mapevents.Behavior(new H.mapevents.MapEvents(map));

// Add responsive resizing
window.addEventListener('resize', () => map.getViewPort().resize());

// Create default UI controls (zoom buttons, etc.)
const ui = H.ui.UI.createDefault(map, defaultLayers);
This adds pan and zoom capabilities, responsive design support, and map controls such as zoom buttons.
Complete basic example
The complete HTML file that incorporates all the preceding steps:
<!DOCTYPE html>
<html>
  <head>
    <script type="text/javascript" src="https://js.api.here.com/v3/3.2/mapsjs-core.js"></script>
    <script type="text/javascript" src="https://js.api.here.com/v3/3.2/mapsjs-service.js"></script>
    <script type="text/javascript" src="https://js.api.here.com/v3/3.2/mapsjs-mapevents.js"></script>
    <script type="text/javascript" charset="utf-8" src="https://js.api.here.com/v3/3.2/mapsjs-ui.js" ></script>
    <link rel="stylesheet" type="text/css" href="https://js.api.here.com/v3/3.2/mapsjs-ui.css" />
    <meta name="viewport" content="initial-scale=1.0, width=device-width" />
    <style>
        body {width: 100%; height: 100%; position: absolute; margin: 0px; padding: 0px; overflow: hidden;}
        #mapContainer {position:absolute; top:0; bottom:0; width:100vw; height: 100vh;}
    </style>
  </head>
  <body>
    <div id="mapContainer"></div>
    <script>
     // Initiate and authenticate your connection to the HERE platform:
     const platform = new H.service.Platform({
         'apikey': 'YOUR_HERE_APIKEY'
     });

     // Obtain the default map types from the platform object:
     const defaultLayers = platform.createDefaultLayers();

     // Instantiate (and display) a map:
     const map = new H.Map(
         document.getElementById("mapContainer"),
         defaultLayers.vector.normal.map, {
             zoom: 16,
             center: {
                 lat: 52.5,
                 lng: 13.4
             }
         });

     // MapEvents enables the event system.
     // The behavior variable implements default interactions for pan/zoom (also on mobile touch environments).
     const behavior = new H.mapevents.Behavior(new H.mapevents.MapEvents(map));

     // Enable dynamic resizing of the map, based on the current size of the enclosing container
     window.addEventListener('resize', () => map.getViewPort().resize());

    // Create the default UI:
    const ui = H.ui.UI.createDefault(map, defaultLayers)
    </script>
  </body>
</html>
Perform the following steps to use this example:
- Save the code as an HTML file (for example,
vector-tile-map.html) - Replace
YOUR_HERE_APIKEYwith your actual HERE API key - Open the file in a web browser to display a map centered on Berlin, Germany with full interactivity:
Change map style and toggle features
The HERE Vector Tile API supports dynamic map customization through a wide variety of features. For example, you can switch between different map styles (such as day, night, or lite themes) and control which feature categories display on the map.
Switch between map styles
The HERE Maps API for JavaScript provides several predefined vector styles through the platform.createDefaultLayers() method, for example:
vector.normal.map: Standard day mapvector.normal.mapnight: Dark theme for night viewingvector.normal.lite: Simplified day map with reduced detailvector.normal.litenight: Simplified night map
To change the map style dynamically, use the setBaseLayer method:
// Switch to night mode
const nightLayer = defaultLayers.vector.normal.mapnight;
map.setBaseLayer(nightLayer);
Filter map features
The HERE Vector Tile API allows you to control which feature categories display on the map by using dataset filters. Common feature categories include:
pois: Points of interestbuildings: Building footprints and 3D structuresroads: Road networks
To toggle specific features, create a custom OMV (Optimized Map for Visualization) layer with a dataset filter query:
// Get the OMV service
const omvService = platform.getOMVService();

// Exclude POIs and buildings from the map
const datasetQuery = '(-pois, -buildings)';
omvService.getUrl().mergeQuery({ datasets: datasetQuery });

// Create a layer with the same style but filtered features
const style = defaultLayers.vector.normal.map.getProvider().getStyle();
const filteredLayer = omvService.createLayer(style);

// Apply the filtered layer
map.setBaseLayer(filteredLayer);Note
The dataset query uses a comma-separated list of feature categories prefixed with a minus sign (
-) to exclude them from rendering.
Complete example with style switching and feature filtering
The following example demonstrates an interactive map with a control panel that allows users to switch between different map styles and toggle feature categories in real-time:
<!DOCTYPE html>
<html>
<head>
<script src="https://js.api.here.com/v3/3.2/mapsjs-core.js"></script>
<script src="https://js.api.here.com/v3/3.2/mapsjs-service.js"></script>
<script src="https://js.api.here.com/v3/3.2/mapsjs-mapevents.js"></script>
<script src="https://js.api.here.com/v3/3.2/mapsjs-ui.js"></script>
<link rel="stylesheet" href="https://js.api.here.com/v3/3.2/mapsjs-ui.css" />
<meta name="viewport" content="initial-scale=1.0, width=device-width" />
<style>
body { margin: 0; padding: 0; overflow: hidden; }
#mapContainer { position:absolute; top:0; bottom:0; width:100vw; height:100vh; }
.overlayBox {
position: absolute; top: 12px; left: 12px; padding: 10px;
background: rgba(255,255,255,0.95); border-radius: 8px;
font-family: system-ui, -apple-system, "Segoe UI", Roboto;
z-index: 1; box-shadow: 0 6px 18px rgba(0,0,0,0.08);
}
.overlayBox hr { margin: 8px 0; border: none; border-top: 1px solid #e6e6e6; }
.overlayBox label { display: block; margin: 6px 0; }
</style>
</head>
<body>
<div class="overlayBox">
<div><strong>Map Style</strong></div>
<select id="styleSelector">
<option value="vector.normal.map" selected>Vector Day</option>
<option value="vector.normal.mapnight">Vector Night</option>
<option value="vector.normal.lite">Lite Day</option>
<option value="vector.normal.litenight">Lite Night</option>
</select>
<hr>
<div><strong>Features</strong></div>
<label><input type="checkbox" class="featureToggle" data-feature="pois" checked> POIs</label>
<label><input type="checkbox" class="featureToggle" data-feature="buildings" checked> Buildings</label>
<label><input type="checkbox" class="featureToggle" data-feature="roads" checked> Roads</label>
</div>
<div id="mapContainer"></div>
<script>
// Initialize the platform with your API key
const platform = new H.service.Platform({
'apikey': 'YOUR_HERE_APIKEY'
});
// Get the default map layers with high-resolution support
const defaultLayers = platform.createDefaultLayers();
// Create the map centered on Berlin
const map = new H.Map(
document.getElementById("mapContainer"),
defaultLayers.vector.normal.map, {
zoom: 15,
pixelRatio: window.devicePixelRatio || 1,
center: { lat: 52.5, lng: 13.4 }
});
// Enable map interactions (pan, zoom, etc.)
new H.mapevents.Behavior(new H.mapevents.MapEvents(map));
// Add responsive resizing
window.addEventListener('resize', () => map.getViewPort().resize());
// Create default UI controls and hide the map settings button
const ui = H.ui.UI.createDefault(map, defaultLayers);
ui.getControl('mapsettings').setVisibility(false);
// Get references to the style selector and feature toggle checkboxes
const styleSelector = document.getElementById('styleSelector');
const featureToggles = document.querySelectorAll('.featureToggle');
// Convert a style value like "vector.normal.map" to the actual layer object
function baseLayerFromStyleValue(value) {
const [type, theme, variant] = value.split('.');
return defaultLayers[type][theme][variant];
}
// Get an array of feature names that are currently unchecked
function getDisabledFeatures() {
return Array.from(featureToggles)
.filter(cb => !cb.checked)
.map(cb => cb.dataset.feature);
}
// Create a map layer with the selected style and feature filters applied
function createBaseLayerWithFilters(styleValue) {
const disabled = getDisabledFeatures();
// If no features are turned off, return the default layer
if (disabled.length === 0) {
return baseLayerFromStyleValue(styleValue);
}
// Build a dataset query to exclude turned-off features
const datasetQuery = `(-${disabled.join(', -')})`;
const omvService = platform.getOMVService();
omvService.getUrl().mergeQuery({ datasets: datasetQuery });
// Create a custom layer with the same style but filtered features
const style = baseLayerFromStyleValue(styleValue).getProvider().getStyle();
return omvService.createLayer(style);
}
// Apply the currently selected style and feature filters to the map
function applySelection() {
const layer = createBaseLayerWithFilters(styleSelector.value);
map.setBaseLayer(layer);
}
// Listen for changes to the style selector and feature toggles
styleSelector.addEventListener('change', applySelection);
featureToggles.forEach(cb => cb.addEventListener('change', applySelection));
// Apply the initial selection
applySelection();
</script>
</body>
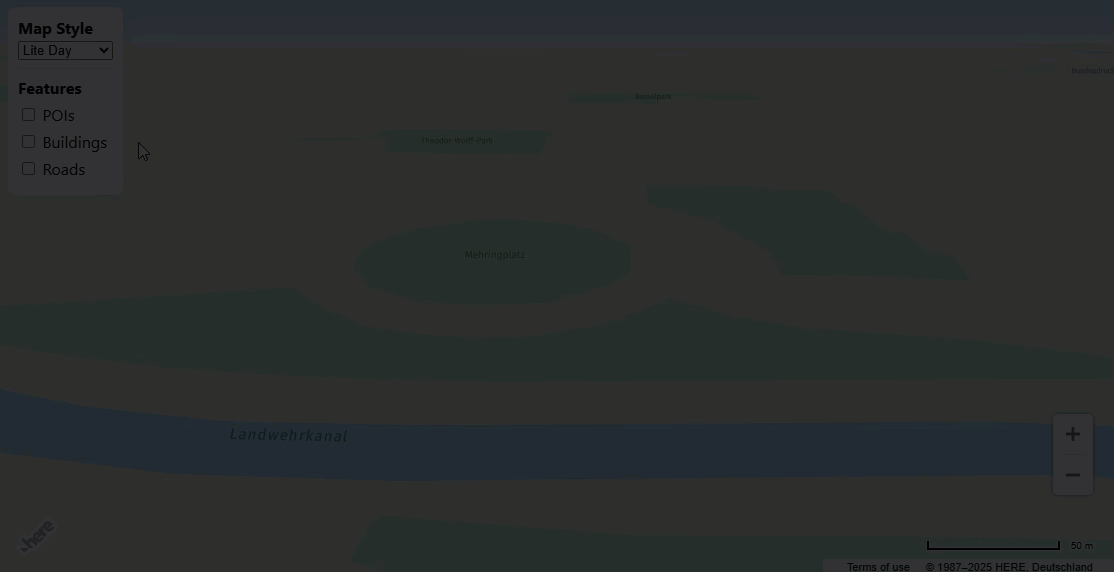
</html>The applySelection function combines the selected style with any features that are toggled off or on to create and apply the appropriate map layer. The following figure shows the updated map, with controls that allow toggling map features and changing map styles:
Next steps
Explore further customization options for vector maps through the HERE Maps API for JavaScript:
Updated 23 days ago