HERE Routing Demo Tool (Routing v8) – Overview and Usage Guide
Overview
--------
This article provides an introduction to the external HERE Routing Demo Tool, a browser‑based utility used to visualize API requests and responses for the HERE Routing v8 service. It is primarily intended for demonstration, testing, and troubleshooting purposes.
> Note: The tool may also be referred to as the “refclient” for legacy reasons.
---
Intended Audience
-----------------
This article is intended for:
HERE platform users
Developers integrating HERE Routing v8 APIs
Technical users evaluating or troubleshooting routing use cases
---
Prerequisites
-------------
Before using the Routing Demo Tool:
You must have a HERE Platform account
You must be signed in to the HERE Platform
A valid HERE API key is required (default or custom)
---
Getting Started
---------------
1. Open the Routing Demo Tool in a browser:
https://demo.routing.ext.here.com
2. Sign in using your HERE Platform credentials.
---
Layout Description
------------------
(If the image appears cut off, scroll horizontally.)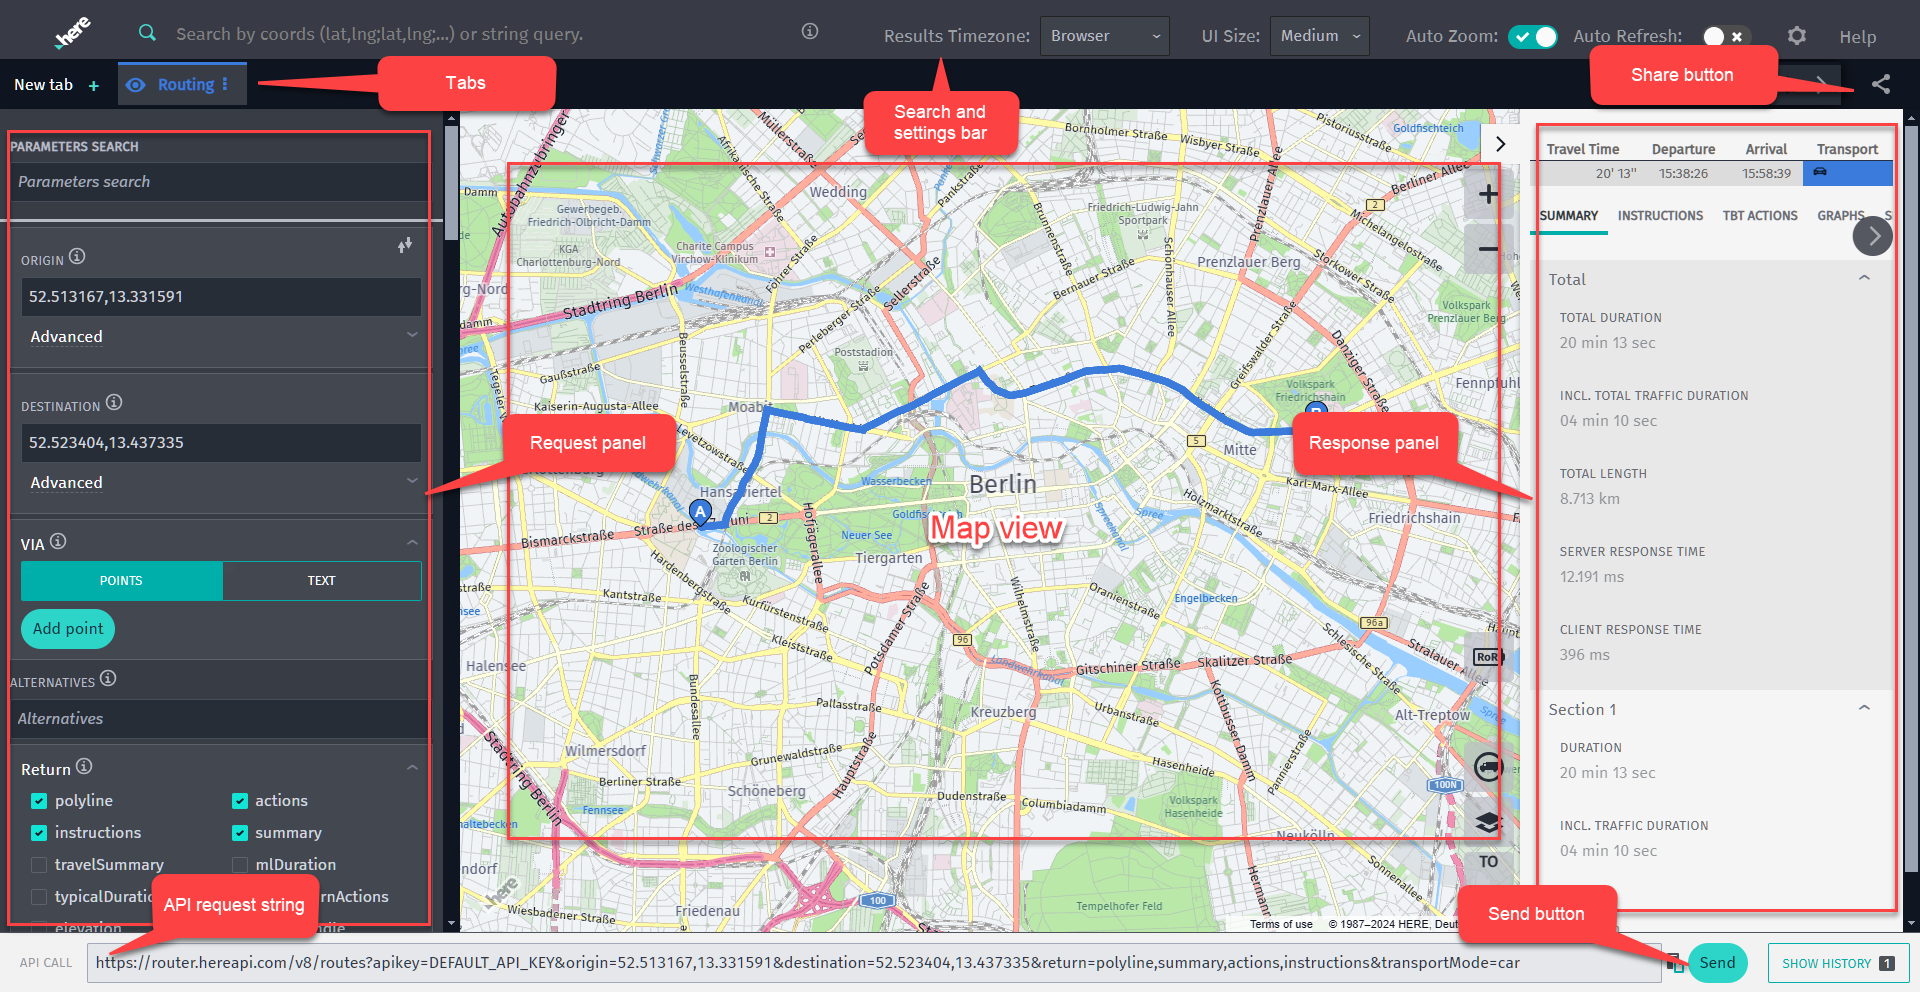
The Routing Demo Tool interface consists of the following components:
Search and Settings Bar
Enter text or geographic coordinates to define the initial map view.
Tabs
Create additional tabs by selecting New Tab. This is useful for comparing multiple routes.
Request Panel
Configure routing parameters using a graphical interface.
API Request String
Displays the Routing v8 API request generated based on the selected request panel settings.
Response Panel
Shows the API response. Response details are organized into tabs within the panel.
Share Button
Provides options to share the Current, Active, or All tabs.
---
Drawing a Route
---------------
Routes can be created using one of the following methods.
### Method 1: Paste a Demo Route URL
Paste a demo route URL into the browser address bar. Demo URLs start with demo.routing.ext.here.com.
Example:<br />https://demo.routing.ext.here.com/#url=https://router.hereapi.com/v8/routes?apikey=DEFAULT_API_KEY&origin=52.513167,13.331591&destination=52.523404,13.437335&return=polyline,summary,actions,instructions&transportMode=car<br />
Select Send for the route to be displayed.
---
### Method 2: Paste a Routing API Request
Paste a HERE Routing v8 API request directly into the API Request String field. These requests begin with router.hereapi.com.
Example:<br />https://router.hereapi.com/v8/routes?apikey=xxx&origin=52.513167,13.331591&destination=52.523404,13.437335&return=polyline,summary,actions,instructions&transportMode=car<br />
If an API key is missing or overridden, the Select Settings screen appears:
1. Choose SELECT ENVIRONMENT
2. Select Api Key (default)
3. Click Save
4. Select Send
---
### Method 3: Manual Configuration
Configure the route manually using the Request Panel.
---
Manually Configuring a Route in the Request Panel
-------------------------------------------------
The minimum required parameters for a route are Origin and Destination.
These values can be entered directly in the request panel fields.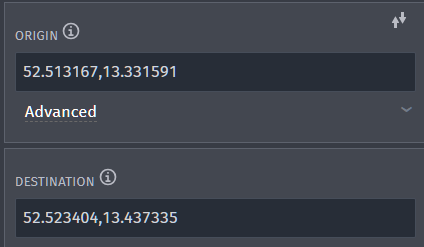
Alternatively:
Right‑click on the map and select Route from or Route to.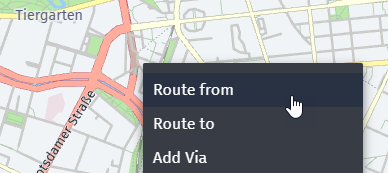
Additional details:
All supported routing parameters can be configured in the request panel.
Hover over the information (ℹ️) icon next to each parameter for field‑level descriptions.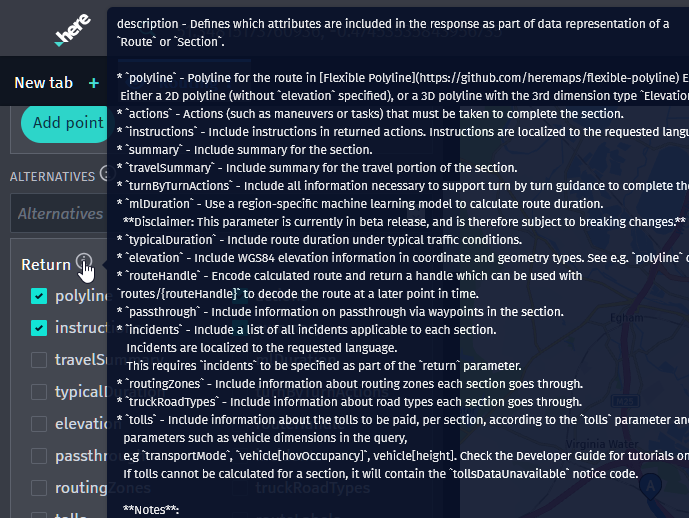
The default transport mode is Car, but this can be changed in the Transport section.
Vehicle‑specific attributes are automatically displayed based on the selected transport mode.
Once configuration is complete, select Send.
---
Map View Options
----------------
Right‑clicking on the map opens a context menu with additional options: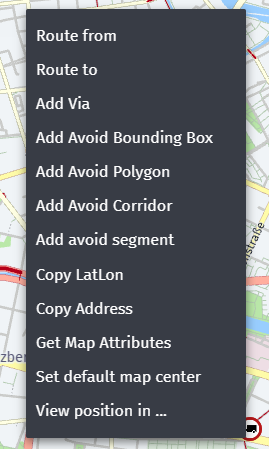
Route from – Set the route origin
Route to – Set the route destination
Add Via – Add intermediate waypoints
Add Avoid [ ] – Add movable and resizable avoid areas
Copy LatLon – Copy geographic coordinates to the clipboard
Copy Address – Copy the reverse‑geocoded address
Get Map Attributes – Open a Map Attributes v8 request in a new tab
Set Default Map Center – Store the map center in the local browser cache
View Position In – Open the location in a selected external service
---
Truck Routing Support
---------------------
To configure truck routing:
1. Set the Transport Mode to Truck
2. Provide truck‑specific attributes such as:
Weight
Height
Width
Length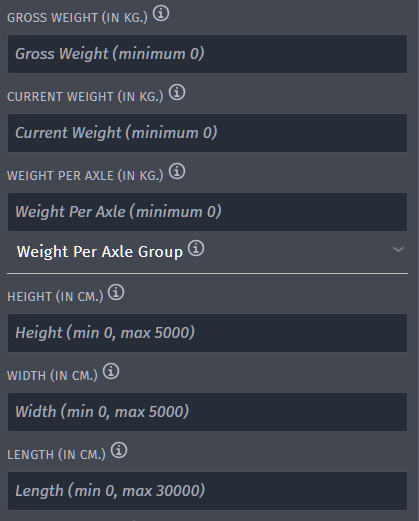
Truck restriction icons can also be enabled directly in the map view.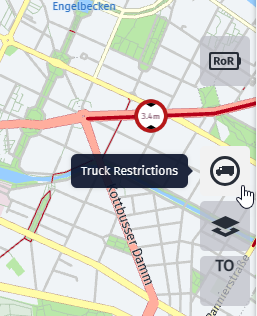
---
Sharing the Route Demo
----------------------
To share a route:
1. Select the Share button
2. Choose the desired tab option
3. Copy the generated link to the clipboard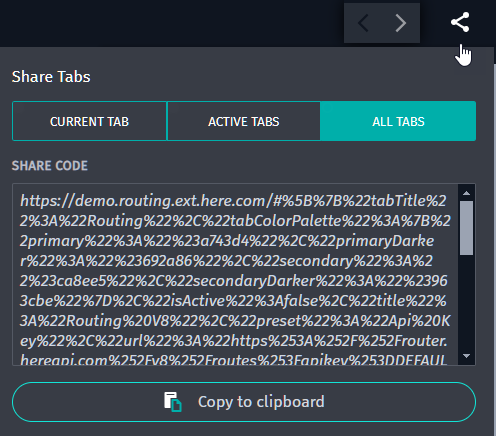
Notes:
Copying the browser URL shares only the current tab
Shared URLs may be very long and can exceed character limits in some applications
If embedding is required, a URL shortening service (such as TinyURL) may be used
---
Setting a Custom Routing URL or API Key
---------------------------------------
You can configure a custom Routing endpoint or API key by adding a new environment in Settings:
Specify the API request URL
Provide an API key
Select Routing v8 as the API module
This information is stored in the local browser cache.
This feature is useful for:
Accessing private map layers
Using specially provisioned API keys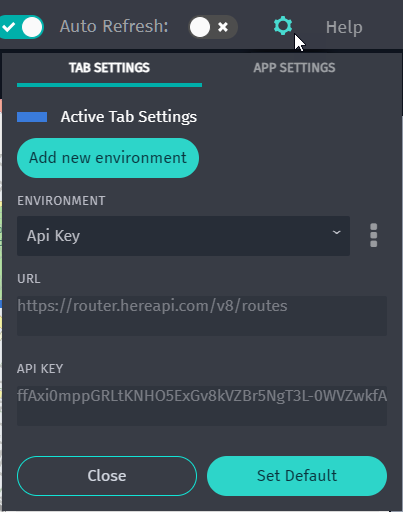
When pasting a Routing API request (see Drawing a Route – Method 2), the Select Settings screen allows you to create a new environment by providing:
A user‑defined environment name
API module selection (Routing v8)
---
References
----------
HERE Routing v8 API Documentation: https://docs.here.com/routing/docs/routing-intro