How to symbolicate the stack trace using HERE SDK 4.x
Symbolicate Stack Trace -
iOS - Starting from 4.13.3 version every release build package of HERE SDK contains the debug symbol which customers can upload in their crash analytics tool/service to symbolicate any unsymbolicated traces.
Android and Flutter - Starting from 4.15.3 we will start shipping the debug symbols for Android and Flutter so that customers can use the same just like iOS to provide the backtrace symbolicated crash logs.
How to symbolicate the stack trace for Android -
Pre-requisite for Mac:
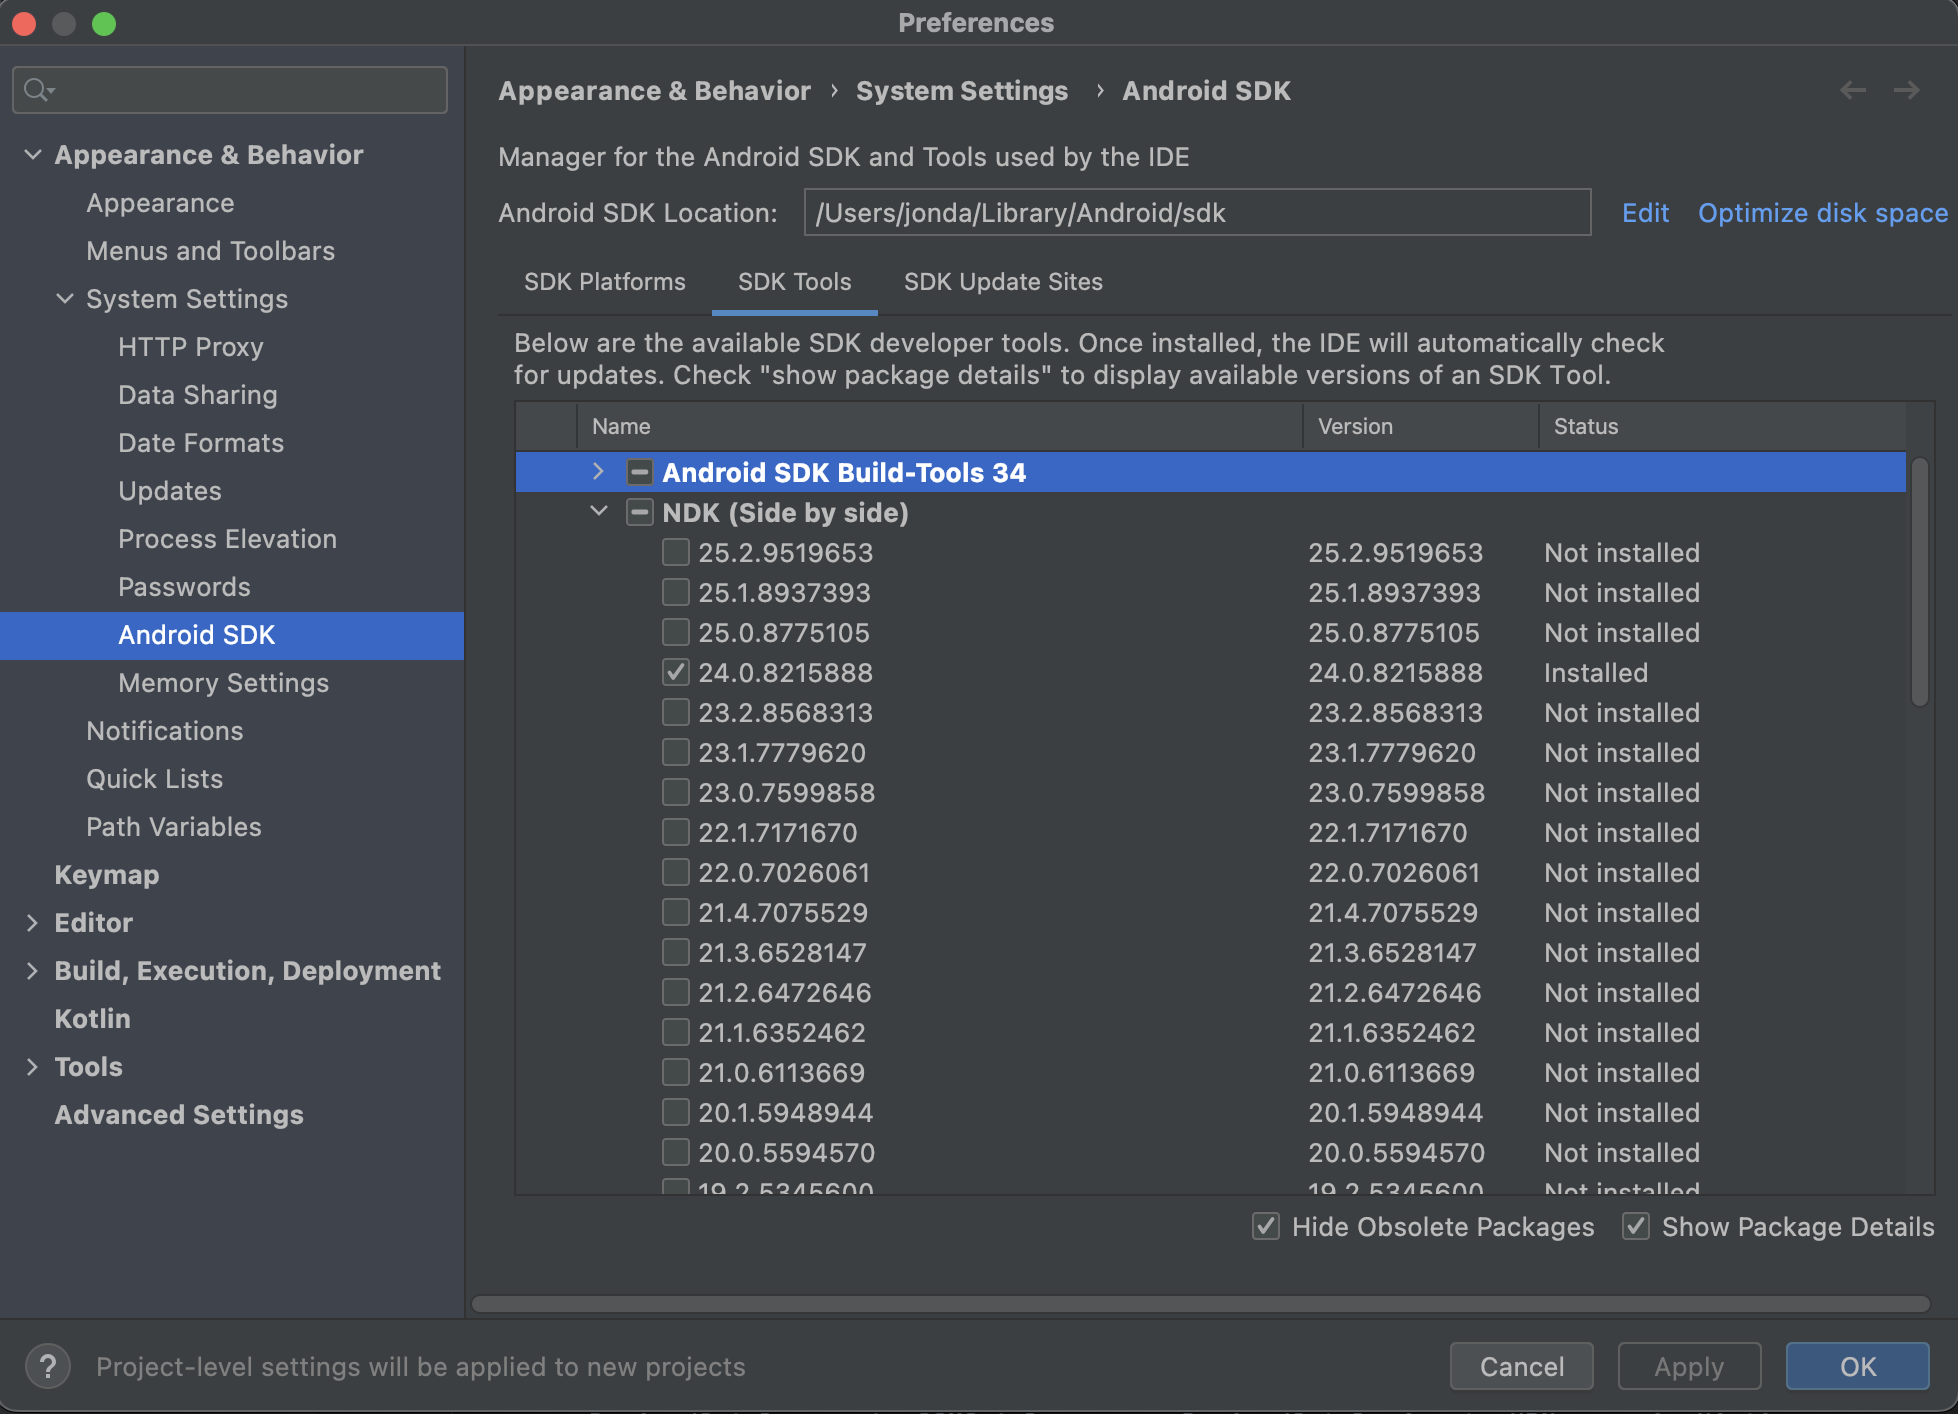
1. Make sure you are using NDK version 24.0.8215888, to check this please go to Android Studio --> Tools --> SDK Manager --> Android SDK --> SDK Tools --> Check mark "Show Package Details" --> drop down "NDK (Side by side)" --> select the version and install.
2. After downloading the NDK, please set the environmental variable path in your ~./zshrc file like following:
export ANDROID_SDK_ROOT=$HOME/Library/Android/sdk
export ANDROID_NDK_ROOT=$HOME/Library/Android/sdk
export PATH=$PATH:$ANDROID_SDK_ROOT/emulator
export PATH=$PATH:$ANDROID_SDK_ROOT/platform-tools
export PATH=$PATH:$ANDROID_NDK_ROOT/ndk/24.0.8215888
export JAVA_HOME="/Library/Java/JavaVirtualMachines/jdk-11.jdk/Contents/Home"
3. Please clone the package from this repository - https://main.gitlab.in.here.com/here-sdk/sdk/-/tree/master/scripts/development
PS: I have uploaded the development.zip folder, kindly replace the same after cloning.
Generate SSH Key
----------------
+ Open your terminal, go to .ssh directory
<br /> cd ~/.ssh<br />
+ Create your SSH Key. We will use RSA SSH key configuration.
<br /> ssh-keygen -t rsa -C "your_email_address"<br />
+ You'll see a message to insert file name for SSH key. For example, I insert: id_rsa_gitlab_key
<br /> Generating public/private rsa key pair.Enter file in which to save the key (/home/user/.ssh/id_rsa):<br />
+ Next, you'll be asked to enter passphrase. Just leave it empty
<br /> Enter passphrase (empty for no passphrase):Enter same passphrase again:<br />
+ Congratulations, you just create your own SSH Key. To check SSH key exist or not, run:
<br /> ls -al<br />
+ You will find two files:
<br /> id_rsa_gitlab_key // private keyid_rsa_gitlab_key.pub // public key<br />
Register SSH Key
----------------
To make sure your mac able to authenticate automatically with GitLab, you need to register your SSH key to SSH agent in your mac.
+ Start the ssh-agent.
<br /> eval $(ssh-agent -s)<br />
+ Add your SSH key to SSH agent.
<br /> ssh-add -K ~/.ssh/id_rsa_gitlab_key<br />
+ Open SSH config file.
<br /> vi ~/.ssh/config<br />
+ To make sure your SSH key added automatically to SSH agent after a reboot (or logout/login), we need to set config file.
<br /> host *.gitlab.in.here.com Port 3389 User git StrictHostKeyChecking no CheckHostIP no AddKeysToAgent yes UseKeychain yes # IdentityFile is your ssh key file location IdentityFile ~/.ssh/id_rsa_gitlab_keyhost gerrit.it.here.com HostkeyAlgorithms +ssh-rsa PubkeyAcceptedAlgorithms +ssh-rsa AddKeysToAgent yes UseKeychain yes # IdentityFile is your ssh key file location IdentityFile ~/.ssh/id_rsa_gitlab_key<br />
<br /> # IdentityFile is your ssh key file location IdentityFile ~/.ssh/id_rsa_gitlab_key<br />
+ Save config file by using esc --> shift+: --> wq!.
+ Check your SSH key in SSH agent.
<br /> ssh-add -l<br />
+ You will see your SSH key has been registered to SSH agent.
Insert SSH Key to GitLab Account
--------------------------------
+ Copy your SSH Key. This key will be copied to your GitLab account.
<br /> pbcopy < ~/.ssh/id_rsa_gitlab_key.pub<br />
+ Go to main.gitlab.in.here.com, then go Profile >> SSH Keys menu (https://main.gitlab.in.here.com/-/profile/keys).

+ Paste your SSH Key to Key input, and also add the Title.
+ Press Add Key button.
After cloning the project, and setting the ssh key agent, please follow:
In terminal go to the root of the folder and navigate to --> scripts --> development folder --> run following command:
<br /> python3 decode_android_crash.py --sdk /Users/jonda/Library/Android/sdk/ -i crash-positioning.json -v 4.14.5.0 -c navigate<br />
Please note: The above command assumes you must have an unsymbolicated ".txt/.json" files in the development folder and must be knewing the SDK version used by the customer which had generated the crash file. I am attaching the sample "crash-positioning.json" file for testing. The above will generate "crash-positioning.symbolicated.json" file in the folder which can be attached to the IOTSDK tickets.
The next step - you need to verify if symbolicated crash looks ok, this is extended version and require deep-level of SDK knowledge.
Please check following:
We need to find stack entries which belong to heresdk and check that call sequence looks ok.
Look for libheresdk.so
For example, please see below entry
<br /> native: #03 pc 00000000028f41f4 /system/priv-app/LucidMaps/lib/arm64/libheresdk.so (???)std::__ndk1::basic_string, std::__ndk1::allocator >::__is_long() const/opt/android-sdk/ndk/24.0.8215888/toolchains/llvm/prebuilt/linux-x86_64/sysroot/usr/include/c++/v1/string:1426 native: #04 pc 00000000028f3c78 /system/priv-app/LucidMaps/lib/arm64/libheresdk.so (???)magma::graphics::TechniquePass::prepareForRender()/workspace/magma/graphics/graphics/src/effects/TechniquePass.cpp:114<br />
* There are many of such entries, i.e. many threads are calling std::string::__is_long. Usually in ANRs many thread are calling wait in this moment.
usually we need to analyse how functions call each other. Saying we have function1 which calls function2 which calls function3.
In stack trace we should see something like
<br /> function3 in/file/blah:42function2 in/file/other:100function1 in/file/yet/another:200<br />
If I open "in/file/yet/another", look for line 200 if there is really call to function2 from function1 at line 200. If yes - I'll continue to check other entries.
Looks complicated but usually it's pretty obvious from lines itself and often you don't need to open actual files.